skoda Workshop Repair Guides

Skoda Workshop Service and Repair Manuals

Testing hydraulic bucket tappets > < Replacing valve stem seals
Removing and installing camshaft
Special tools and workshop equipment required
t  Torque wrench
t  Counterholder -MP 1-216-
t  Adjusting straightedge -MP 1-312-
t  Puller -T40001- with hook -T40001/2- and -T40001/3-
Removing
–  Remove top toothed belt guard, cylinder head cover and vacuum pump.
   
–  Position crankshaft to TDC cylinder 1 -arrow- (vehicles with manual gearbox).
  Note
Position crankshaft to TDC cylinder 1 on removed engine → Chapter.
  S13-0483
–  Position crankshaft to TDC cylinder 1 -arrow- (vehicles with automatic gearbox).
  S13-0482
–  The adjusting straightedge -MP 1-312- must be inserted simultaneously into the rear groove on the camshaft (without the shown feeler gauges).
  Note
t  If the adjusting straightedge cannot be inserted, tighten crankshaft by 1 turn (360 °).
t  The valves of cylinder 1 must be closed and the valves of cylinder 4 must overlap -arrows-.
–  Slacken tensioning pulley.
–  Remove timing belt.
  Note
To slacken and tighten the fixing screw for camshaft sprocket, never use the adjusting straightedge as counterholder! Counterhold with counterholder -MP 1-216-.
–  Loosen the fixing bolt for the camshaft timing sprocket by 1 turn.
  S13-0207
–  Insert puller -T40001- with hook -T40001/2--A- and -T40001/3--B- into the camshaft sprocket. Use open-end wrench -C- as counterholder and slacken the camshaft sprocket from the cone of the camshaft.
–  Remove camshaft sprocket.
–  First remove bearing caps 5, 1 and 3. Release bearing caps 2 and 4 alternately and crosswise.
Install
  Note
When fitting the camshaft the cams of cylinder 1 must point upwards.
  S13-0253
t  
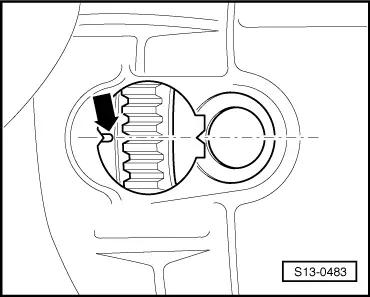
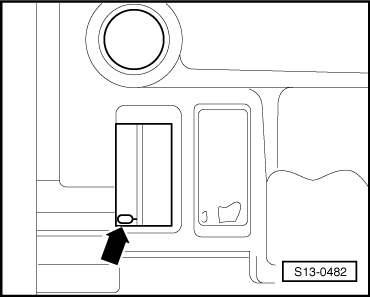
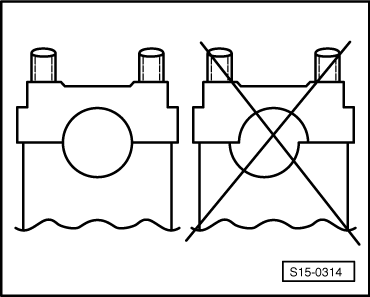
When installing the bearing caps pay attention to the centre displacement of the bore, before installing insert bearing cap and determine fitting position.
–  Oil contact surfaces of camshaft.
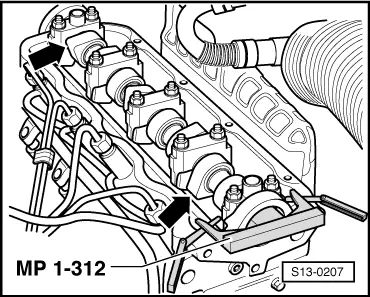
–  Tighten bearing caps 2 and 4 alternately crosswise to 20 Nm.
–  Install bearing caps 5, 1 and 3 and also tighten to 20 Nm.
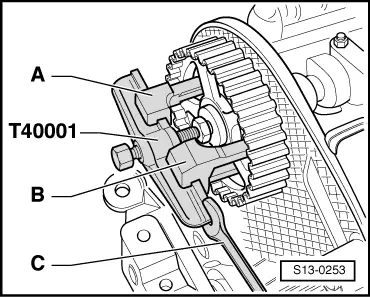
–  Position camshaft sprocket and tighten by hand.
–  Installing the timing belt → Chapter.
  Note
t  If new hydraulic tappets are installed, the engine must not be started for about 30 minutes. The hydraulic clearance compensation elements must “settle” (otherwise valves would strike the pistons).
t  After carrying out work on the valve gear, carefully crank engine at least 2 revolutions to ensure that no valve touches the piston when the engine is started.
  S15-0314

Testing hydraulic bucket tappets > < Replacing valve stem seals