
Octavia Mk1
|
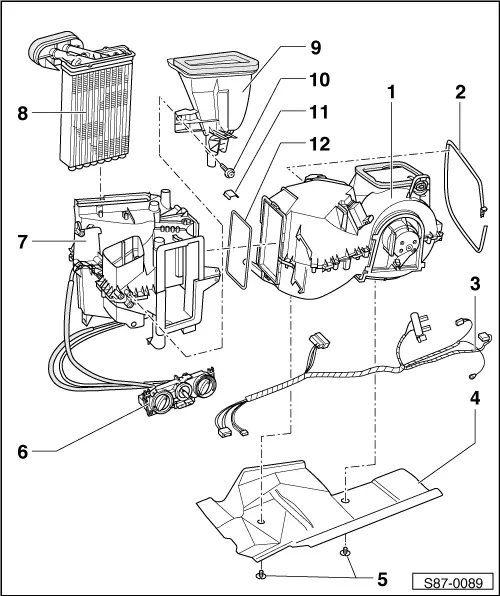
| 1 - | Evaporator housing |
| t | disassembling and assembling → Chapter |
| 2 - | Tensioning strap |
| t | pay attention to the correct routing → Fig. |
| 3 - | Wiring loom air conditioning system |
| 4 - | Cover |
| t | fixed with the tensioning strap -Pos. 2- and both screw clips -Pos. 5- on the evaporator housing |
| 5 - | Screw clip |
| 6 - | Heater control |
| t | Remove and install Bowden cables → Chapter |
| t | Adjust Bowden cables → Chapter |
| t | Connection diagram for the Bowden cables → Chapter |
| t | Replace light bulb → Chapter |
| 7 - | Heater flap box |
| t | do not disassemble |
| t | Remove Bowden cables, install and adjust → Chapter |
| t | Connection diagram for the Bowden cables → Chapter |
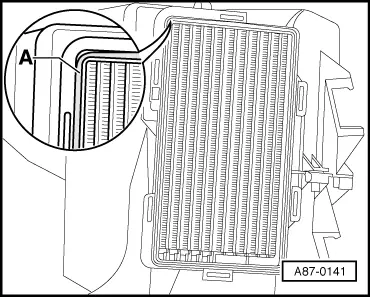
| 8 - | Heat exchanger |
| t | removing and installing → Chapter |
| t | for vehicles with mapped cooling on the basis of higher temperatures in an all-metal version |
| 9 - | Air guide duct to the dash panel vents |
| t | screwed to the air conditioning unit, locked on the top |
| 10 - | Screw |
| 11 - | Retaining clip |
| t | release with a screwdriver |
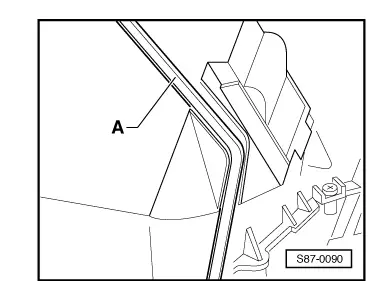
| 12 - | Gasket |
| t | install on the evaporator housing → Fig. |
 Note
Note
|
|
Note
|
|