Remove holder for brake line at the front assembly bearings.
–
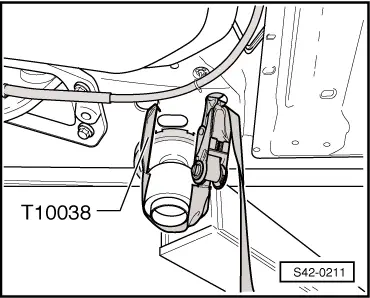
Now lash the vehicle securely to the lift platform using tensioning straps -T10038-.
WARNING
If the vehicle is not lashed, there is a risk of the vehicle toppling off the lift platform.
–
Position engine/gearbox jack e. g. -V.A.G 1383/A- with universal gearbox mount e. g. -V.A.G 1359/2- under the assembly carrier and secure with tensioning strap.
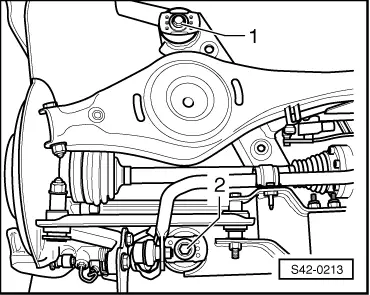
–
Release screw -1- or -2- on both sides.
Note
To provide a clearer illustration, only the left vehicle side is illustrated.
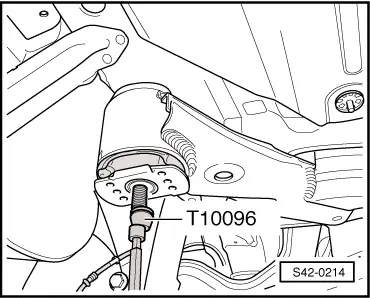
–
Fix the position of the assembly carrier using two fixing devices -T10096-.
–
Lower assembly carrier with engine/gearbox jack e.g. -V.A.G 1383/A- approx. 10 cm
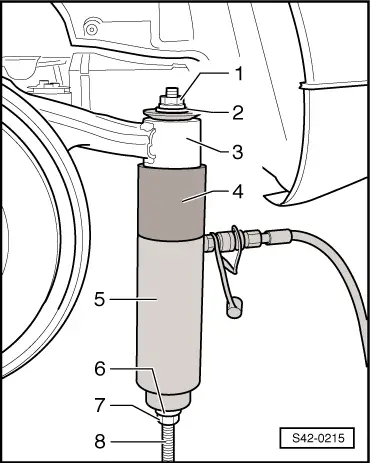
–
Position the special tools as shown in the figure.
1 -
Nut -T10263/1-
2 -
Washer, commercially available
3 -
Assembly carrier
4 -
Pipe section -T10263/1-
5 -
Hydraulic cylinder e.g. -VAS 6178-
6 -
Washer, commercially available
7 -
Nut -T10263/1-
8 -
Screw -T10263/4-
–
Pretension special tools.
–
Remove the rubber-metal bearing by actuating the pump.
 WARNING
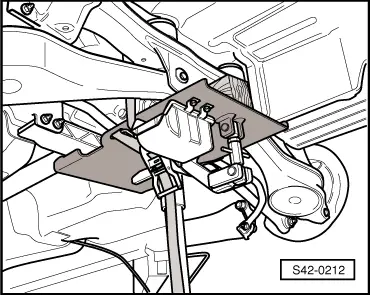
 Note
Note