
Octavia Mk2
| Removing and installing V-ribbed belt (Octavia II) |

| 1 - | V-ribbed belt pulley |
| q | with vibration damper |
| q | Adjust → Fig. TDC with the belt pulley fitted |
| 2 - | Cap |
| q | mounted up to 05.05 |
| 3 - | 10 Nm + torque a further 90° (1/4 turn) |
| q | replace |
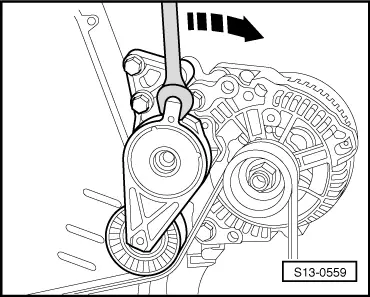
| 4 - | Tensioning device for V-ribbed belt |
| q | swivel tensioning device for V-ribbed belt with open-end wrench to slacken the V-ribbed belt |
| q | Tensioning device can be interlocked with locking pin -T10060- or Allan key. |
| 5 - | 23 Nm |
| 6 - | Bracket for auxiliary units |
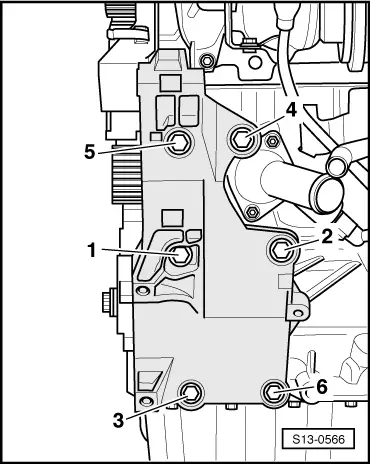
| q | order of tightening → Fig. |
| 7 - | Bushing |
| 8 - | 23 Nm |
| 9 - | Generator |
| q | removing and installing → Electrical System; Rep. Gr.27 |
| q | to facilitate positioning, drive the threaded bushings of the retaining screws at the generator slightly backwards |
| 10 - | 45 Nm |
| q | insert using locking agent -D 000 600 A2- |
| q | order of tightening → Fig. |
| 11 - | Bushing |
| q | 2 pieces |
| 12 - | 25 Nm |
| 13 - | AC compressor |
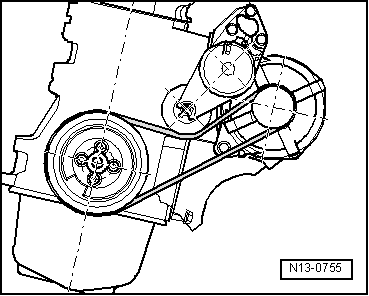
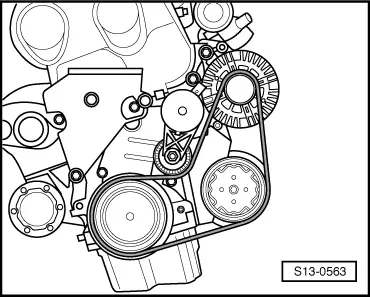
| 14 - | V-ribbed belt |
| q | mark the direction of rotation with chalk or a felt-tip pen before removing |
| q | check for wear |
| q | do not kink |
| q | removing → Anchor |
| q | installing → Anchor |
|
|
|
|
|
|
 Note
Note
|
|
|
|
Note
|

|
|
|
|
|