skoda Workshop Repair Guides

Skoda Workshop Service and Repair Manuals

Summary of components - Repairing the clutch make "LuK" > < Removing
Install
Install
Installation is performed in the reverse order, pay attention to the following points:
  Note
t  Always replace pressure plate and clutch disc together.
t  Assign the pressure plate and clutch disc in accordance with the engine identification characters via the → Electronic catalogue of original parts.
t  The two-mass flywheel, pressure plate and clutch disc are assigned to each other and must not be installed together with components from other manufacturers.
   
Distinguishing feature self-adjusting clutch type „Sachs“
t  Pressure plate with stop (position sensor) -arrow-.
  A30-10048
Fitting location of clutch disc
l  Legend „side of gearbox“ points to the gearbox.
  S30-0123
Check the extremities of the membrane springs
l  Wear is allowed up to half the membrane spring thickness -arrows-.
  V30-0094
Check feather joints and riveted joints
–  Check the feather joints between pressure plate and cover for cracks as well as the riveted joints for firm seating.
l  Pressure plate with damaged feather joints or with loose riveted joints -arrows- must be replaced.
  Note
t  Replace the clutch discs and pressure plate if the riveting is damaged or loose.
t  In order to reduce unpleasant odours if the clutch is burnt, thoroughly clean the clutch bell as well as the flywheel and the engine on the side of the gearbox.
t  Clean the drive shaft serration and hub serration on a used clutch disc, remove corrosion. Apply a very thin layer of grease -G 000 100- onto the serration. Subsequently move the clutch disc up and down on the drive shaft until the hub fits smoothly on the shaft. Remove all excess grease.
t  The pressure plates are protected against corrosion and are greased. Only clean the thrust surface as otherwise the life of the clutch may be considerably reduced.
t  The thrust surface of the pressure plate and the clutch disc lining must fully rest against the flywheel before the screws are inserted. Only then may the fixing screws be inserted.
  V30-0454
–  When installing, re-use the counterholder -MP1-223 (3067)- for tightening the screws.
–  Place the pressure plate onto the centering pins.
–  Use centering mandrel -MP3-475A (3190A)- for centering the clutch disc.
  S30-0208
In order to avoid a deformation of the pressure plate when installing it (this leads to jerking during start-up), the pressure plate must be installed as follows:
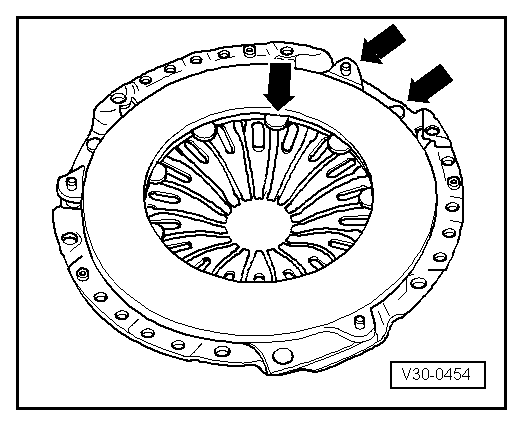
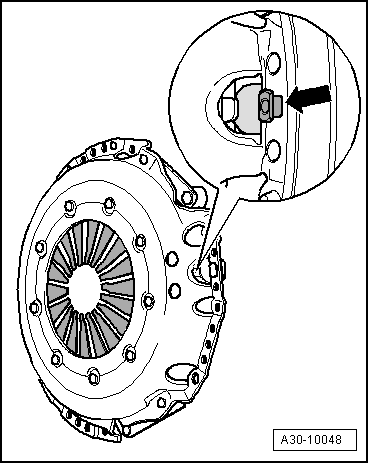
–  Pay attention that the stop bolt (position sensor) -arrow- can move freely.
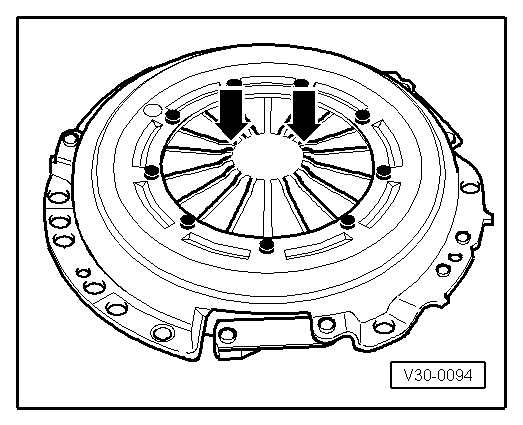
–  Screw in all the screws by hand uniformly, until the bolt head rests against the pressure plate.
–  Tighten the screws gradually and crosswise so as not to damage the centering holes on the pressure plate and the centering pins of the flywheel, while doing so the stop bolt -arrow- must not be lifted up from the pressure plate.
–  Tighten all 6 screws gradually to tightening torque → Item
–  Install gearbox (Octavia II) → Chapter.
–  Install gearbox (Superb II) → Chapter.
  A30-10048

Summary of components - Repairing the clutch make "LuK" > < Removing