| Important instructions for installing the injection units |
| l
| The following components and gaskets or O-rings must be replaced: |
| –
| Screw for clamping claw |
| –
| O-ring for channel in cylinder head |
| –
| O-ring for fuel return-flow line |
| –
| Only for new injection unit: injection line. |
| l
| When reinstalling, only insert injection units and injection lines for the same cylinder in the cylinder head. |
| l
| Check the injection units and the fitting positions for cleanliness before installing. |
| l
| The injection units must not show any sign of damage. |
| l
| All the O-rings must be coated with engine oil before installing. |
| If a used injection unit is reinstalled: |
| –
| Spray the tip of the injection unit with a rust solvent spray. Remove the soot particles or the oil particles with a cloth after approx. 5 minutes. |
| –
| For disassembling the old copper gasket ring from the injection unit, carefully tighten the gasket ring in a vice until the copper gasket ring is prevented from spinning between the chuck jaws. Pull the injection unit out of the copper gasket ring with slight turning and pulling movements of the hand. |
| Continued for all injection units |
| –
| Install the new copper gasket ring with the aid of a plastic bush. |
| –
| Clean the channel with a cloth soaked in engine oil or rust solvent in order to remove the soot particles on the contact surface of the injection unit in the cylinder head. Make sure the sealing surfaces are not damaged in the process. |
|
|
|
 Note
Note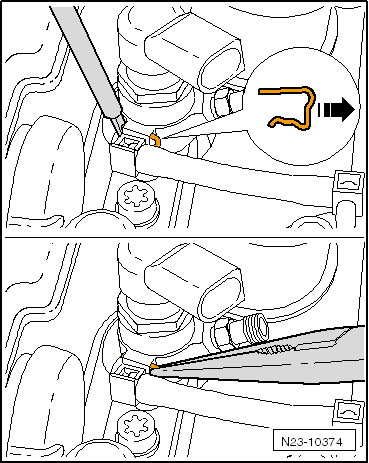

 Caution