skoda Workshop Repair Guides

Skoda Workshop Service and Repair Manuals

Testing the pressure of the high pressure pump > < Removing and installing fuel pressure senderG247
Removing and installing the high pressure pump
(Octavia II, Superb II, Yeti)
Special tools and workshop equipment required
t  Counterholder -T10051-
t  Extractor -T40064-
t  Thrust piece -T40064/1-
t  Fillister head screws -T40064/2-
Removing
  Note
t  Safety precautions when working on the fuel supply system → Chapter.
t  Observe rules for cleanliness → Chapter.
–  Remove the toothed belt from the camshaft and the high pressure pump → Chapter.
  Caution
t  Carefully disconnect the plug from the glow plugs.
t  If the plug is damaged when disconnecting it, the complete wiring loom including the plugs must be replaced (plugs cannot be replaced separately).
   
–  Carefully disconnect the plug from the glow plugs. Use the assembly spanner SW 12 for help.
  N23-10224
–  Unscrew the fixing screws -arrows- and lay the coolant return-flow line to the side.
  N23-10288
–  Unscrew fixing screws -arrows-.
  N23-10287
–  Disconnect the fuel feed line -arrow- on the high pressure pump and disconnect the plug -1- at the fuel temperature sender -G81-.
  N23-10302
–  Release screws -1, 3, 4- and remove engine mount -grey-.
–  Detach fuel return-flow line -2-.
–  Remove the fuel high pressure line between the high pressure pump and the fuel distributor.
–  Remove the toothed belt gear from the high pressure pump.
  N23-10286
–  Hold the hub of the high pressure pump with the counterholder -T10051- and unscrew the securing nut -1-.
  Note
Replace the basic pressure plate with the pressure plate -T40064/1- on the extractor -T40064-.
  N23-10221
–  Position the extractor -T40064- with thrust piece -T40064/1- and cylinder screws -T40064/2- as shown and pull out the hub from the high pressure pump. If necessary, counterhold with an assembly spanner SW 24.
  N23-10372
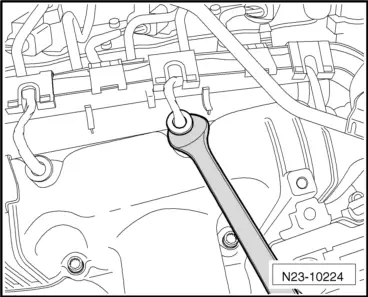
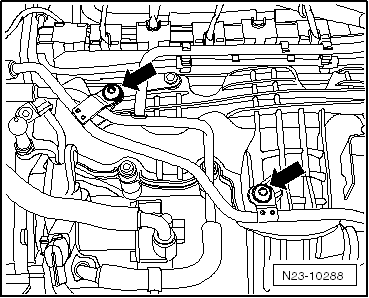
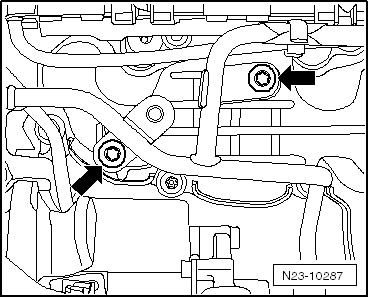
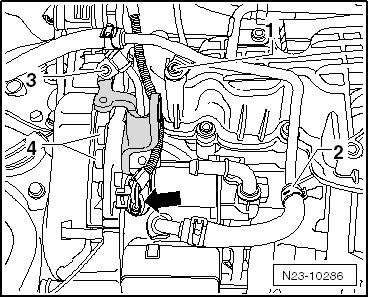
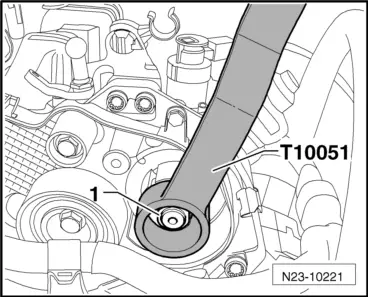
–  Unscrew fixing screws -arrows- of high pressure pump.
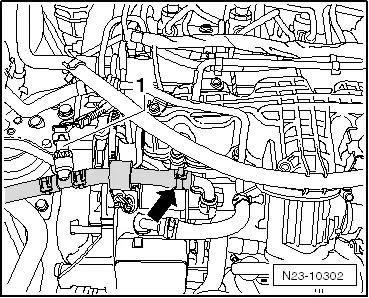
–  Remove the high pressure pump.
Install
  Caution
Risk of damage to the high pressure pump through running dry
If the high pressure pump is removed or replaced, the initial fuel filling of the high pressure pump must be carried out before the first engine start. For this purpose, connect the vehicle diagnosis, measurement and information system -VAS 505x- and carry out the targeted function „bleeding the fuel system“. During this function, the fuel pump is actuated for 180 seconds.
  Note
t  When installing the high pressure pump, ensure that no dirt penetrates the fuel system.
t  Only remove the screw plug immediately before installing the fuel lines.
Installation is performed in the reverse order, pay attention to the following points:
t  The screws for the high pressure pump must be replaced.
t  Tightening torques of fuel system: → Chapter.
t  Tightening torques of toothed belt drive → Chapter.
  Note
If the high pressure pump was replaced, the initialisation values must be reset → Vehicle diagnostic tester, „Targeted functions“; „Reset initialisation values of the engine control“.
–  Filling and bleeding the fuel system. For this purpose, connect the vehicle diagnosis, measurement and information system -VAS 505x- and carry out the targeted function „bleeding the fuel system“. During this function, the fuel pump is actuated for 180 seconds.
–  Check fuel system for tightness → Chapter.
  N23-10223

Testing the pressure of the high pressure pump > < Removing and installing fuel pressure senderG247