skoda Workshop Repair Guides

Skoda Workshop Service and Repair Manuals

Testing components > < Removing and installing injection valves
Replace Teflon gasket ring and supporting washer at injection valve
  Note
t  Safety precautions when working on the fuel supply system → Chapter.
t  Rules of cleanliness when working on the fuel supply system → Chapter.
Special tools and workshop equipment required
t  Set of tools -T10133-
Work procedure
Replace Teflon gasket ring
–  Remove injection valves → Chapter.
–  Carefully clean the injection valve.
   
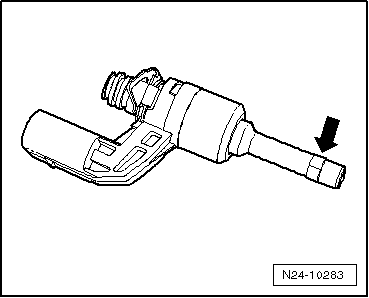
–  Carefully cut open the gasket ring with a knife as shown -arrow-. Absolutely try to avoid the contact of the knife blade with the valve body.
–  Remove the old gasket ring and clean the gasket ring nut in the area of the gasket ring -arrow-. Remove the existing deposits (carbon deposits) with a wire brush.
  N24-10283
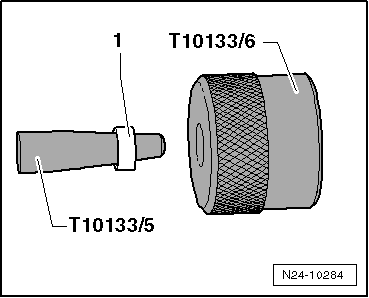
–  Fit a new gasket ring -1- onto the assembly cone -T10133/5-. Slightly push the gasket ring with the assembly sleeve -T10133/6- (knurling points to the gasket ring -1-) as far as possible onto the assembly cone -T10133/5 -.
  N24-10284
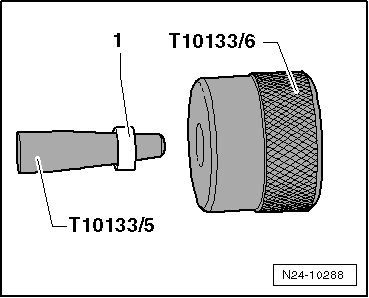
–  Turn the assembly sleeve -T10133/6 - around (now the knurling points away from the gasket ring), and push the gasket ring -1- up to the end onto the assembly cone -T10133/5 -.
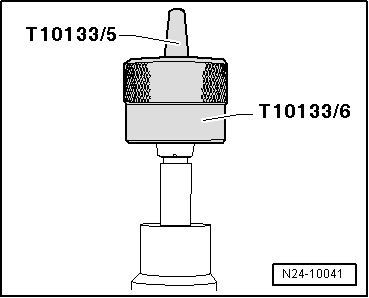
–  Now position the assembly cone -T10133/5- with the gasket ring from the front onto the injection valve. Push the gasket ring with the assembly sleeve -T10133/6- further onto the injection valve.
  N24-10288
The gasket ring is not yet seated in its groove.
–  Remove the assembly sleeve -T10133/6 - and the assembly cone -T10133/5-.
–  Push the gasket ring by hand into the annular groove.
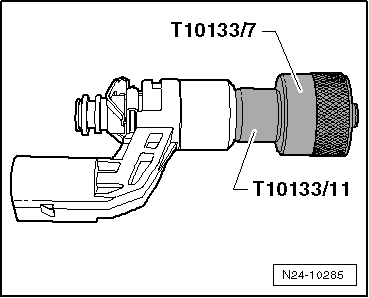
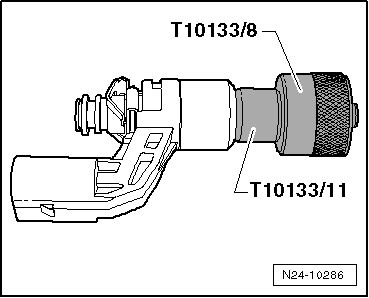
–  Fit the spacer sleeve -T10133/11 - onto the valve body.
  N24-10041
–  Now press the calibration sleeve - T10133/7- via the gasket ring up to the stop at the spacer sleeve -T10133/11-.
–  Pull off again the calibration sleeve -T10133/7-.
  N24-10285
–  Now press the calibration sleeve - T10133/8- via the gasket ring up to the stop at the spacer sleeve -T10133/11-.
–  Pull off again the calibration sleeve -T10133/8-.
Now the Teflon gasket ring has its correct fitting dimension.
Replace supporting washer
  N24-10286
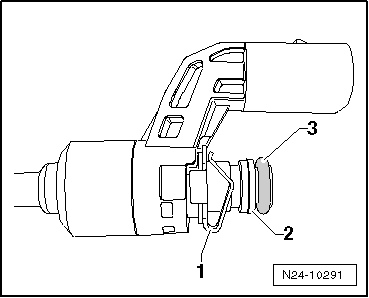
–  Remove O-ring -3-.
–  Cut open the supporting washer -2- with a small side cutter and take it off.
–  Pull off the spring element at the injection valve -1- and instead push on the lock washer -T10133/12 -.
  N24-10291
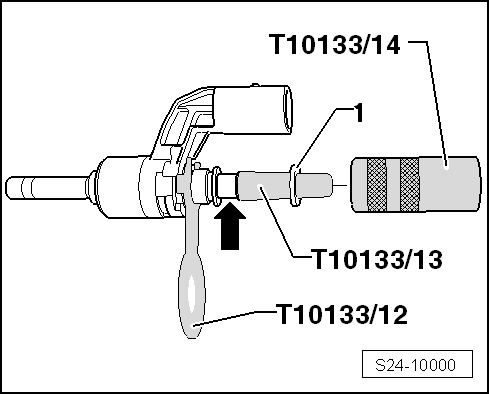
–  Mount a new supporting washer -1- on the assembly cone -T10133/13- and fit it onto the injection valve as shown.
–  Push the supporting washer -1- with the calibration sleeve -T10133/14- (knurled side points to the injection valve) up to the first nut -arrow- onto the injection valve.
  S24-10000
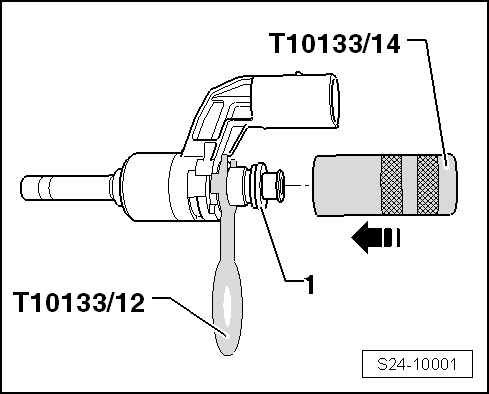
–  Now turn the calibration sleeve -T10133/14- around (knurled side points away from the injection valve). Push the calibration sleeve via the supporting washer -1- in -direction of arrow- up to the stop on the lock washer -T10133/12-.
–  Pull off again the calibration sleeve -T10133/14-.
Now the supporting washer has its correct fitting dimension.
  S24-10001
–  Now fit a new spring element -1- for the lock washer -T10133/12 - and push a new O-ring -3- in front of the supporting washer -2-.
  Note
  N24-10291
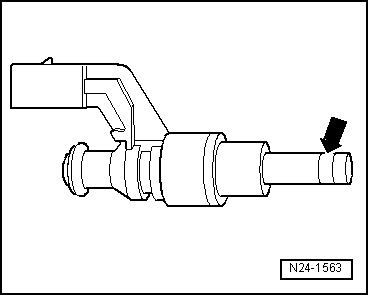
The Teflon gasket ring -arrow- must not be oiled when installing the injection valve.
–  Install injection valves → Chapter.
Further installation occurs in reverse order to removal.
  N24-1563

Testing components > < Removing and installing injection valves