Skoda Workshop Service and Repair Manuals
HOME
FEATURES
MENU
INDEX
ABOUT US
Removing and installing the E-box (relay and fuse carrier in the engine compartment) >
< Removing and installing the relay carrier under the vehicle voltage control unitJ519 - vehicles as of MY 09
Octavia Mk2
Vehicle electrics
Electrical System
Wiring / Fuse holder and relay carrier
Removing and installing additional relay carrier above the onboard supply control unit
Removing and installing additional relay carrier above the onboard supply control unit
Removing and installing additional relay carrier above the onboard supply control unit
Note
t
The assignment of the relay carrier depends upon the vehicle equipment.
t
Exact assignment of the relay carrier
→ Current flow diagrams, Electrical fault finding and Fitting locations
.
Removing
–
Disconnect battery earth strap
→ Chapter
.
–
Remove lower part of the dash panel insert on the driver's side
→ Body Work; Rep. gr.70
.
–
Pull the relay out of the relay carrier above the vehicle voltage control unit.
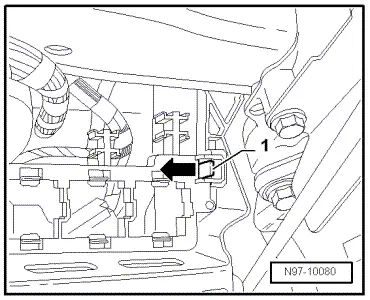
–
Slacken the plug connections
-1-
out of the catch pegs
-arrows-
and press out of the relay carrier.
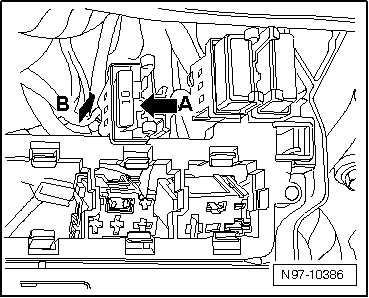
–
Release the holder
-arrow A-
and remove together with the fuse
-arrow B-
from the relay carrier.
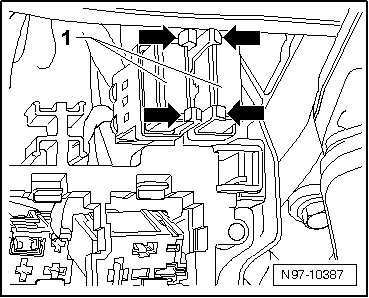
–
Unlatch the clamps
-arrows-
and remove the thermal fuses
-1-
from the support.
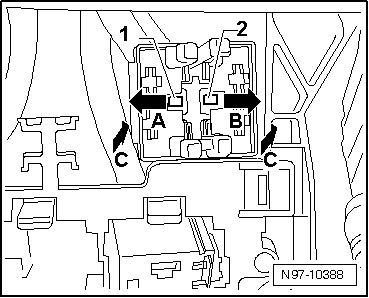
–
Release the stops
-1-
and
-2-
in direction of arrow
-A-
and
-B-
and remove the support in direction of arrow
-C-
.
–
Unlatch the fuse
-1-
-arrow-
and remove the holder.
Install
Installation is performed in the reverse order, pay attention to the following points:
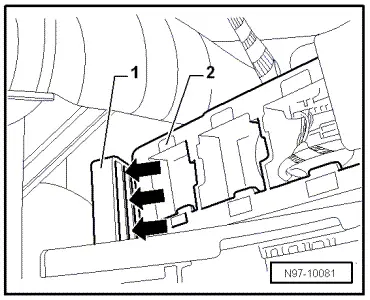
–
Insert the relay carrier
-2-
into the guide
-1-
and then lock it.
–
Pay attention to the work sequence when connecting the battery
→ Chapter
.
Vehicle electrics
Electrical System
Wiring / Fuse holder and relay carrier
Removing and installing additional relay carrier above the onboard supply control unit
Removing and installing the E-box (relay and fuse carrier in the engine compartment) >
< Removing and installing the relay carrier under the vehicle voltage control unitJ519 - vehicles as of MY 09
 Note
Note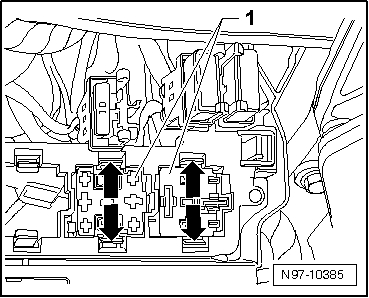
 Note
Note