skoda Workshop Repair Guides

Skoda Workshop Service and Repair Manuals

Removing and installing sealing flange and flywheel > < Crankshaft, Piston and Conrod
Removing and installing bracket for auxiliary units
Removing
–  Remove the high pressure pump → Chapter.
   
–  Remove alternator → Electrical System; Rep. gr.27.
Vehicles with air conditioning
  WARNING
Risk of injury through refrigerant.
Do not open the refrigerant circuit of the air conditioning system.
  Caution
Risk of damaging the condensor, the refrigerant lines and hoses.
Do not over-tension or buckle refrigerant lines and hoses.
–  Remove the AC compressor from the bracket for auxiliary units and secure it with connected refrigerant hoses to the body.
Continued for all vehicles
  A27-10114
–  Remove guide pulleys -1 and 2- and release the screw -arrow- of the rear timing belt guard.
  A13-10609
–  Release screw -1- of engine support.
  N13-10436
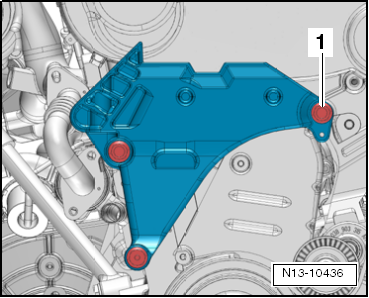
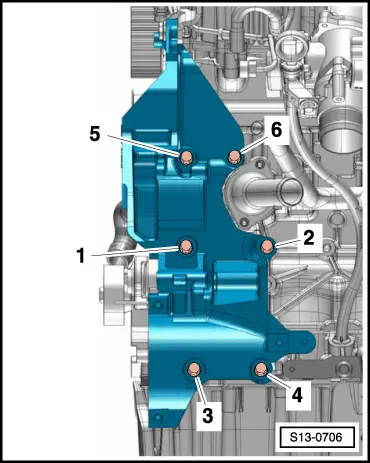
–  Release screws in the sequence -6 … 1- and remove bracket for auxiliary units.
Install
Installation is performed in the reverse order, pay attention to the following points:
  Note
t  
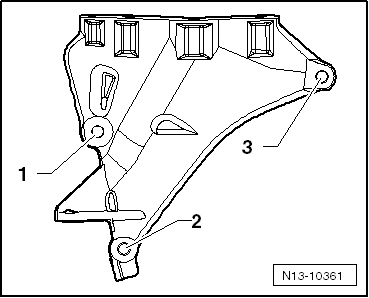
A dowel sleeve must be located between the bracket for auxiliary units and the cylinder block in the screw hole -6-.
t  Replace all the screws of the bracket for auxiliary units and the engine support, which have been tightened to a torquing angle.
t  Before tightening the fixing screws of the bracket for auxiliary units, screw in the screw of the engine support by hand.
  S13-0706
–  Screw in the new screws of the bracket for auxiliary units.
   Screws -1- and -2- M10 x 52
screws -3- and -4- M10 x 30
screws -5- and -6- M10 x 60
–  Gradually tighten the new fixing screws for auxiliary units in the sequence -1…6-:
1.  Screw in all the screws by hand.
2.  Tighten all bolts initially to 40 Nm.
3.  Torque the screws with a rigid wrench as follows:
   Torque screws -1 and 2- a further 90° (1/4 turn.)
   Torque screws -3 and 4- a further 45° (1/8 turn.)
   Torque screws -5 and 6- a further 90° (1/4 turn.)
  S13-0706
–  Tighten the new screw of the engine support -3-.
   Tightening torque: 40 Nm + torque a further 180° (1/2 turn)
–  Install high pressure pump → Chapter.
–  Install alternator → Electrical System; Rep. gr.27.
–  Install AC compressor → Chapter.
–  Filling and bleeding the fuel system. For this purpose, connect vehicle diagnosis, measurement and information system -VAS 505X- and carry out the targeted function „filling/bleeding the high pressure pump and the fuel system“. During this function, the fuel pump is actuated for 180 seconds.
–  Check fuel system for tightness → Chapter.
  N13-10361

Removing and installing sealing flange and flywheel > < Crankshaft, Piston and Conrod