skoda Workshop Repair Guides

Skoda Workshop Service and Repair Manuals

Replace Teflon gasket ring and supporting washer at injection valve > < Injection valves
Removing and installing injection valves
  Note
t  Safety precautions when working on the fuel supply system → Chapter.
t  Rules of cleanliness when working on the fuel supply system → Chapter.
t  Observe the safety instructions before starting fitting work → Chapter.
  Note
The Teflon gasket ring on the injection valve must be replaced each time after removing the injection valve → Chapter.
Special tools and workshop equipment required
t  Set of tools -T10133-
Removing
For the vehicles Fabia II, Roomster
   
–  Release screws -1- and remove retaining clip.
–  Disconnect plug -2- at charge pressure sender -G31- with intake air temperature sender 2 -G299-.
–  Release the catches in -direction of arrow- and detach the pressure pipe -3- first of all from the throttle valve control unit -J338 - and then from the exhaust gas turbocharger.
For the vehicles Octavia II, Yeti
–  Release screws -1- and remove retaining clip.
  S15-0531
–  Disconnect plug -2- at charge pressure sender -G31- with intake air temperature sender 2 -G299 -.
–  Release the catches in -direction of arrow- and detach the pressure pipe -3- first of all from the throttle valve control unit -J338 - and then from the exhaust gas turbocharger.
Continued for all vehicles
–  Remove the high pressure pump → Chapter.
  N15-10561
–  Release the fixing screws -arrows- and carefully remove the fuel distributor from the injection valves.
  N15-10563
–  Press the O-ring upwards by hand as shown and remove it from the injection valve.
–  Screw the striking hammer -T10133/3- with the extractor -T10133/15-.
  N24-10197
–  Then insert the extractor -T10133/15- into the groove -arrow- on the injection valve.
  N24-10292
–  Pull out the injection valve with careful knocks.
Install
  N24-10361
–  Thoroughly clean the holes of the injection valves in the cylinder head with the nylon brush -T10133/4-.
–  Check the supporting washer made of plastic for damage, replace if necessary → Chapter.
  N24-10198
–  Replace the spring element -arrow- as well as the Teflon gasket ring each time after removing the injection valves → Chapter.
–  Replace O-rings between injection valve and bottom part of the intake manifold and moisten lightly with clean engine oil.
  Note
t  The Teflon gasket ring of the injection valve must neither be oiled nor greased.
t  The injection valve must insert easily, if necessary wait until the gasket ring has been drawn together sufficiently.
  N24-10216
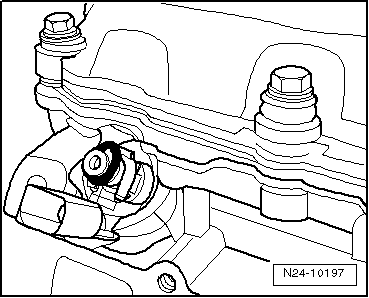
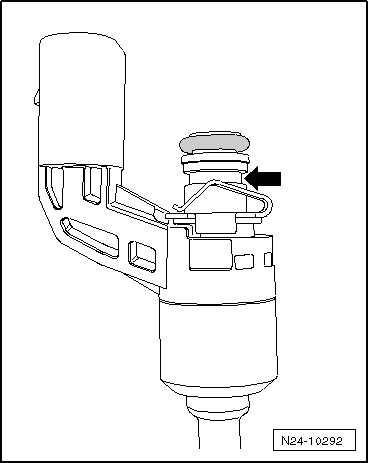
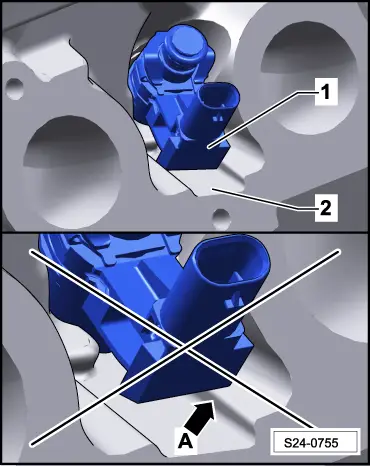
–  Press the injection valve -1- by hand up to the stop into the hole of the cylinder head. The injection valve should be pressed evenly into the countersink -2- on the cylinder head.
  Note
t  The injection valve must never rest against the countersink edge on the cylinder head -arrow A-, but it must always be pressed evenly into the countersink -2- on the cylinder head.
t  
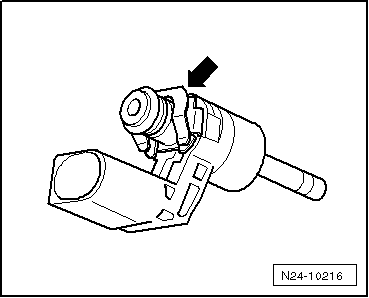
After installing, carry out a visual inspection of the fitting location of the injection valve.
Further installation occurs in a similar way in reverse order to removal.
  S24-0755

Replace Teflon gasket ring and supporting washer at injection valve > < Injection valves