
ForTwo L3-1.0L (2009)
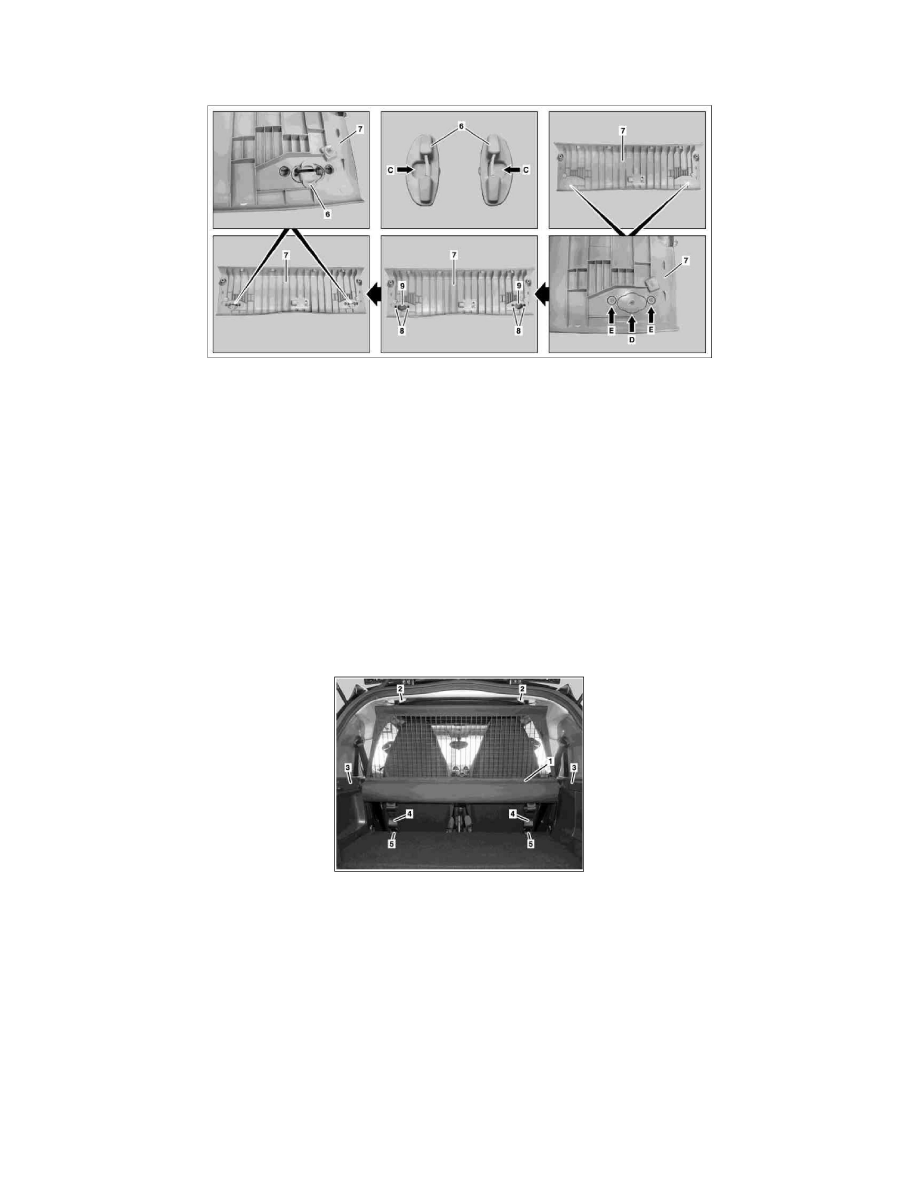
The adhesive tape (4) serves as an installation aid due to the limited clearance when inserting and positioning the counterplates (2).
4
Position anchorings (1) at top on holes (5) and tighten bolts (3) to left and right counterplate (2).
The chamfer (arrow B) on the anchorings (1) should be pointed to the center of the vehicle.
5
Provide for recesses (9) on roof frame paneling (7) according to perforation (arrow D).
The perforation (arrow D) on the roof frame paneling (7) serves as reinforcement and should not be damaged: otherwise, the covers (6) are no
longer held properly.
Position graduated bit at corresponding center point and drill hole up to perforation (arrow D).Cut or mill out remaining pieces at side until the
recess (9) corresponds to the perforation (arrow D).
Cordless drill/driver, see GOTIS
http://gotis.aftersales.daimlerchrysler.com
6
Drill holes (8) in roof frame paneling (7) according to perforation (arrow E).
The perforation (arrow E) on the roof frame paneling (7) serves as reinforcement and should not be damaged; otherwise the covers (6) are no
longer held properly.
7
Position cover (6) on roof frame paneling (7) and turn 90°
The recesses (arrows C) on the covers (6) should point toward rear when installed.
AZ68.50-P-0005MCC Install divider between luggage and passenger compartment
AZ68.50-P-0005MCC Install Divider Between Luggage And Passenger Compartment
1
Divider
2
Upper anchorings
3
Trunk lining
4
Belt
5
Lower anchorings