
ForTwo L3-1.0L (2009)
1
Center windshield (1) above body opening and position to coincide with strips of adhesive tape (arrows).
Cup suction tool
http://gotis.aftersales.mercedes-benz.com
Helper required.
2
Position windshield (1) on body flange and press on until it makes contact with spacers. Then fix in place with suitable adhesive tape.
The curing time is approx. 2 h measured from the time the windshield (1) is installed. The rated accident strength is achieved only after approx. 8
h.
AR67.10-P-1600-01MCC Prepare repair for windshield
AR67.10-P-1600-01MCC Prepare Repair For Windshield
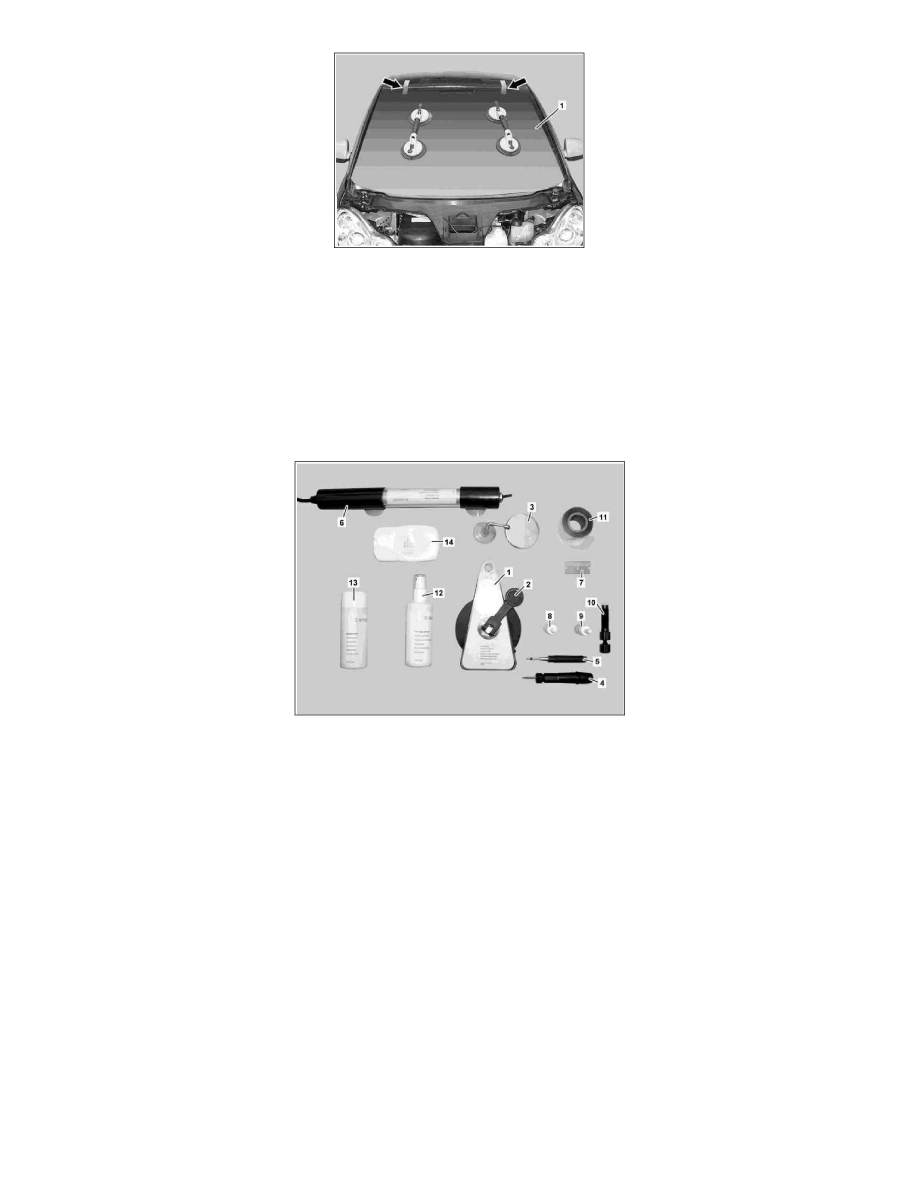
1
Tool holder
2
Clamping lever
3
Inspection mirror
4
Milling cutter
5
Stone impact cracker
6
UV curing lamp
7
Bow-shaped blade
8
Filler resin
9
Finish resin
10
Injector
11
Curing foil
12
Cleaning agents
13
Adhesion gel
14
Finish polish
1
Check damaged point for moisture
If applicable, heat damaged point with hot air gun and allow to flash off for approx. 10 minutes.
2
Clean windshield around damaged point with cleaning agent (12).
3
Evaluate damaged point
A conical fissure or filling cavity should be present in each damaged point to ensure that the filler resin (8) continues to flow.
4
If applicable, crack damaged point to create conical fissure or filling cavity.
Use stone impact cracker (5).
5
Install inspection mirror (3) on inside of windshield.
6
Chamfer edges of damaged point using milling cutter (4).