
Forester F4-2.5L SOHC (2004)
2. Remove the automatic belt tension adjuster assembly.
INSTALLATION
AUTOMATIC BELT TENSION ADJUSTER ASSEMBLY AND BELT IDLER
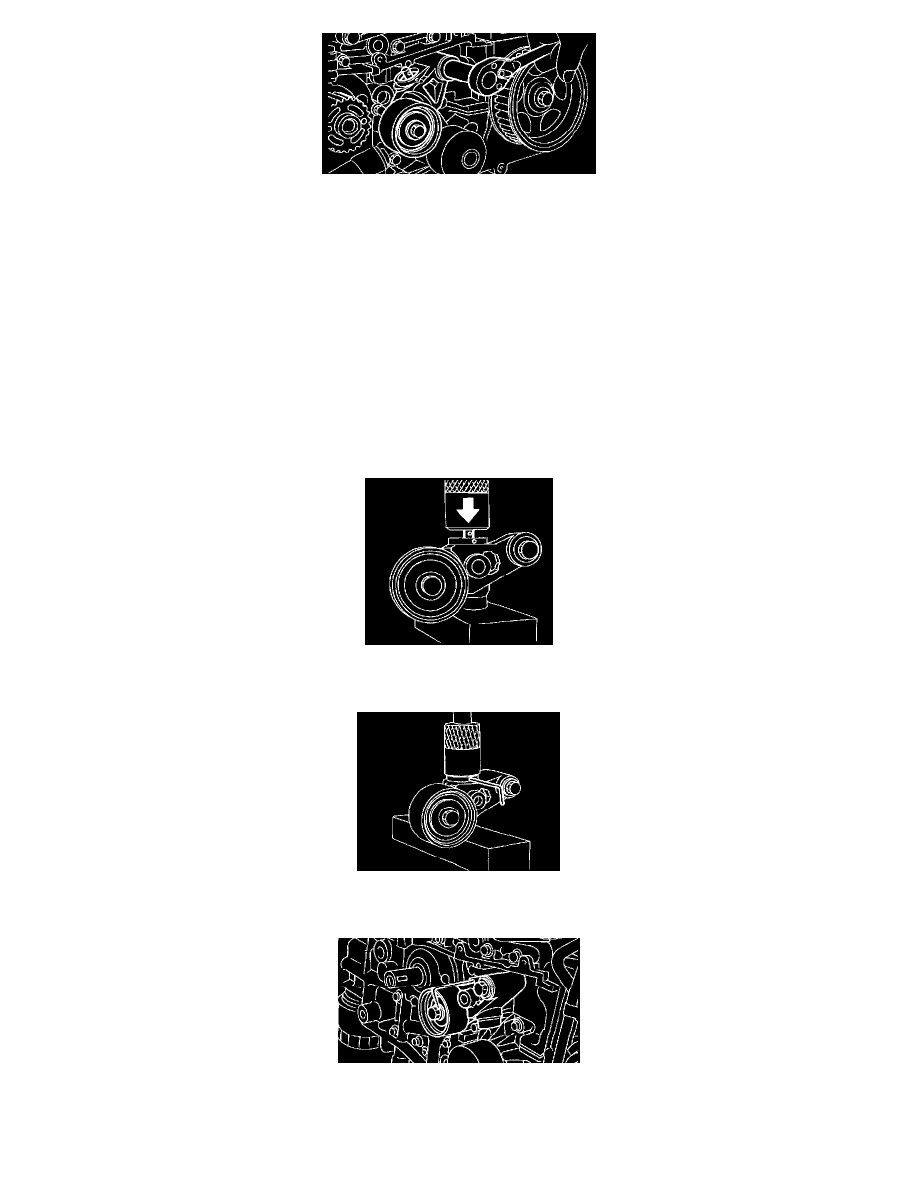
1. Preparation for installation of automatic belt tension adjuster assembly;
CAUTION:
^
Always use a vertical type pressing tool to move the adjuster rod down.
^
Do not use a lateral type vise.
^
Push the adjuster rod vertically.
^
Press-in the push adjuster rod gradually taking more than 3 minutes.
^
Do not allow press pressure to exceed 9,807 N (1,000 kgf, 2,205 lb).
^
Press the adjuster rod as far as the end surface of cylinder. Do not press the adjuster rod into the cylinder. Doing so may damage the cylinder.
^
Do not release the press pressure until stopper pin is completely inserted.
1. Attach the automatic belt tension adjuster assembly to the vertical pressing tool.
2. Slowly move the adjuster rod down with a pressure of 165 N (16.8 kgf, 37.1 lb) until the adjuster rod is aligned with the stopper pin hole in
the cylinder.
3. With a 2 mm (0.08 inch) dia. stopper pin or a 2 mm (0.08 inch) (nominal) dia. hex bar wrench inserted into the stopper pin hole in the
cylinder, secure the adjuster rod.
2. Install the automatic belt tension adjuster assembly.
Tightening torque: 39 Nm (4.0 kgf-m, 28.8 ft. lbs.)