Forester F4-2.5L SOHC (2004)

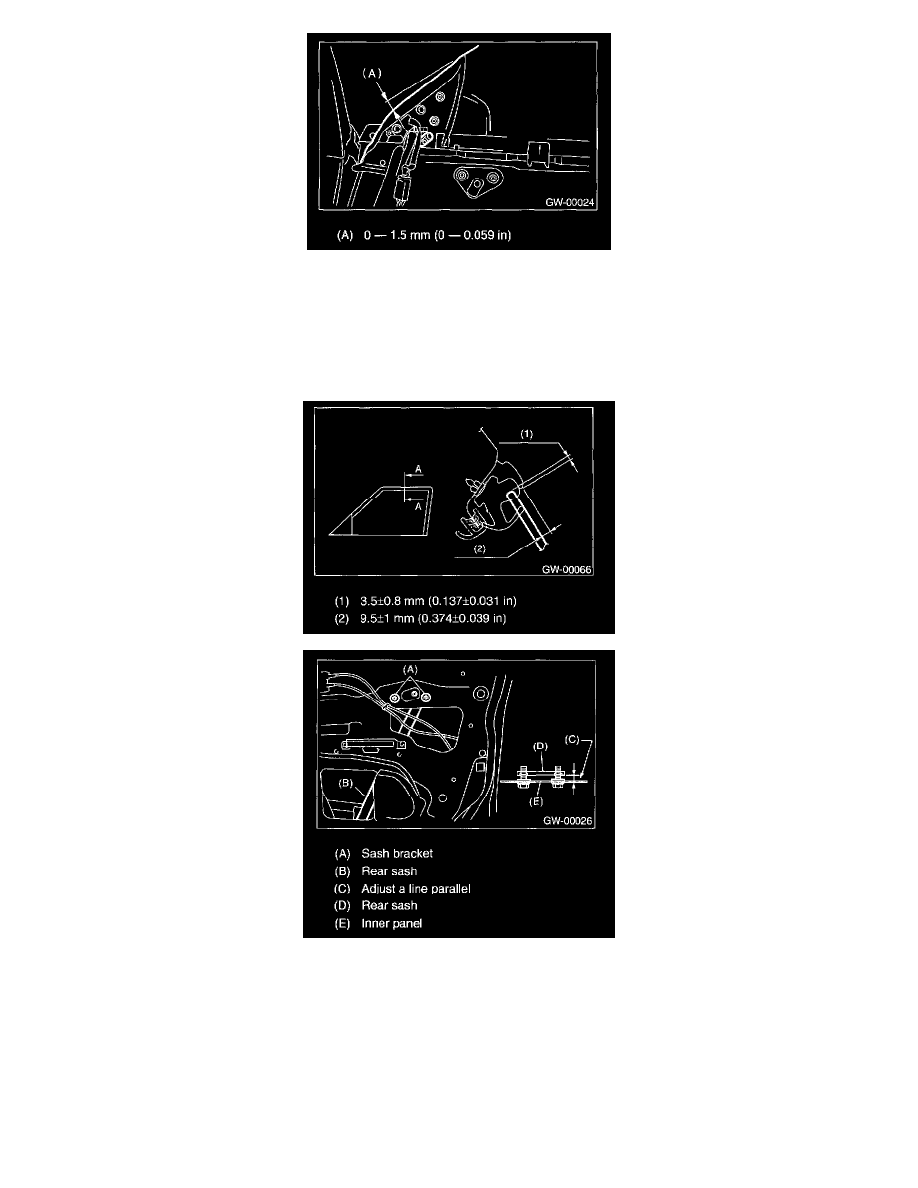
For preventing wind noise, adjust the glass at the position where tip of gusset is raised up a little.
8. After stabilizer adjustment, carry out the glass crimp adjustment. First, visually ensure positional relationship between retainer & molding and
glass of the roof side, and then begin with rear sash adjustment. Adjust two adjusting bolts alternately step by step to obtain dimensions
shown(cross-section A)
NOTE: If two nuts are loosened at the same time, sash moves back and forth. Therefore, when one nut is adjusted, secure the other.
9. Make the same adjustment of two adjusting bolts of rear sash.
NOTE: Do not tilt the sash bracket to inner panel during adjustment Otherwise smooth regulator operation cannot be achieved.
10. Make adjustment of front sash in the same manner as that of rear sash.
NOTE: Although front and rear sashes must, as a rule, be adjusted in the same manner, in some door installation, the adjustment in a different
manner may be required However, adjustment of one sash to the maximum amount and the other to the minimum amount is not permitted Such
adjustment may result in application of excessive load to regulator.
11. After adjustments, tighten the nuts
