
Impreza Coupe FWD F4-1820cc 1.8L SOHC (1995)
2) Ground check connector body K and L terminals which are accessible after removing A.B.S. check connector from lower side of steering
column.
3) Set the front wheels or rear wheels on the brake tester and set the select lever's position at "neutral".
4) Operate the brake tester.
5) Perform sequence control.
(1) Turn ignition switch ON.
(2) The A.B.S. warning light comes on.
(3) Depress the brake pedal within 0.5 seconds after the warning light goes out so that the brake tester registers a pressure equal to the initial
value.
CAUTION: Do not depress the clutch pedal.
NOTE: The engine must not be operating.
6) Hydraulic unit begins to work; and check the following working sequence.
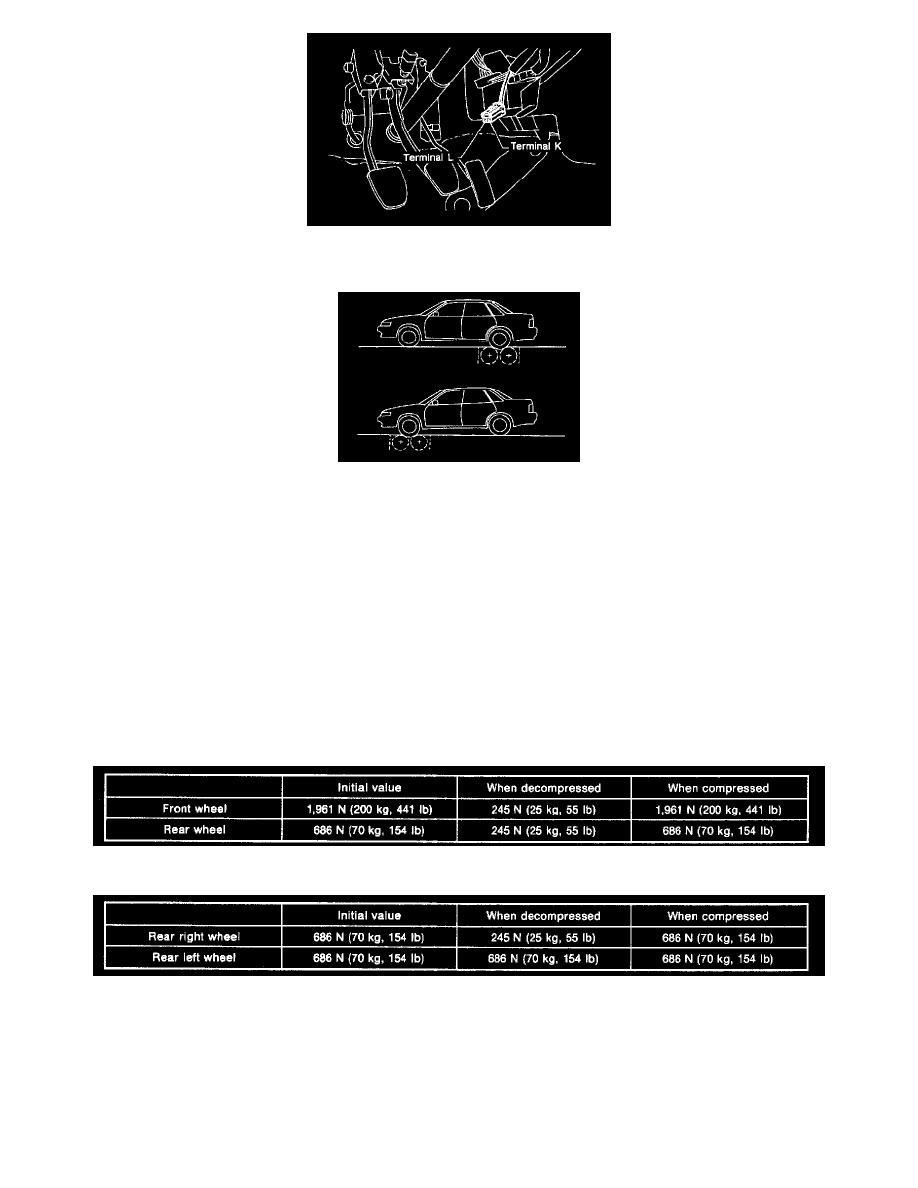
(1) The right front wheel performs decompression, holding, and compression in sequence, and subsequently the left front wheel repeats the
cycle.
(2) Simultaneously both right and left rear wheel perform decompression, holding, and compression in sequence.
7) Read values indicated on the brake tester and check if the fluctuation of values, when decompressed and compressed, meet the standard values.
-
In case of hydraulic unit plunger piston malfunction
8) After checking, also check if any irregular brake pedal tightness is felt.
9) In case of AWD AT vehicles, remove the spare fuse from the FWD connector in the engine compartment to return to the original AWD state.