
Impreza GT F4-2.5L Turbo (2009)
Seat Heater: Testing and Inspection
SEAT HEATER SYSTEM
INSPECTION
1. WIRING DIAGRAM
[Ref. to WI-99, WIRING DIAGRAM, Seat Heater System.] See: Diagrams/Electrical Diagrams/Diagrams By Diagram Name
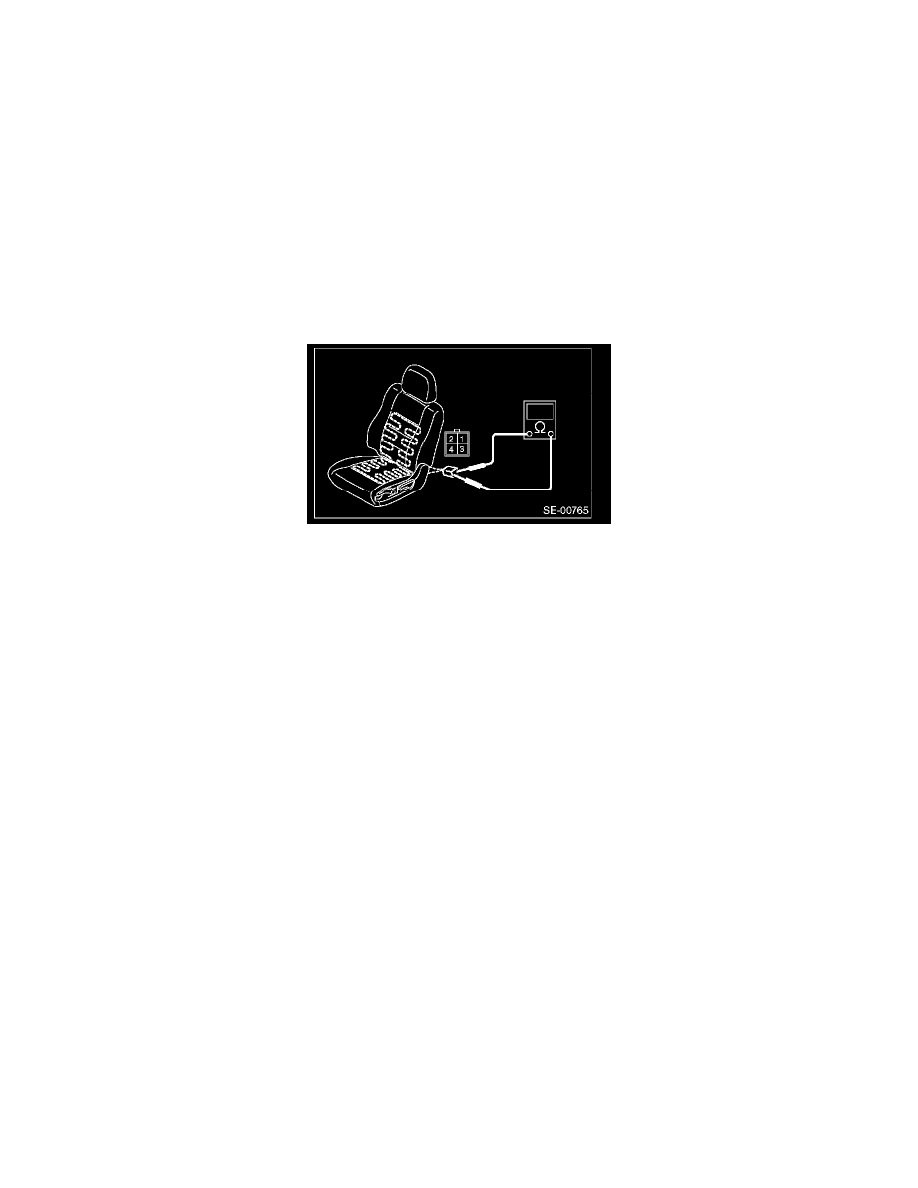
2. SEAT HEATER UNIT
Disconnect the seat heater unit connector, check the continuity between terminals of connector.
Connector & terminal
No.1 - No.3:
No.1 - No.4:
No.3 - No.4:
If no continuity exists, replace the seat heater unit with a new part.
3. SEAT HEATER SWITCH
-
CHECK THERMISTOR OUTPUT VOLTAGE
1. Connect the battery to the connector.
Connector terminals No.2 (+):
2. Measure the voltage between connector and chassis ground.
Connector & terminal:
LHD side seat
(R43) No.4 (+) - Chassis ground (-):
RHD side seat
(R42) No.4 (+) - Chassis ground (-):
If voltage is not 1.5 V or more, replace the seat heater switch.
-
CHECK SWITCH OUTPUT VOLTAGE
1. Connect the battery to the connector.
Connector terminals No.2 (+):
2. Measure the voltage between connector and chassis ground while turning the switch to ON.
Connector & terminal:
LHD side seat
(R43) No.3 (+) - Chassis ground (-):
RHD side seat
(R42) No.3 (+) - Chassis ground (-):
If voltage does not change from 10 V or more to zero, replace the seat heater switch.