
Impreza Outback Sport AWD F4-2.5L SOHC (2002)
4. Connect the stabilizer link to transverse link, and temporarily tighten bolts.
CAUTION: Discard the loosened self-locking nut and replace with a new one.
5. Tighten the following points in the order shown below when the wheels are in full contact with the ground and vehicle is curb weight.
1. Transverse link and stabilizer
Tightening torque:
Sedan Turbo model: 45 Nm (4.6 kgf-m, 33 ft. lbs.)
Except sedan Turbo model: 30 Nm (3.1 kgf-m, 22 ft. lbs.)
2. Transverse link and crossmember
Tightening torque: 100 Nm (10.2 kgf-m, 74 ft. lbs.)
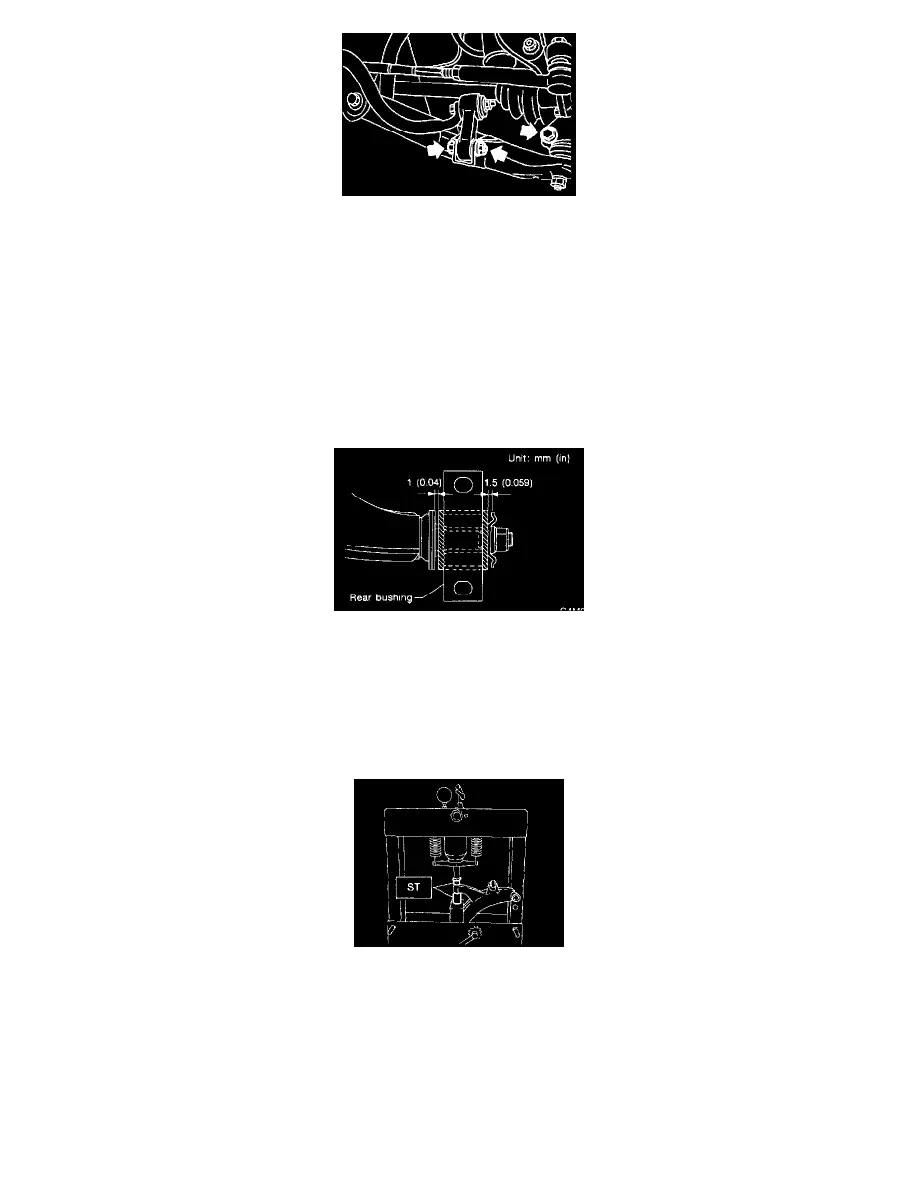
3. Transverse link rear bushing and body
Tightening torque: 250 Nm (25.5 kgf-m, 184 ft. lbs.)
NOTE: Move the rear bushing back and forth until transverse link-to-rear bushing clearance is established (as indicated in figure.) before
tightening.
6. Install the sub frame.
7. Inspect the wheel alignment and adjust if necessary.
C: DISASSEMBLY
1. FRONT BUSHING
Using ST, press the front bushing out of place.
ST 927680000 INSTALLER & REMOVER SET
2. REAR BUSHING
1. Scribe an aligning mark on the transverse link and rear bushing.