
Impreza Outback Sport AWD F4-2.5L SOHC (2002)
5. Remove the control valve.
NOTE: When removing control valve body, be careful not to interfere with transfer duty solenoid wiring.
INSTALLATION
1. Set the select lever in "N" position.
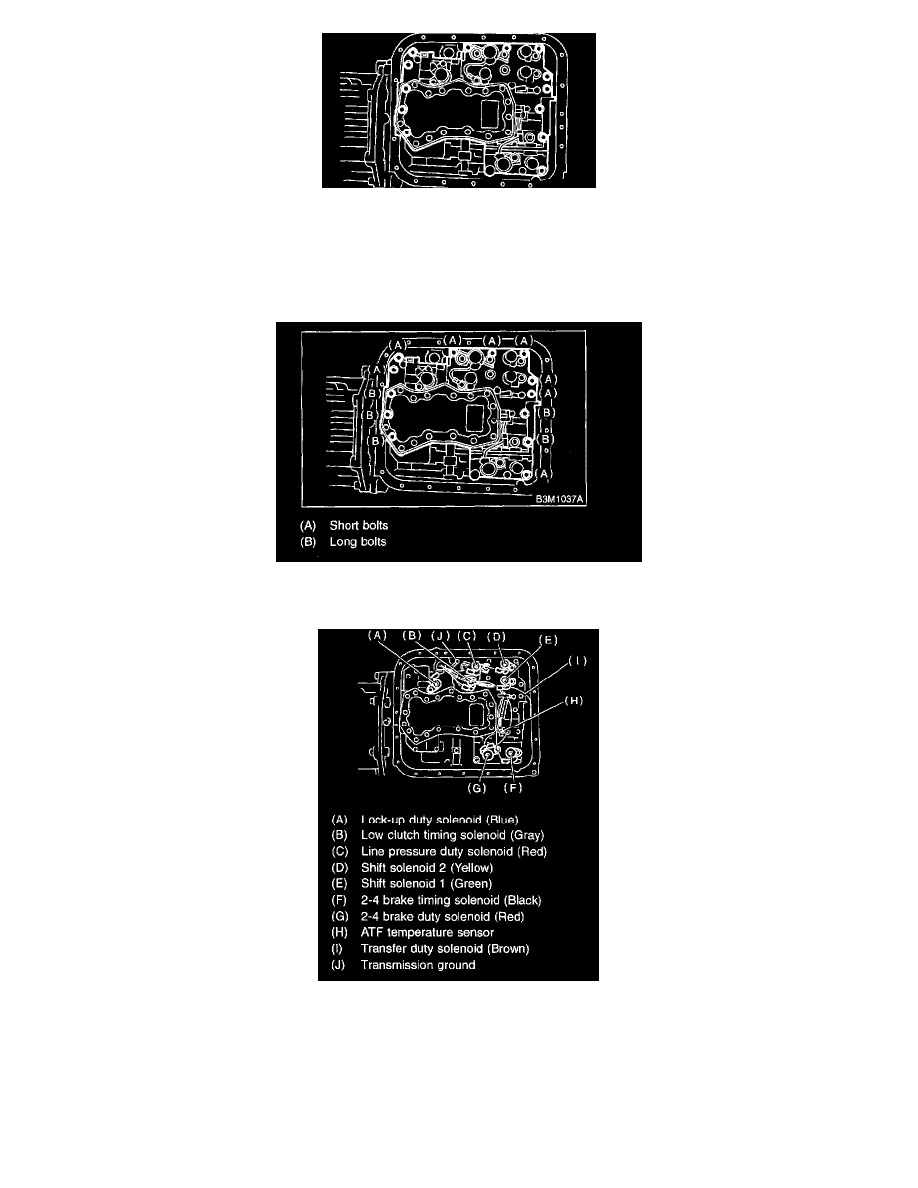
2. Install the control valve and ground earth connectors.
Tightening torque: 8 Nm (0.8 kgf-cm, 5.8 ft. lbs.)
3. Connect all connector.