
Impreza RS Coupe AWD F4-2.5L SOHC (1999)
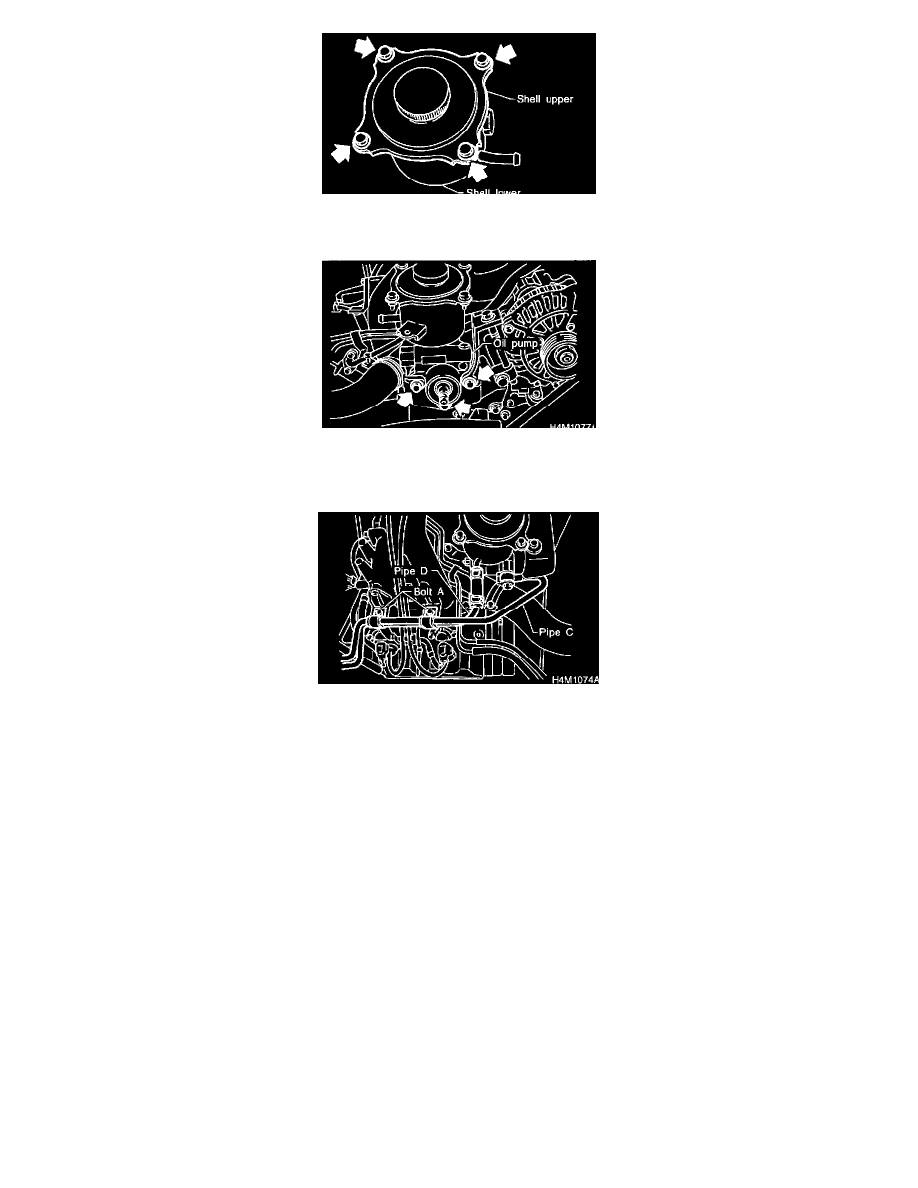
3. Install shell upper and baffle to shell lower.
Tightening torque: 13 ± 3 Nm (1.3+0.3 kg-m, 9.4 ± 2.2 ft. lbs.)
3. Install oil pump, previously assembled to oil tank, on bracket.
Tightening torque: 22 ± 2 Nm (2.2 ± 0.2 kg-m 15.9 ± 1.4 ft. lbs.)
4. Place oil pump pulley and tighten pulley nut temporarily.
5. Interconnect pipes C and D.
Tightening torque:
Joint nut: 15 ± 5 Nm (1.5 ± 0.5 kg-m, 10.8 ± 3.6 ft. lbs.)
CAUTION: If a hose is twisted at this step, the hose may come into contact with some other parts.
6. Install pulley belt to oil pump.
7. Tighten oil pump pulley nut to the specified torque.
Tightening torque: 52 ± 10 Nm (5.3 ± 1.0 kg-m, 38 ± 7 ft. lbs.)
8. Check pulley belt tension.
9. Tighten bolt belt tension.
Tightening torque: 8 ± 2 Nm (0.8 ± 0.2 kg-m, 5.8 ± 1.4 ft. lbs.)
10. Install pulley belt cover bracket.
11. Connect minus terminal of battery.
12. Feed the specified power steering fluid and discharge air.
CAUTION: Never start the engine before feeding the fluid; otherwise vane pump might be seized up.