
Impreza Wagon FWD F4-1820cc 1.8L SOHC (1995)
surface.
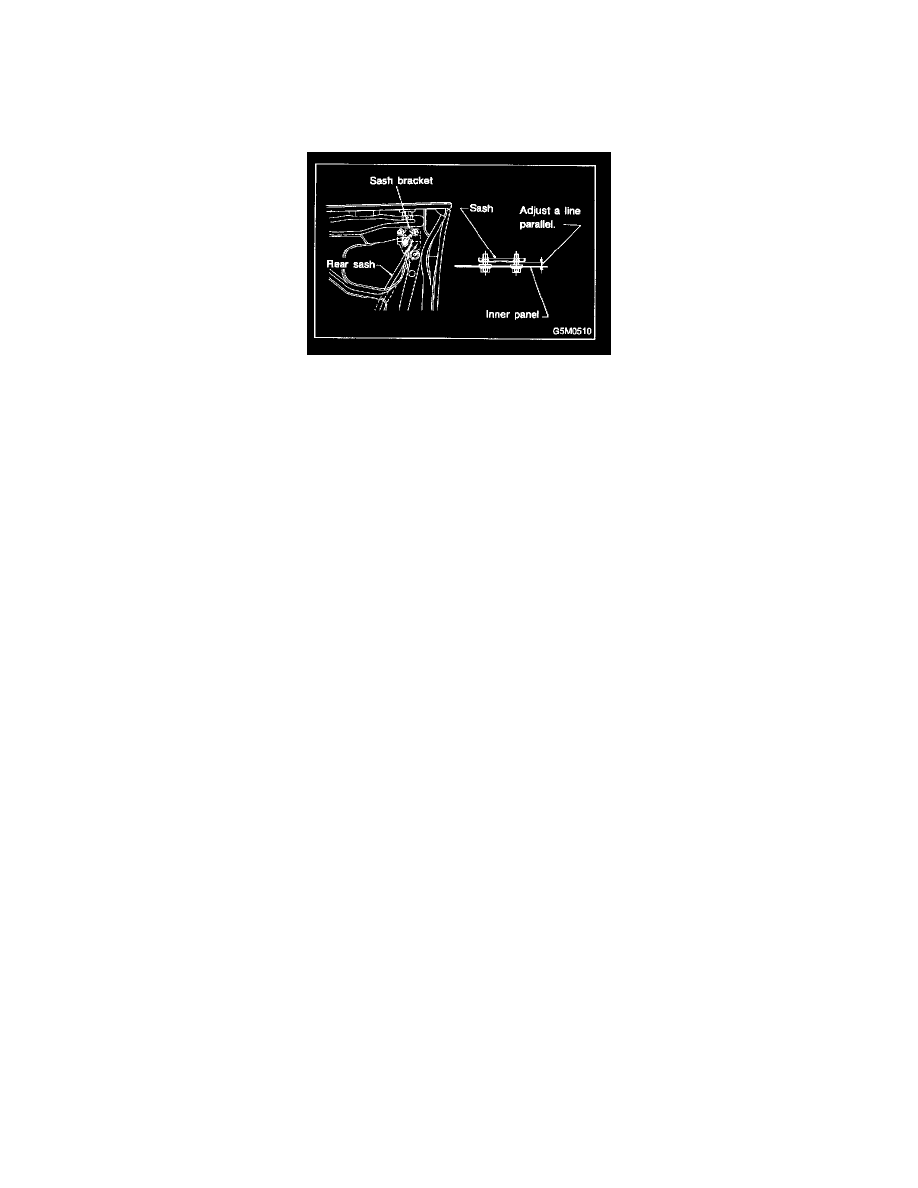
1. Alternately adjust two rear sash adjusting bolts ® until dimensions (indicated in figure) are obtained.
CAUTION: Do not loosen two adjusting nuts (A) at the same time, as this moves sash fore and aft, creating unequal glass- to-sash clearance.
During adjustment, loosen only one nut and keep the other tightened.
NOTE: Always adjust two rear sash adjusting bolts (A) by the same amount. Do not adjust the adjusting bolts with sash bracket inclined
toward inner panel, as this increases effort required to operate regulator.
2. Adjust front sash fit using rear sash adjustment procedure outlined above as a guide. Two adjusting bolts must be adjusted by the same amount.
NOTE: Front and rear sash adjustment procedures are basically the same; however, the amount of adjustment is not always the same due to
alignment dispersion of individual doors.
Adjust front and rear sash fit, as equally as possible. Otherwise, effort required to operate regulator may increase.
3. After adjusting front sash-to-glass fit, secure front sash.