Impreza WRX STI F4-2.5L Turbo (2008)

Seat Belt: Service and Repair
Front Seat Belt
Front Seat Belt
REMOVAL
1. OUTER SEAT BELT ASSEMBLY
1. Before working, turn the ignition switch to OFF, disconnect the battery ground cable, and wait for 20 seconds or more.
2. Fold the backrest all the way forward, and then move the front seat all the way forward.
3. Remove the center pillar lower trim.
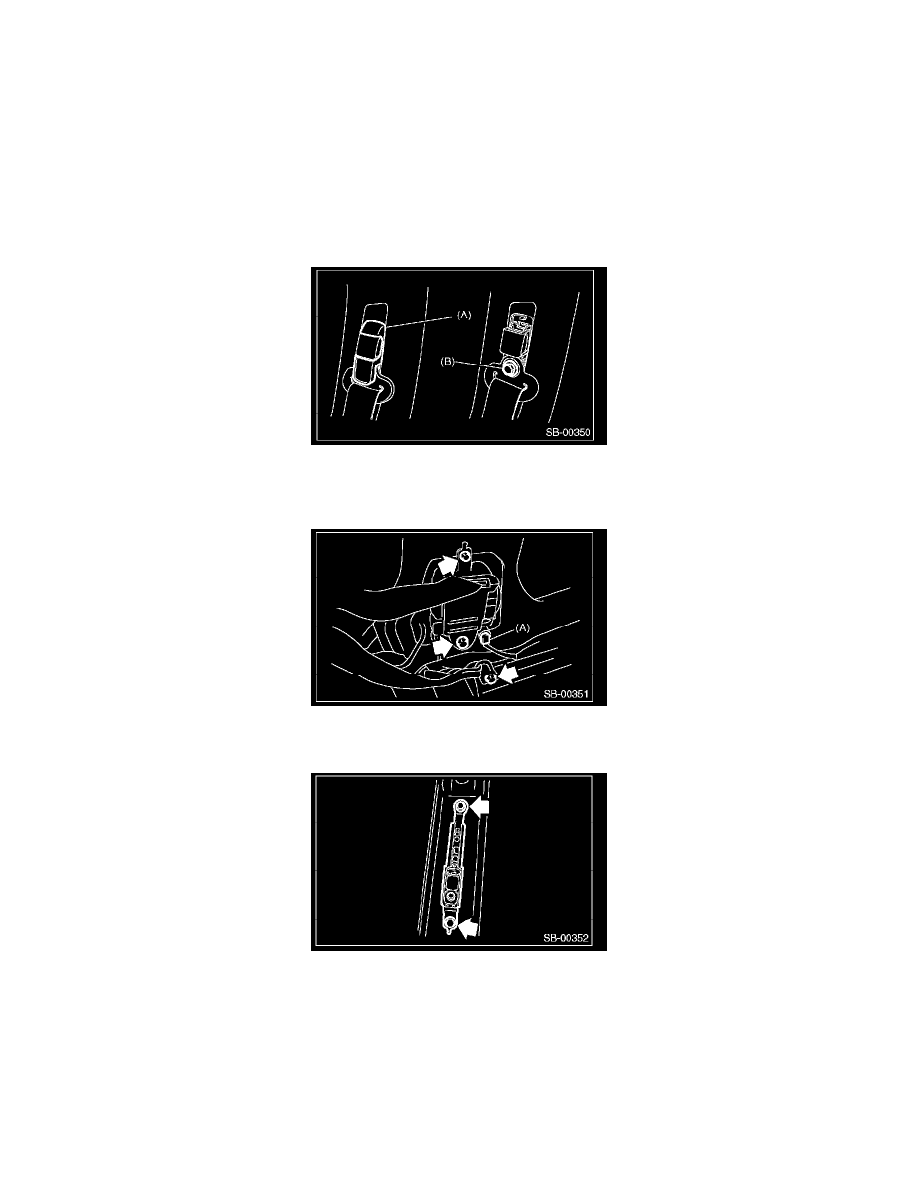
4. Remove the anchor cover (A).
5. Loosen the shoulder anchor bolt (B), and then detach the shoulder anchor from center pillar.
6. Disconnect the connector of the belt tension sensor on passenger's seat.
7. Turn over the floor mat to disconnect the connector (A) of belt tension sensor.
8. Loosen the three bolts to remove the front outer belt.
9. Remove the center pillar upper trim.
10. Remove the two bolts to remove the adjustable anchor assembly.
CAUTION:
-
Do not drop or subject the pretensioner to any impact.
-
Since the pretensioner and bracket are integrated as a unit, do not disassemble them.
2. INNER SEAT BELT ASSEMBLY
1. Turn the ignition switch to OFF, disconnect the battery ground cable, and wait for 20 seconds or more.
2. Remove the console box.
3. Disconnect the seat belt warning light connector under the seat.
4. Remove the harness clips from slide rail.
5. Remove the TORX® bolt, and then remove the inner seat belt assembly.
