
Impreza WRX STI F4-2.5L Turbo (2008)
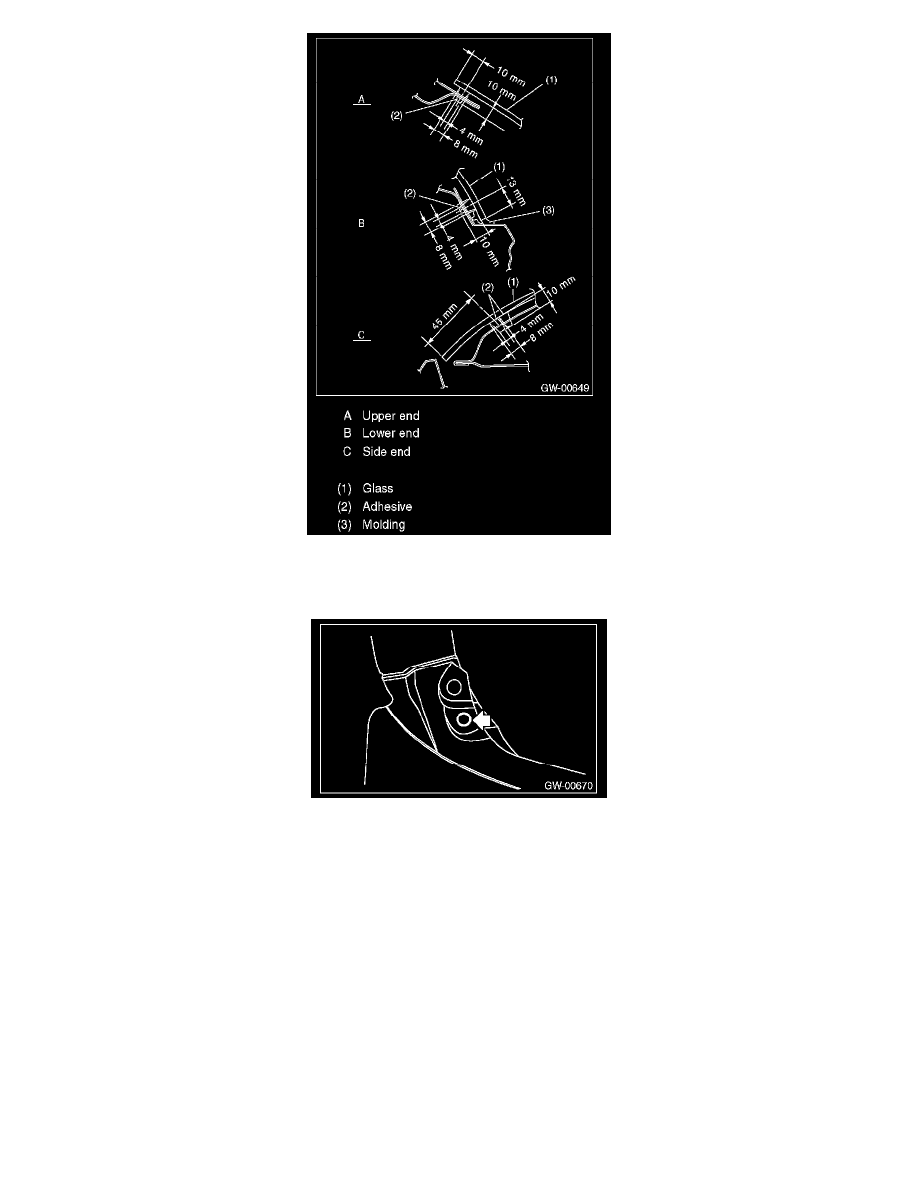
4. Insert the glass locating pin into the hole on rear gate panel and push on the area around the locating pin to secure it.
NOTE: Insert the locating pin into the lower hole of the rear gate panel.
5. Push lightly all around the locating pin to seal it.
6. After completion of all work, allow the vehicle to stand for about 24 hours.
NOTE:
-
When door is opened/closed after glass is bonded, always lower the door glass first, and then open/close it carefully.
-
Move the vehicle slowly.
-
For minimum drying time and vehicle standing time before driving after bonding, follow instructions or instruction manual from the adhesive
manufacturer.
-
When a vehicle is returned to the user, tell him or her that the vehicle should not be subjected to heavy impact for at least three days.
7. After curing of adhesive, pour the water on external surface of vehicle to check that there are no water leaks.
8. Connect the rear defogger terminals.
9. Install the rear wiper.
REPLACEMENT
When replacing only the molding, perform work according to the following procedures, (when reusing the rear gate glass)
1. Remove the rear gate glass from the vehicle.