
Justy L3-1189cc 1.2L (1987)
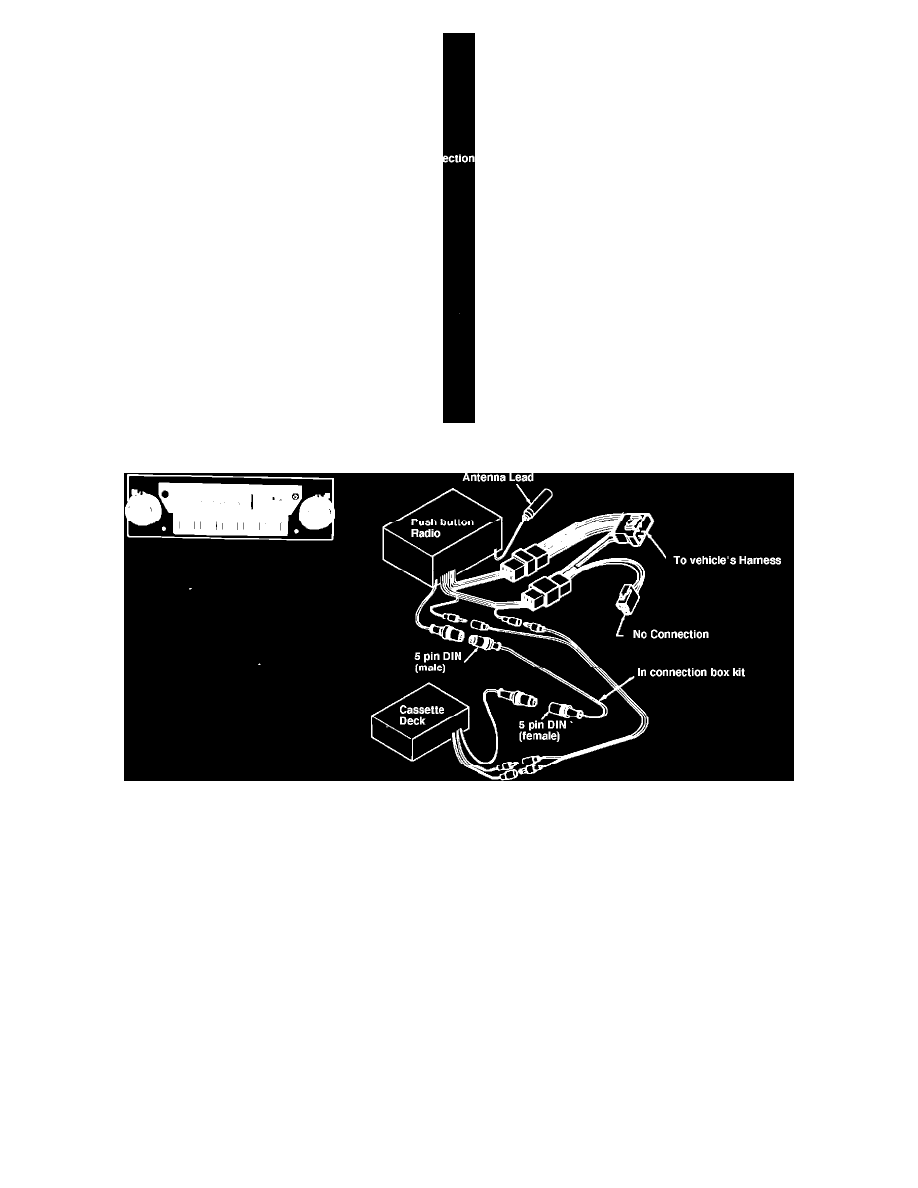
FIGURE 5 - ETR RADIO S0A333D114 (FOR '88 DL JUSTY)
FIGURE 6 - PUSH BUTTON RADIO S0A333D107 (FOR '88 MY DL JUSTY)
'88 MY JUSTY
1.
Remove radio trim plate by gently prying forward.
2.
Remove the screw from each bracket that secures the radio to the vehicle.
3.
Pull radio out from dash.
4.
Remove shorting plug from rear of radio.
5.
Using extensions provided, connect the electrical connections to the radio, as shown.
6.
Guide the electrical connectors through opening in the rear of the dash.
7.
Reinstall radio into dash, and replace screws removed in step 2.
8.
Replace trim plate by gently pushing on.
9.
Connect electrical connectors to cassette deck as shown in FIG. 4, 5 or 6 on back.
10.
Install the console box to vehicle by:
a.
Using the provided two sheet metal screws, secure the console box bracket to the console box, as shown.
b.
Remove the two vehicle mounting screws from vehicle mounting area.
c.
Secure console box to the vehicle using the screws removed in step 10b.
Justy Console Cassette Deck Installation Chart