
Justy L3-1189cc 1.2L (1987)
Distributor: Service and Repair
Distributor Service
EXC. JUSTY
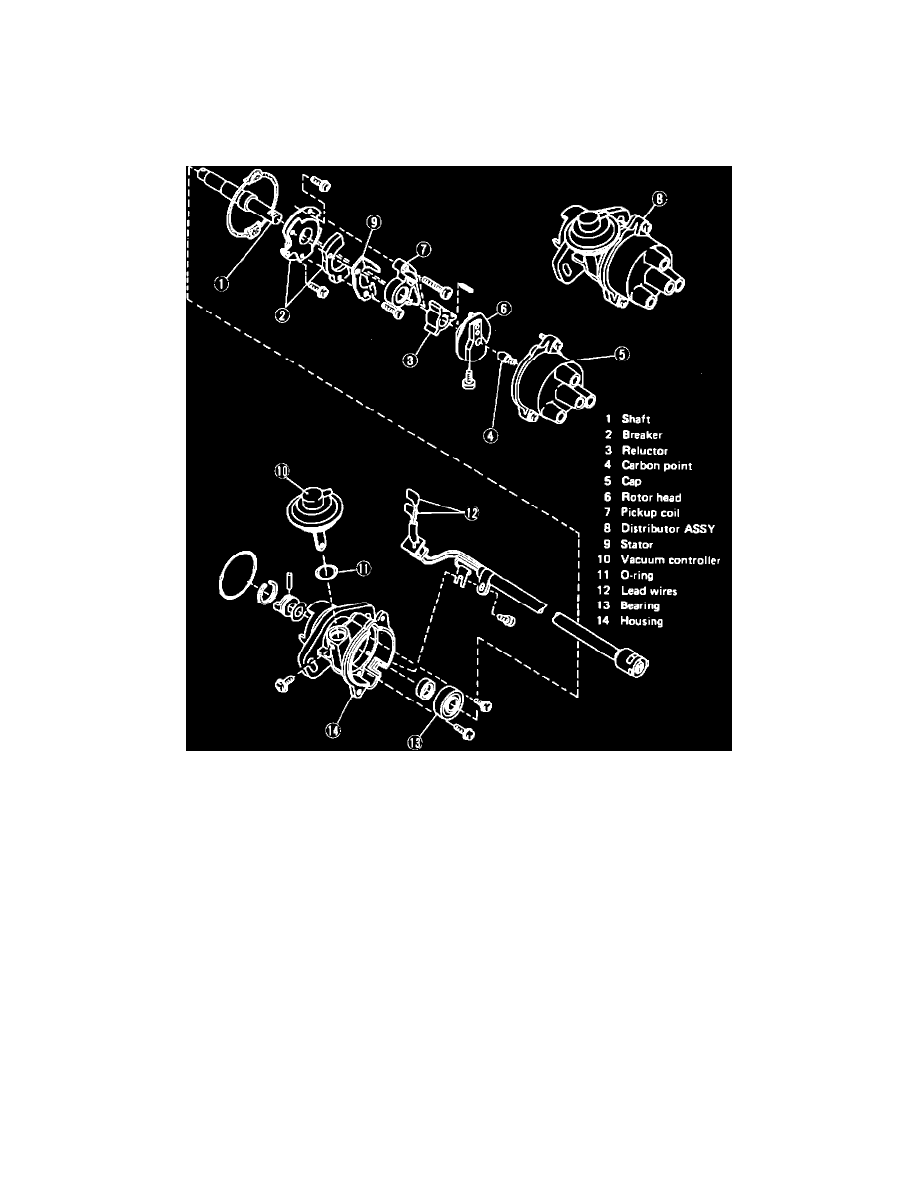
JUSTY
Fig. 6 Exploded view of Justy breakerless type distributor
1.
Remove cap retaining screws, then the cap, Fig 6.
2.
Remove rotor head retaining screws, then the rotor head.
3.
Remove rubber packing, then disconnect harness connector. When disconnecting harness connector, ensure not to pull on cord. Pinch plug,
using suitable needle nose pliers.
4.
Remove harness retaining screws, then the harness.
5.
Remove vacuum controller retaining screws, then the controller.
6.
Place a screwdriver under each side of reluctor, then pry upward to remove.
7.
Remove breaker assembly attaching screws, then the breaker assembly.
8.
Remove pickup coil attaching screws, then the breaker assembly. Do not disassembly breaker assembly unless defective. If disassembly is
necessary, adjust air gap between reluctor and stator as noted for reassembly.
9.
Reverse procedure to assemble, noting the following:
a. Apply a suitable lubricant to breaker plate mating surfaces and the connection between vacuum controller and breaker.
b. When installing breaker assembly, align mark on breaker plate with mark on housing.
c. Ensure lead wires are properly connected.
d. Check that air gap between reluctor and stator is .012-.016 inch. If necessary to adjust, loosen stator screw.