
Legacy Brighton Wagon AWD F4-2.5L SOHC (2000)
Brake Proportioning/Combination Valve: Service and Repair
A: INSPECTION
1. Install the oil pressure gauges to measure the master cylinder fluid pressure (front wheel brake fluid pressure) and rear wheel cylinder fluid
pressure.
2. Bleed air from the oil pressure gauges.
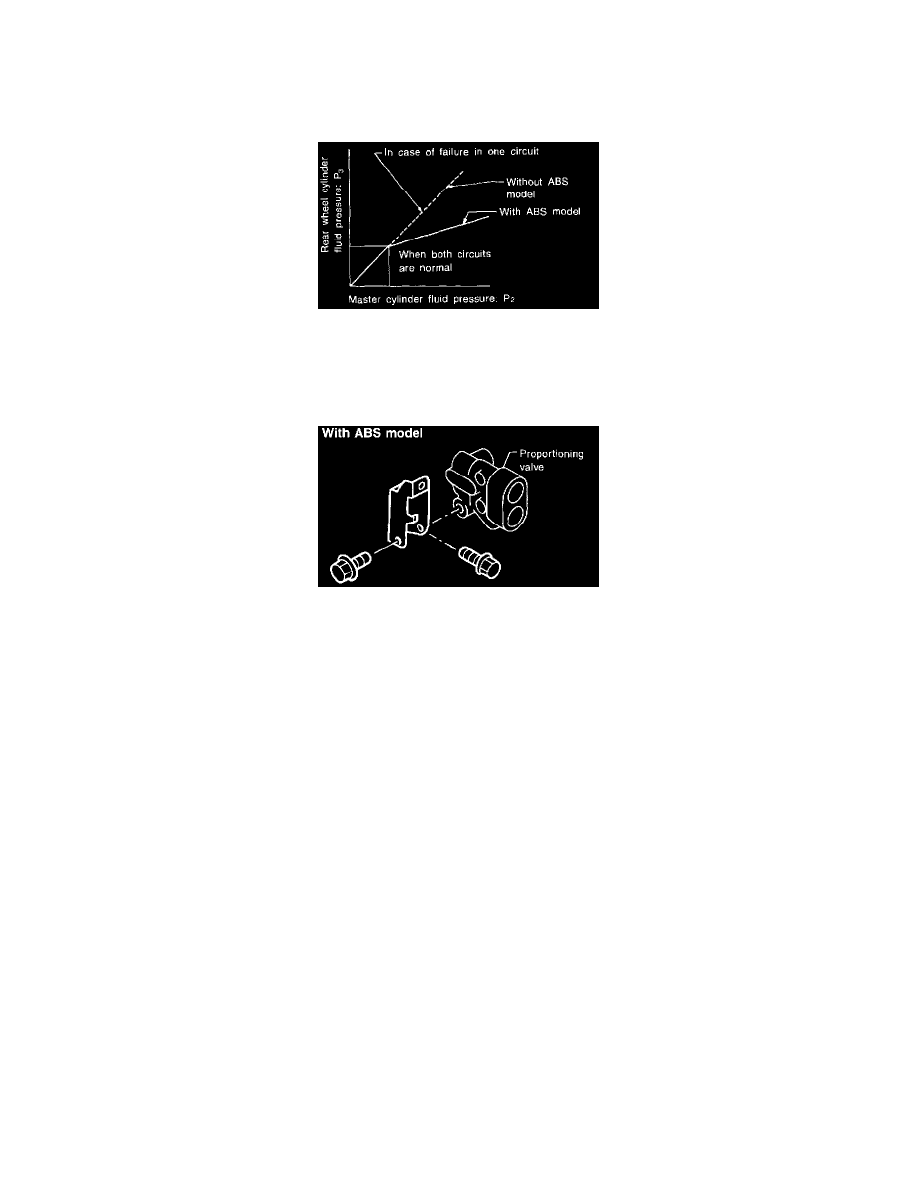
3. Check the master cylinder fluid pressure and rear wheel cylinder fluid pressure.
The standard values are shown in Figure.
4. For the oil pressure in case of split point, refer to "SPECIFICATIONS".
B: REMOVAL
1. Remove brake pipe from proportioning valve at four places.
2. Remove proportioning valve from its bracket.
CAUTION: Do not disassemble or adjust the proportioning valve. (The proportioning valve must be replaced as an assembly.)
C: INSTALLATION
1. Install-proportioning valve to bracket.
2. Connect brake pipes correctly to proportioning valve.
3. Bleed air, then check each joint of brake pipe for oil leaks.
Tightening torque:
Proportioning valve to brake pipe flare nut: 15 +3/-2 Nm (1.5 +0.3/-0.2 kg-m, 10.8 +2.2/-1.4 ft. lbs.)
Proportioning valve to bracket (Without ABS model): 22 ± 4.4 Nm (2.25 ± 0.45 kg-m, 16.3 ± 3.3 ft. lbs.)
Proportioning valve to bracket (With ABS model): 18 ± 5 Nm (1.8 ± 0.5 kg-m, 13.0 ± 3.6 ft. lbs.)