
Legacy Brighton Wagon AWD F4-2.5L SOHC (2000)
a. Check for oil leakage.
b. Move the piston rod up and down to check its operates smoothly without any binding.
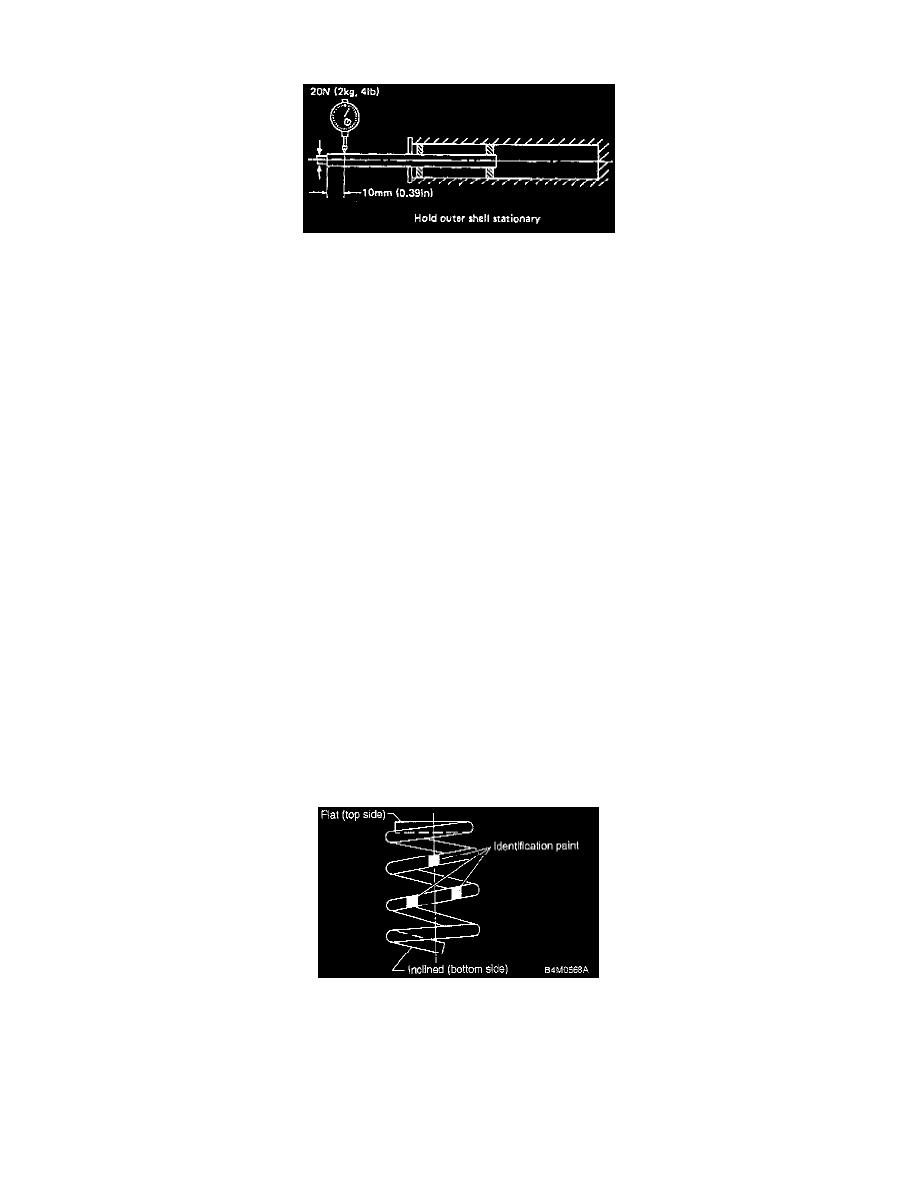
c. Play of piston rod. Measure the play as follows: Mix outer shell and fully extend the rod. Set a dial gauge at the end of the rod: L [10 mm
(0.39 inch)], then apply a force of W [20 N (4 lb)] to threaded portion. With the force of 20 N (4 lbs.) applied, read dial gauge indication: P1
Apply a force of 20 N (4 lbs.) in the opposite direction of "W", then read dial gauge indication: P1. The free play is determined by the
following equation:
Play = P1, P2
Limit of play: Less than 0.8 mm (0.031 inch).
If the play is greater, replace the strut with new one.
2. Strut mount. Check rubber part for wear, cracks and deterioration, and replace it with new one if defective.
3. Dust cover. If any cracks or damage are found, replace it with new one.
4. Coil spring. When vehicle posture is uneven, although there are no considerable reasons like tire puncture, uneven loading, etc., check coil spring
and spring seats for cracks, deformation, etc., and replace it with a new one if defective.
5. Helper. Replace it with new one if cracked or damaged.
ASSEMBLY
1. Before installing coil spring, strut mount, etc., on the strut, check for the presence of air in the dampening force generating mechanism of the strut
since air prevents proper dampening force from being produced.
2. Checking for the presence of air
a. Place the strut vertically with the piston rod facing upward.
b. Move the piston rod to the center of its entire stroke.
c. While holding the piston rod end with finger tips, move the rod up and down.
d. If the piston rod moves at least 10 mm (0.39 inch) in step (3), purge air from the strut.
3. Air purging procedure
a. Place the strut vertically with the piston rod facing upward.
b. Fully extend the piston rod.
c. With the piston rod fully extended, place the piston rod side down. The strut must stand vertically.
d. Fully contract the piston rod.
e. Repeat 3 or 4 times steps a through d above.
NOTE: After completely purging air from the strut, be sure to place the strut with the piston rod facing upward. If it is laid down, check for
entry of air in the strut as outlined under step 2 above.
4. Using a coil spring compressor, compress the coil spring.
NOTE: Make sure that the vertical installing direction of coil spring is as shown in figure.