
Legacy Brighton Wagon AWD F4-2.5L SOHC (2000)
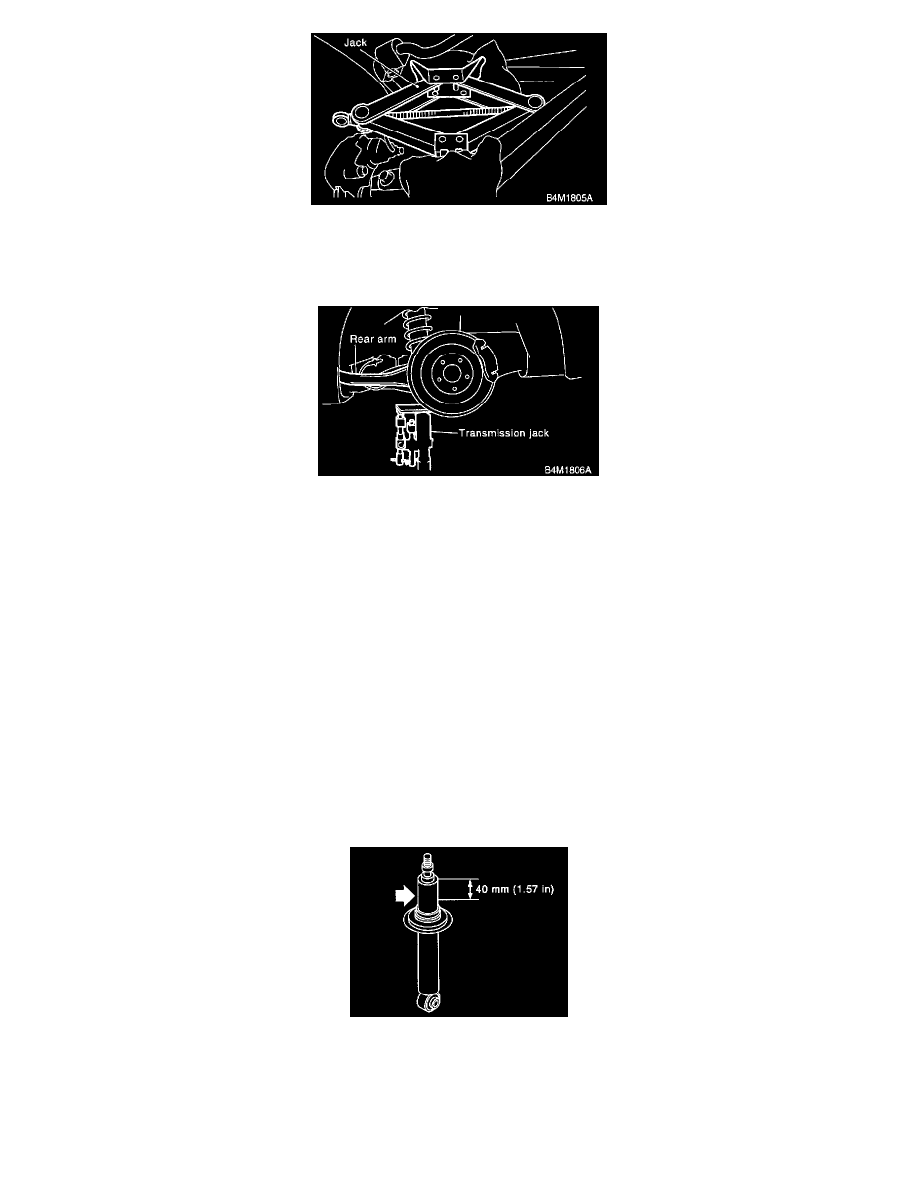
3. Place jack (furnished with vehicle) upside down and position it between link rear and sub frame. Adjust jack position so rear shock absorber is
aligned with rear arm at their corresponding holes. Install lower shock absorber bolts.
CAUTION: Put a cloth between jack and its mating area to protect link rear and sub frame from scratches.
4. Using transmission jack, support rear arm horizontally and tighten shock absorber nuts and bolts to specified torque.
Tightening torque: 157 ± 20 Nm (16 ± 2 kg-m, 116 ± 14 ft. lbs.)
CAUTION: Use a new self-locking nut.
5. Install floor mat. (Wagon model)
6. Set trunk side trim. (Sedan model)
7. Install trunk mat. (Sedan model)
NOTE: Check wheel alignment and adjust if necessary.
F: DISPOSAL PROCEDURES FOR SHOCK ABSORBER
CAUTION:
-
Completely discharge the gas from the shock absorber before disposal. Follow the disposal procedure outlined below.
-
Do not disassemble shock absorber or place into a fire.
-
Drill holes before disposing of shock absorber.
-
Before handling shock absorber, be sure to wear goggles to protect eyes from gas, oil and/or filings.
1. Place shock absorber on a flat and level surface with piston rod fully extended.
2. Using a 2 to 3 mm (0.08 to 0.12 inch) dia. drill, drill 30 mm (1.18 inch) deep holes in areas shown in the figure.