
Legacy GT LTD Sedan AWD F4-2.5L DOHC (1998)
7) Remove air cleaner lower case.
8) Disconnect spark plug cords from spark plugs (#1 and #3 cylinders).
9) Place suitable container under the vehicle.
10) Disconnect PCV hose from rocker cover (RH).
11) Remove bolts, then remove rocker cover (RH).
-
When inspecting # 2 and #4 cylinders;
1) Disconnect battery cables, and then remove battery and battery carrier.
2) Disconnect washer motor connectors.
3) Disconnect washer hoses from washer motors, then plug connections with suitable caps.
4) Remove washer tank.
5) Disconnect spark plug cords from spark plugs (#2 and #4 cylinders).
6) Remove under cover (LH).
7) Place suitable container under the vehicle.
8) Disconnect PCV hose from rocker cover (LH).
9) Remove bolts, then remove rocker cover (LH).
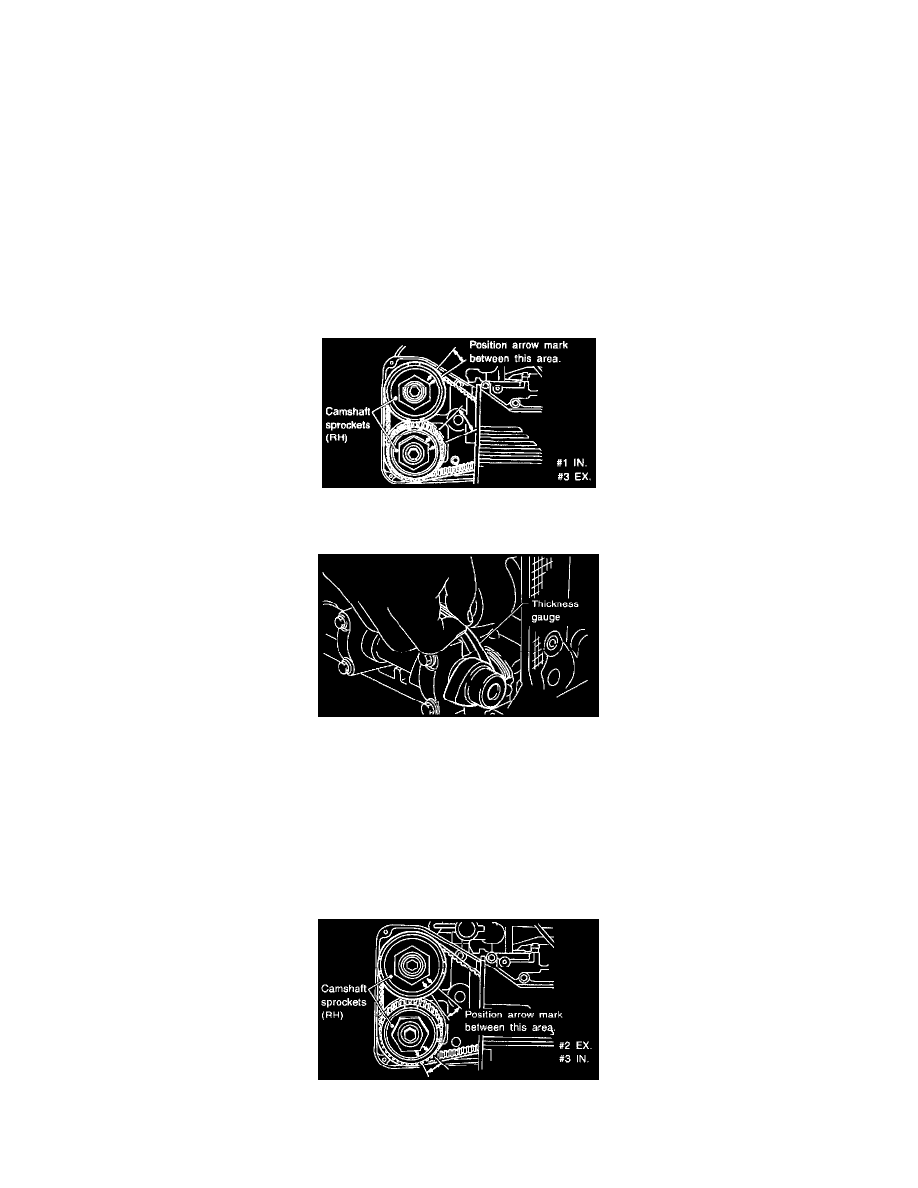
11) Turn crankshaft pulley clockwise until arrow mark on camshaft sprocket is set to position shown in figure.
12) Measure #1 cylinder intake valve and #3 cylinder exhaust valve clearances by using thickness gauge.
CAUTION:
-
Insert the thickness gauge in as horizontal a direction as possible with respect to the shim.
-
Measure exhaust valve clearances while lifting-up the vehicle.
Valve Clearance:
Intake: 0.20 ± 0.02 mm (0.0079 ± 0.0008 inch)
Exhaust: 0.25 ± 0.02 mm (0.0098 ± 0.0008 inch)
13) If necessary, adjust the valve clearance.
14) Further turn crankshaft pulley clockwise. Using the same procedures as in step 12) above, measure valve clearances.
1) Set arrow mark on camshaft sprocket to position shown in figure, and measure #2 cylinder exhaust valve and #3 cylinder intake valve
clearances.