
Legacy GT LTD Sedan AWD F4-2.5L SOHC (2001)
5. Pass piano wire through the hole, and attach securely both the wire ends to pieces of wood.
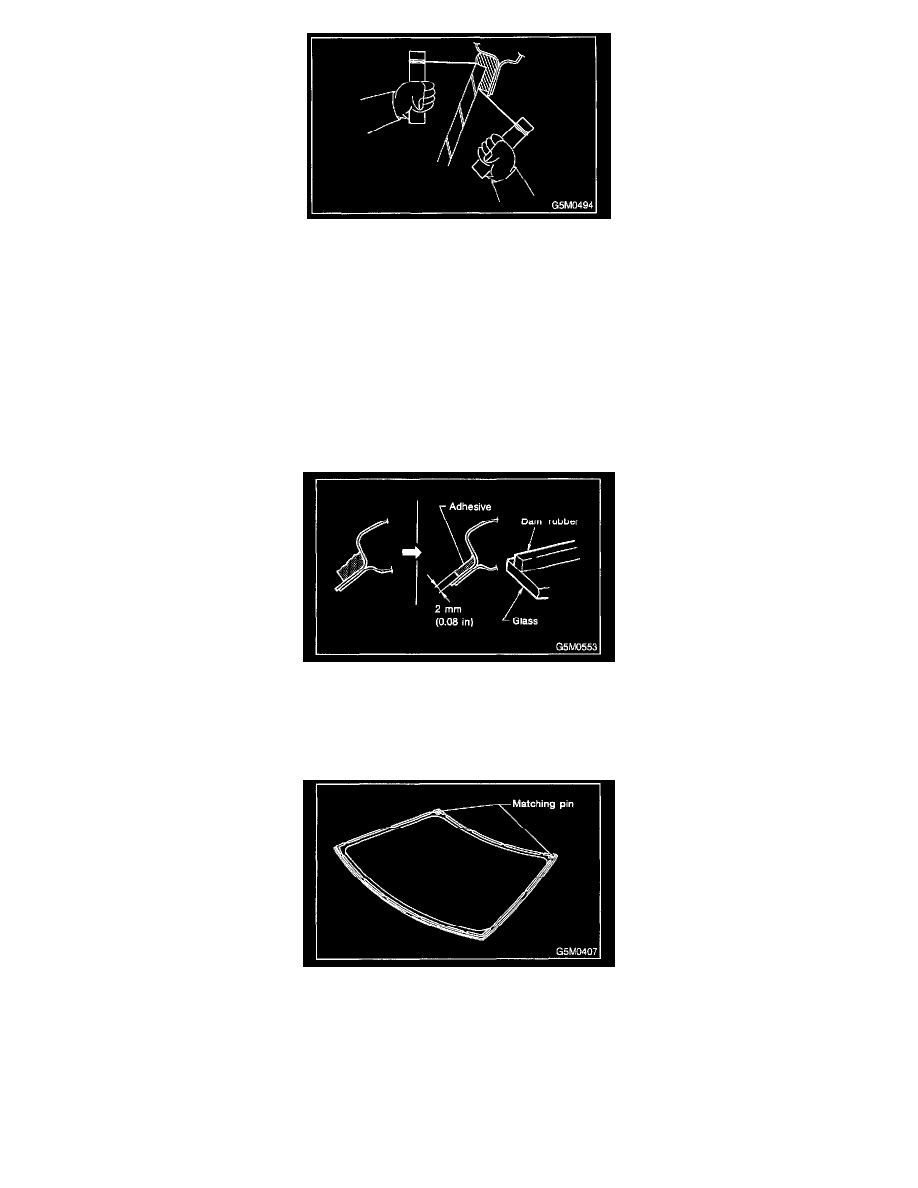
6. Pull the wire ends alternately to cut off the adhesive layer.
CAUTION:
-
Do not tightly pull the piano wire against the windshield glass edge.
-
Be careful not to damage interior and exterior parts.
-
When removal is made with area close to instrument panel, place a protection plate over it. Pay particular attention to the removal.
-
Do not cross piano wires. Otherwise they may be cut.
INSTALLATION
1. Clean external circumference of windshield glass with alcohol or white gasoline.
2. Remove adhesive layer on the body using cutter knife to obtain smooth face 2 mm (0.08 in) thick.
CAUTION: Be careful not to damage the body and paint surface.
3. Clean body with alcohol or white gasoline to remove thoroughly chips, dusts, and dirts from body face.
4. Place glass on body.
5. Adjust glass position to make uniform clearance between body and glass in four corners.
6. Place matching pins and body on glass.
7. Remove glass from body.