
Legacy L Wagon AWD F4-2.2L SOHC (1997)
(4) Install 10 vanes into rotor with their nose radius facing toward cam ring.
(5) Install cam ring to front casing, securing with knock pins.
CAUTION: Do not use hammer to fit knock pins in position.
4) Rear cover
(1) Mount seal washer on front casing.
(2) With knock pin positions aligned, install rear cover.
Tightening torque:
16 ± 2 Nm (1.6 ± 0.2 kg-m, 11.6 ± 1.4 ft-Ib.)
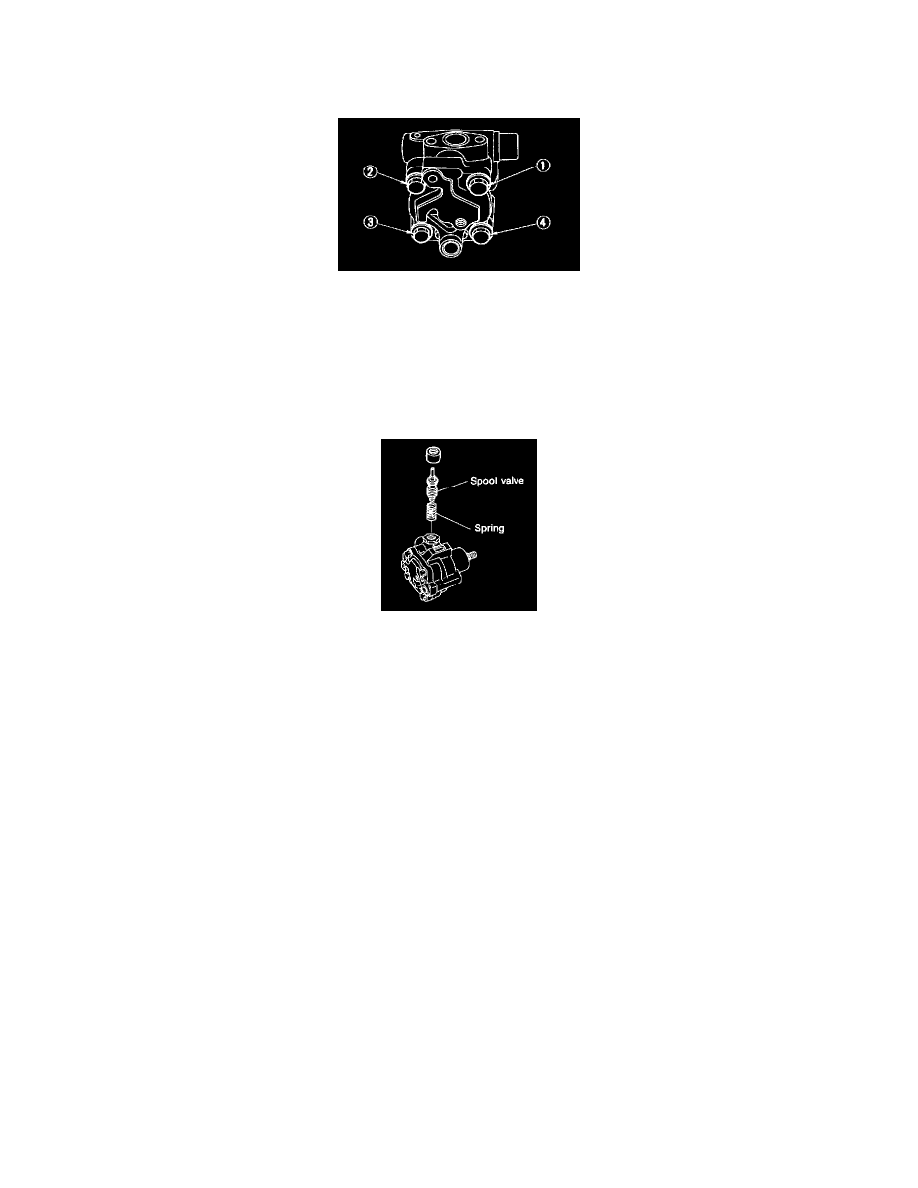
CAUTION: Loosely tighten bolts in the sequence (1), (3), (2), and (4) shown in figure. Then, tighten in the same sequence.
5) Spool Valve
(1) Install spring into front casing. Then, with spool valve dipped in specified hydraulic oil, install it into the front casing.
(2) Using a 5-mm dia. round bar, ensure that valve moves smoothly.
(3) Set O-ring, with grease applied to it, onto connector and secure connector to front casing.
Tightening torque:
74 ± 5 Nm (7.5 ± 0.5 kg-m, 54.2 ± 3.6 ft-lb)
CAUTION:
-
Use care to prevent damage to 0-ring at installation.
-
When tightening connector, ensure that 0-ring does not protrude or get caught.
6) Check
(1) When reassembly procedures have been completed, turn shaft by hand to ensure it turns smoothly. If it binds or other unusual conditions are
evident, disassemble again and check for foreign matter trapped on sliding surfaces and improper installation. Eliminate the cause of trouble.
(2) Check followings by referring to "CHECK" article.
-
Excessive play in pulley shaft
-
Ditch deflection of pulley
-
Resistance to rotation of pulley
-
Measurement of generated oil pressure
Installation
F: INSTALLATION
1) Install bracket on engine.
Tightening torque:
22 ± 2 Nm (2.2 ± 0.2 kg-m, 15.9 ± 1.4 ft-Ib)
2) Install oil pump on oil tank as follows outside the vehicle: