
Legacy Outback Ltd Sedan F4-2.5L SOHC (2000)
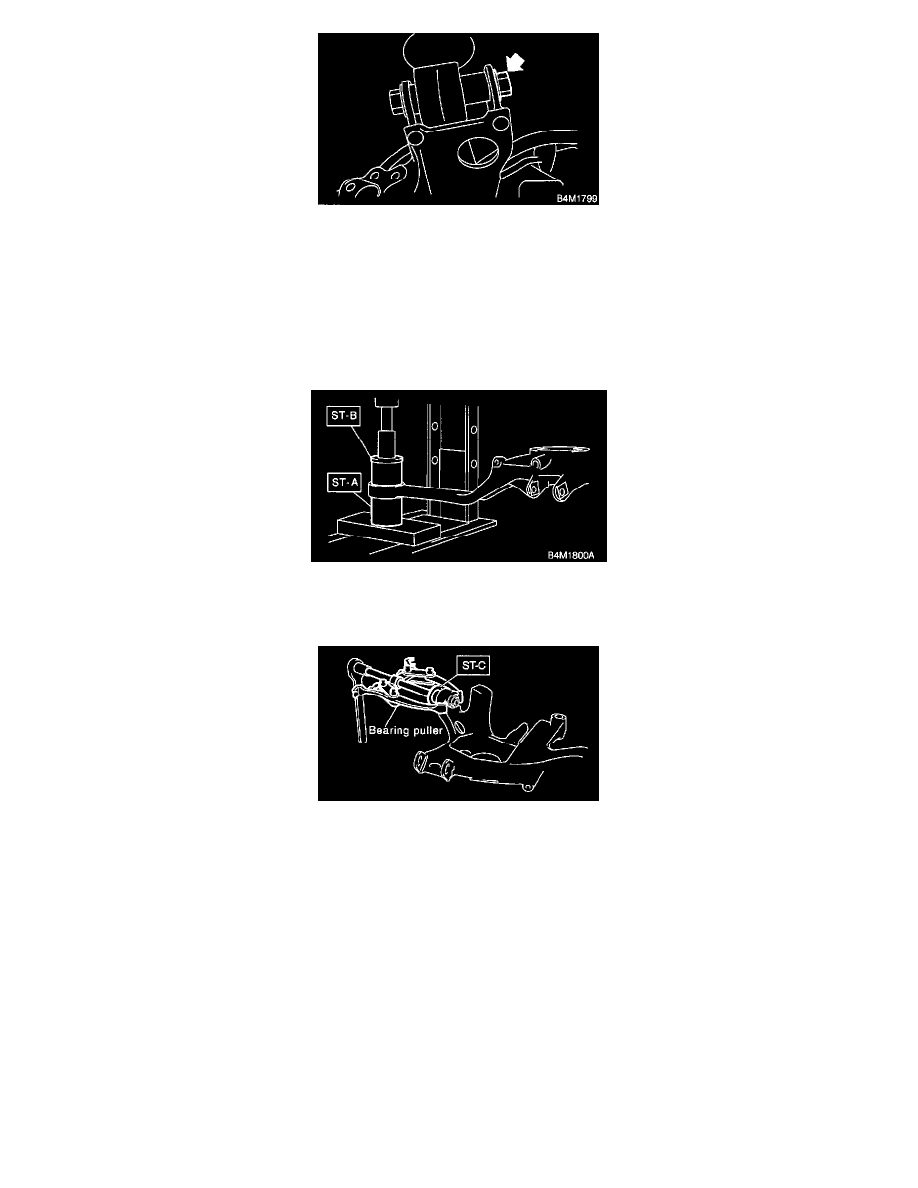
14. Loosen nut securing upper fink to rear arm.
15. Remove bolts securing rear arm to links and remove rear arm.
B: DISASSEMBLY
1. FRONT BUSHING
1. Using ST-A, B. press front bushing out of place.
ST-A, B 20099AE020 INSTALLER & REMOVER SET
1. Set ST-A in position with larger inside diameter side facing up.
2. Set rear arm with protruded bushing side facing down.
3. Place ST-B on upper side of bushing, then press bushing out of position.
2. REAR BUSHING
Using ST-C and bearing puller, press rear bushing out of place.
ST-C 20099AE040 INSTALLER & REMOVER SET
C: INSPECTION
Check trailing links for bends, corrosion or damage.
D: ASSEMBLY
1. FRONT BUSHING
1. Using ST-A, B. press bushing into trailing link.
ST-A, B 20099AE020 INSTALLER & REMOVER SET
1. Set ST-A in position with smaller inside diameter side facing up.
2. Set rear arm in position with outer side of vehicle body facing down.
3. Place bushing on upper side of rear arm.
4. Place ST-B on upper side of bushing, then press bushing into position.