
Outback F4-2.5L (2008)
4) Wait 5 to 10 minutes for the parking brake to cool down. Repeat again from step (1).
5) After breaking-in, re-adjust the parking brakes.
INSPECTION
1) Measure the brake disc rotor inside diameter. If the disc is scored or worn, replace the brake disc rotor.
Disc rotor inside diameter.
Standard: 170 mm (6.69 in)
Service limit: 171 mm (6.73 in)
2) Measure the lining thickness. If it exceeds the limit, replace shoe assembly.
Lining thickness:
Standard: 3.2 mm (0.126 in)
Service limit: 1.5 mm (0.059 in)
NOTE: Replace the right and left brake shoe as a set.
ADJUSTMENT
SHOE CLEARANCE
1) Return the parking brake lever fully.
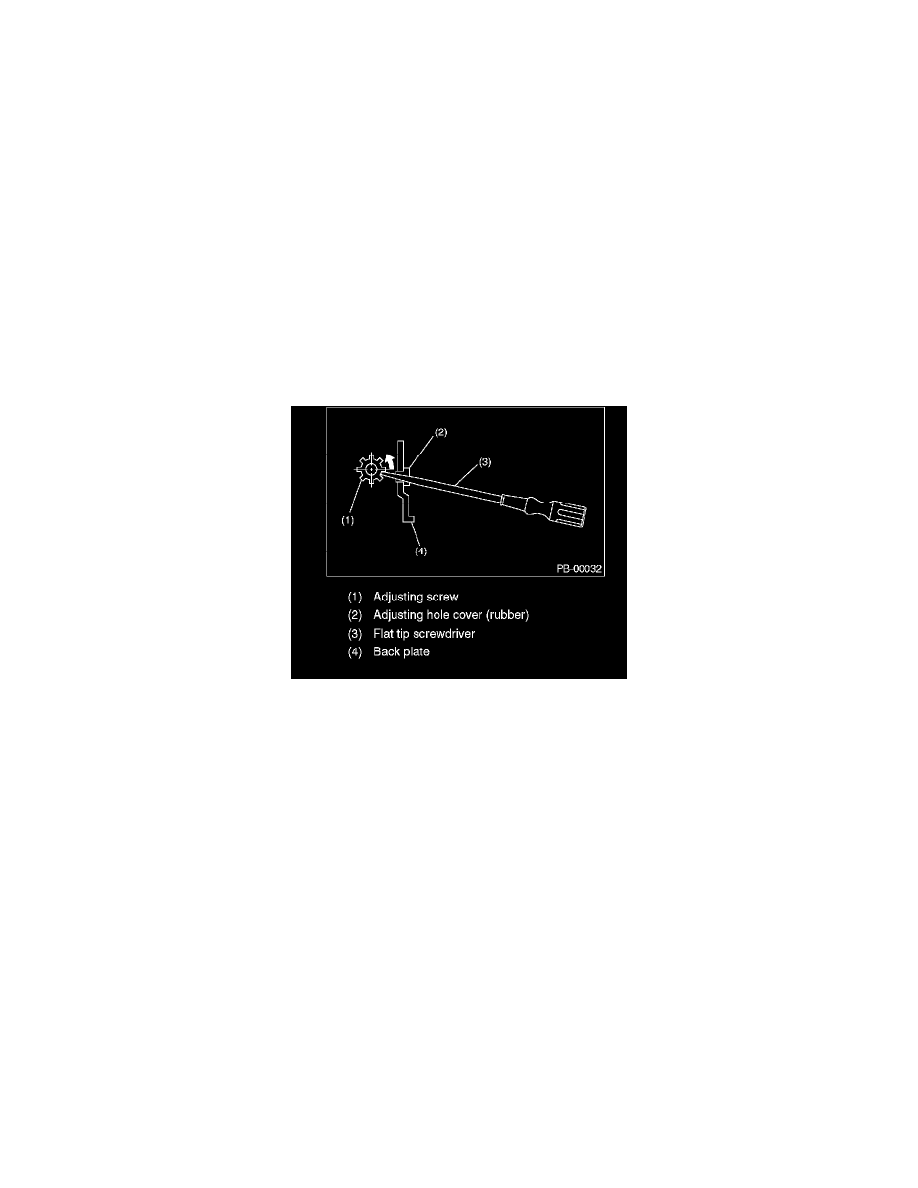
2) Remove the adjusting hole cover from the back plate.
3) Turn the adjusting screw using a flat tip screwdriver until the brake shoe is in close contact with the disc rotor.
4) Turn back (downward) the adjusting screw 3 to 4 notches.
CAUTION: Check there is no brake drag.
5) Install the adjusting hole cover to the back plate.
6) Adjust the parking lever stroke.
LEVER STROKE
1) Adjust the shoe clearance before adjusting lever stroke.
2) Remove the parking lever cover.
3) Operate the parking brake lever 3 to 4 times.
4) Turn the adjusting nut until the lever stroke is at the specified value.