
Outback F4-2.5L (2008)
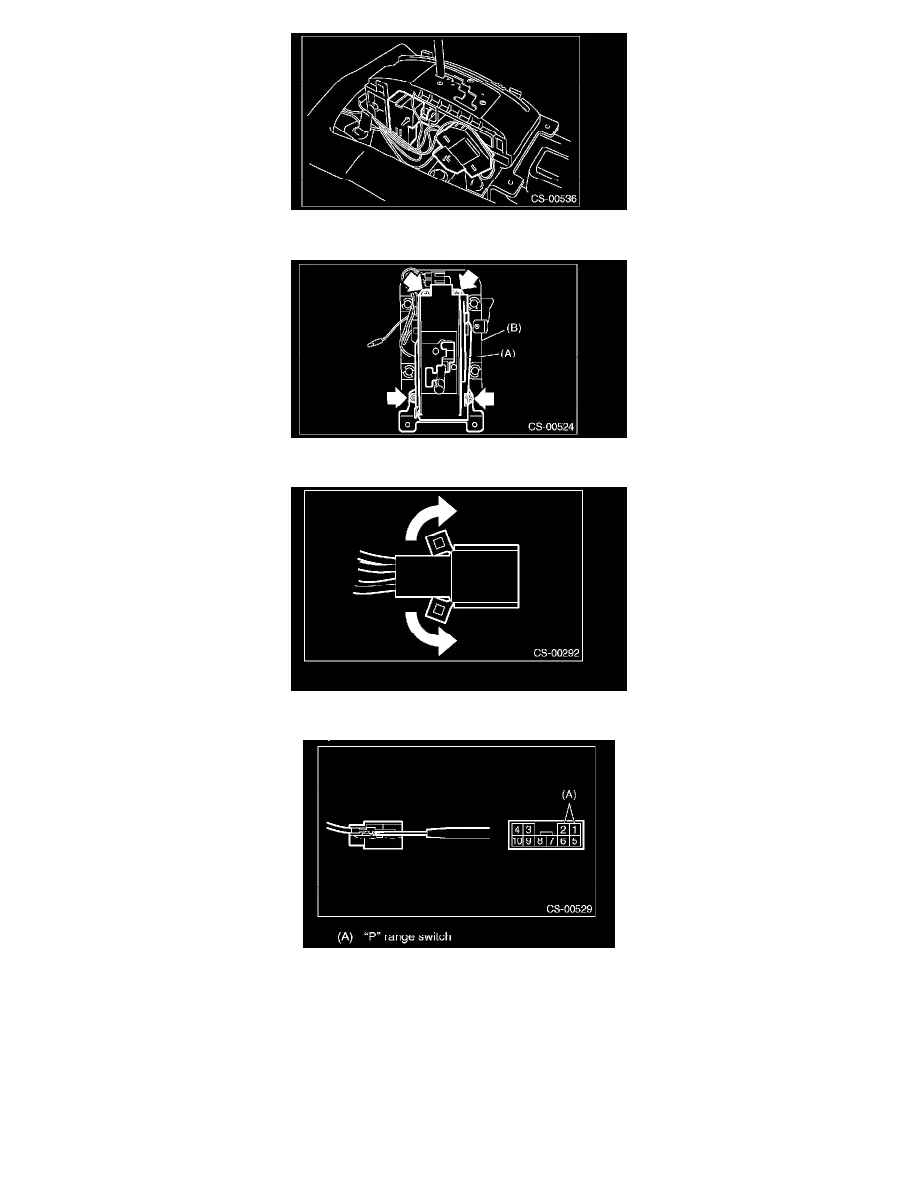
9) Remove the bolt to remove the guide plate upper (A) from the plate lower (B)
10) Raise the claw of the connector.
11) Disconnect the terminal of the "P" range switch from connector, using a flat-tip screwdriver with a thin tip.
INSTALLATION
Install in the reverse order of removal.
NOTE:
^
Refer to "COMPONENT" for each tightening torque.
^
Connect the "P" range switch terminal to connector.