
Outback F4-2.5L DOHC Turbo (2006)
Control Assembly: Service and Repair
Control Panel (Auto A/C Model)
Control Panel (Auto A/C Model)
REMOVAL
1. Remove the audio assembly.
2. Remove the six screws.
NOTE: When working the removed audio assembly with its back facing down, place wooden blocks between the audio assembly and the
workbench to prevent ground terminal from folding.
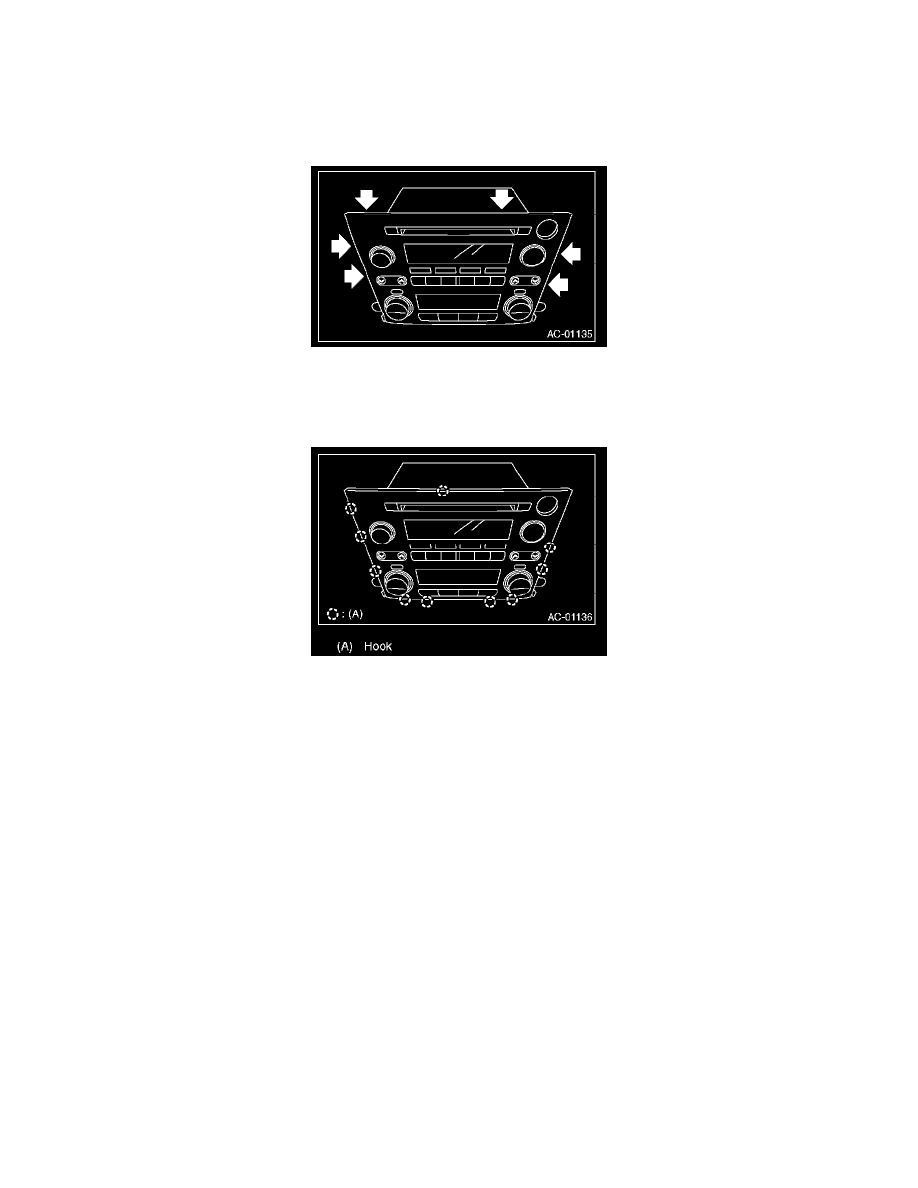
3. Using a fine flat tip screwdriver, remove the ten hooks gradually in the order of both sides, lower and upper side.
4. Pull the panel straight toward you to remove.
CAUTION: Be careful not to touch the logic board to prevent static electricity damage.
INSTALLATION
1. Fit the hooks. Make sure the firm connection between logic board and connector by pushing the center part of panel with fingertips.
2. Install in the reverse order of removal.