
Outback F4-2.5L DOHC Turbo (2006)
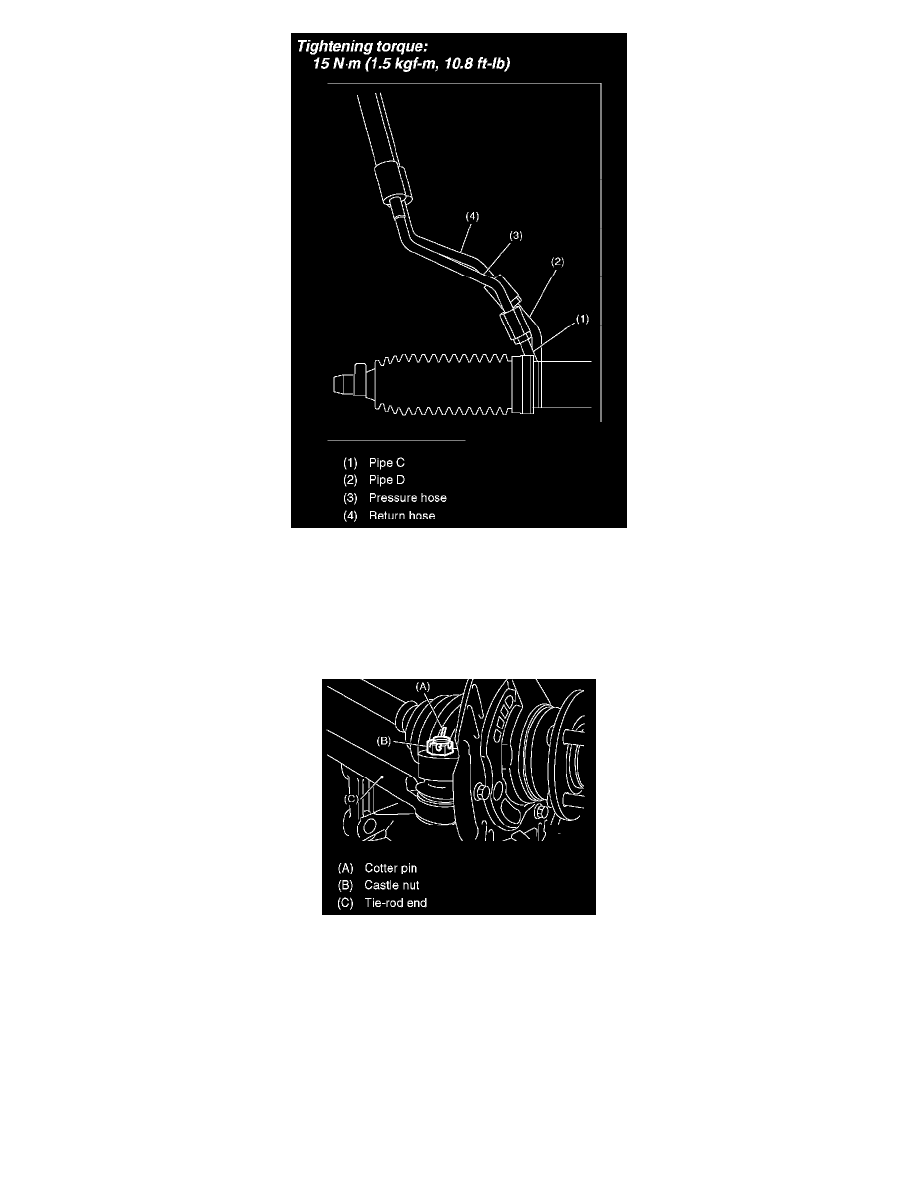
5. Connect the pipe D to return hose first, and the pipe C to pressure hose second.
Tightening torque: 15 Nm (1.5 kgf-cm, 10.8 ft. lbs.)
6. Install the universal joint.
7. Connect the tie-rod end and knuckle arm, and tighten with castle nut.
Castle nut tightening torque: 27 Nm 2.75 kgf-cm, 19.9 ft. lbs.)
CAUTION: When connecting, do not hit cap at the bottom of tie-rod end with hammer.
8. After tightening the castle nut to specified tightening torque, tighten it further within 60° until cotter pin hole is aligned with slot in the nut. Fit the
cotter pin into nut, and then bend the pin to lock.
9. Install the front stabilizer.
10. Install the front crossmember support plate and jack-up plate.
11. Install the front exhaust pipe assembly. (Nonturbo model)
12. Install the undercover.
13. Install the front wheels.
14. Tighten the wheel nuts to specified torque.
Tightening torque: 90 Nm (9.1 kgf-cm, 65.8 ft. lbs.)
15. Lower the vehicle.
16. Remove the steering wheel.
17. Align the center of roll connector.