
Outback F4-2.5L DOHC Turbo (2006)
Suspension Strut / Shock Absorber: Service and Repair
Rear Suspension
Rear Shock Absorber
REMOVAL
1. Remove the luggage floor mat. (Wagon model)
2. Roll up the trunk side trim. (Sedan model)
3. Lift-up the vehicle, and then remove the rear wheels.
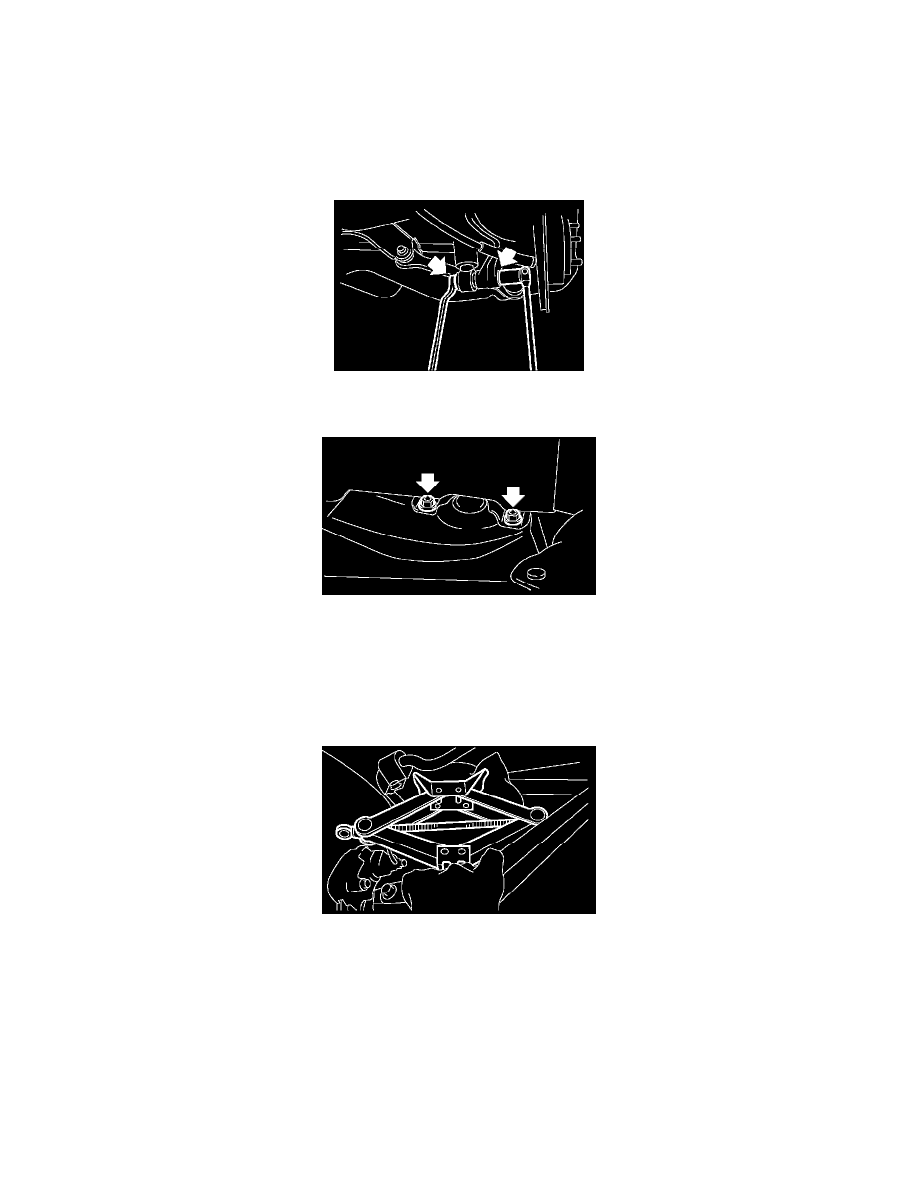
4. Remove the bolts which secure the shock absorber to rear arm.
5. Support the shock absorber using a jack.
6. Remove the nuts which secure the shock absorber mount to vehicle.
7. Remove the shock absorber.
INSTALLATION
1. Support the shock absorber using a jack.
2. Using new self-locking nuts, secure the shock absorber to vehicle.
Tightening torque: 30 Nm (3.1 kgf-cm, 22.4 ft. lbs.)
3. Set the jack which is originally equipped to the vehicle under the upside down situation, and place the jack between rear link and sub frame. Align
the installing position of rear shock absorber and rear arm by adjusting the jack position. Using new selflocking nuts, temporary tighten the bolt.
CAUTION: Protect the rear link and sub frame from scratch in the way of putting a shop cloth between the jack and the mating portion.
4. Using the transmission jack, support the rear arm horizontally.