
Outback F6-3.0L DOHC (2006)
^
Do not clean the ABSCM & H/U by applying compressed air.
^
Even if damage is found on the H/U seal, do not attempt repair by filing or with a metal scraper. To remove the seal residue, always use a plastic
scraper. Do not use chemical such as paint thinner, etc., to clean.
7. Position the coil of the new ABSCM to align with the H/U valve.
8. To prevent deformation of the ABSCM housing cover, hold the corner of ABSCM and install it to the H/U without tilting.
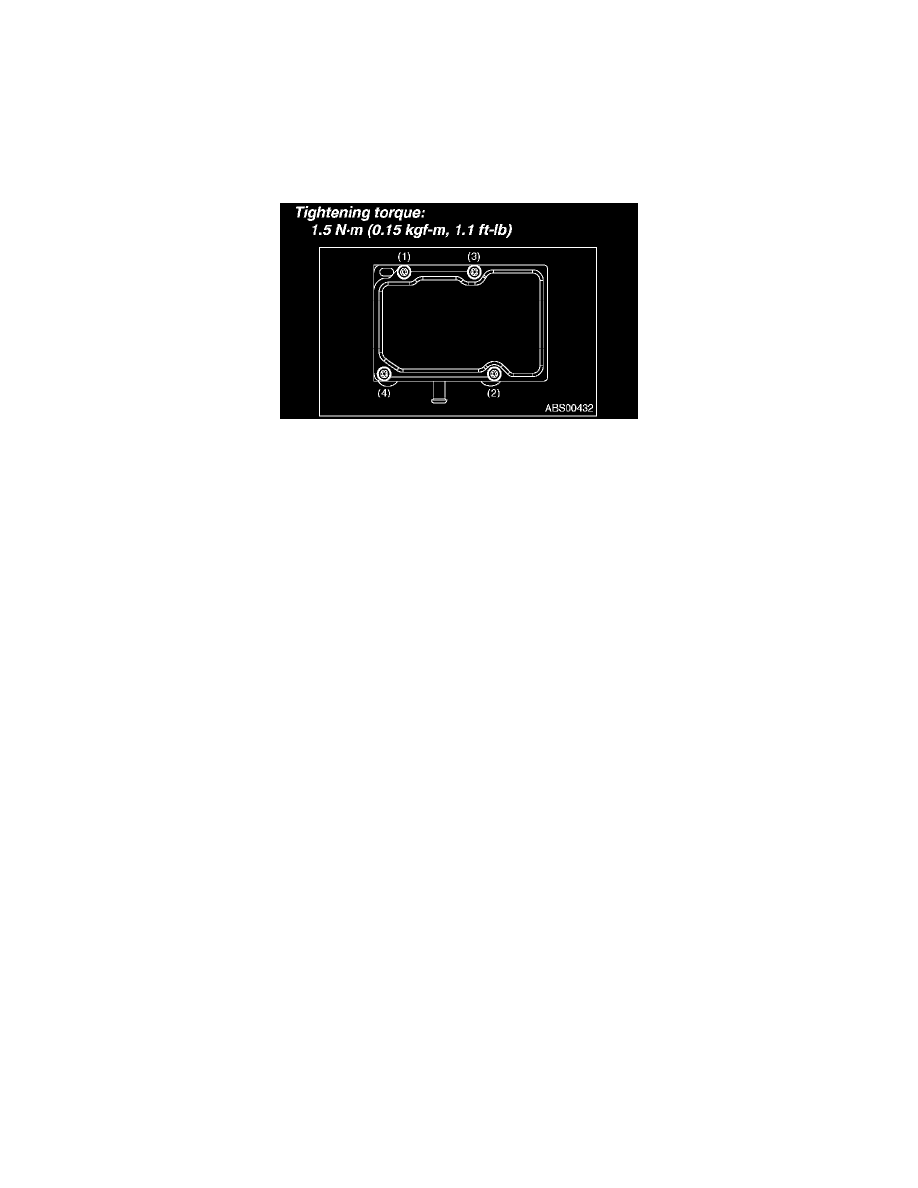
9. Using a TORX BIT E5, attach/tighten new screws in the order of (1) through (4).
CAUTION: Always use new screws.
10. Check that there is no foreign matter in mating surface between the ABSCM & H/U.
11. Using a TORX BIT E5, tighten the screws in the order of (1) through (4) again.
Tightening torque: 3 Nm (0.3 kgf-m, 2.2 ft. lbs.)
12. Check that there is no gap in the mating surface between ABSCM & H/U.
13. Install the ABSCM & H/U to the vehicle.