
Outback F6-3.0L DOHC (2006)
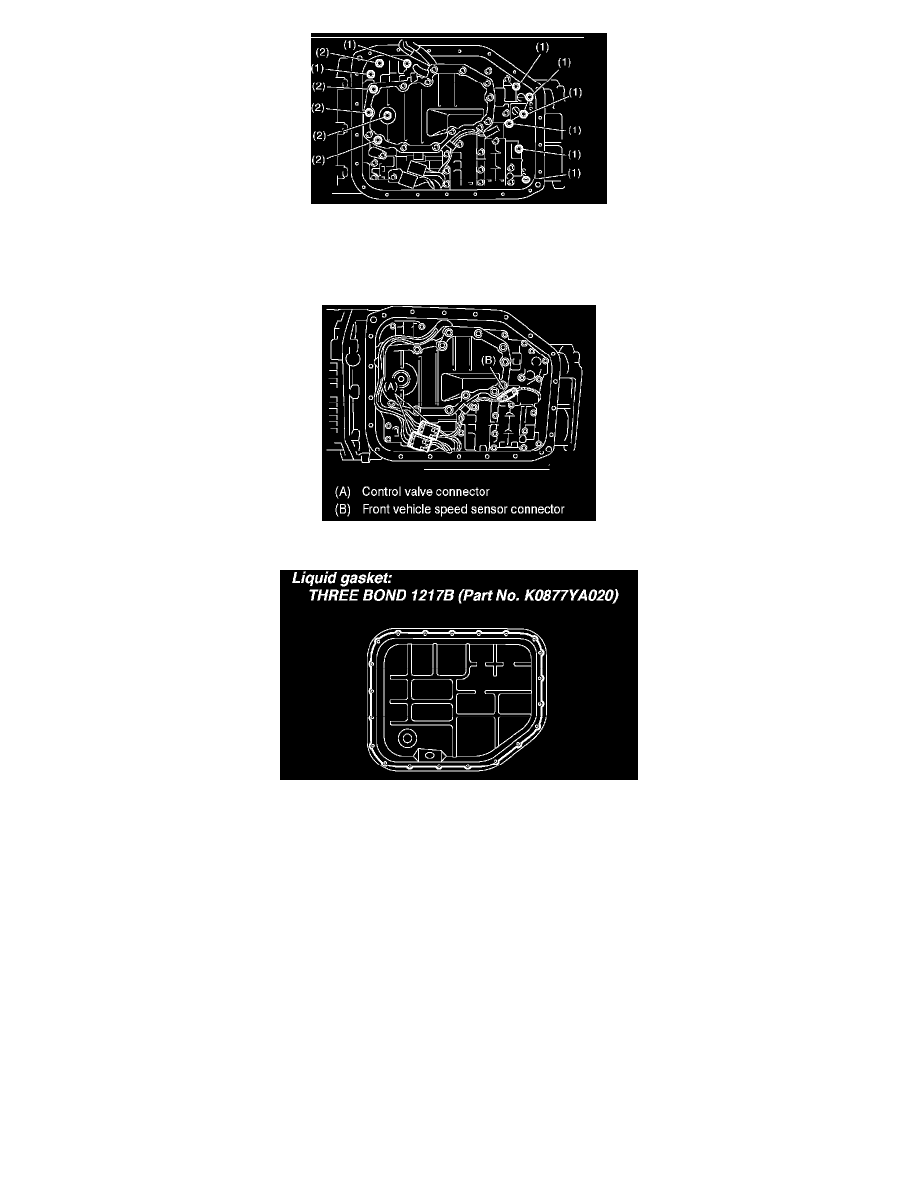
3. Install the control valve body.
Tightening torque: 8 Nm (0.8 kgf-cm, 5.8 ft. lbs.)
NOTE: Be careful not to catch harness in.
4. Connect the control valve connector and front vehicle speed sensor connector.
5. Apply proper amount of liquid gasket to the entire oil pan mating surface.
Liquid gasket: THREE BOND 1217B (Part No. K0877YA020)
6. Install the oil pan by equally tightening the bolts.
Tightening torque: 5 Nm (0.5 kgf-cm, 3.7 ft. lbs.)
7. Install the rear vehicle speed sensor and turbine speed sensor 1, and then fasten the harness.
Tightening torque: 7 Nm (0.7 kgf-cm, 5.2 ft. lbs.)
8. Install a new aluminum washer and oil cooler pipe.
Tightening torque: 25 Nm (2.5 kgf-cm, 18 ft. lbs.)
9. Install the oil charge pipe.
10. Install the transmission rear crossmember bolt.
Tightening torque: 70 Nm (7.1 kgf-cm, 51.6 ft. lbs.)
11. Install the propeller shaft.
12. Install the heat shield cover.
13. Install the center exhaust pipe, rear exhaust pipes and muffler. (Turbo model)
14. Install the rear exhaust pipe and muffler. (Nonturbo model)
15. Lower the vehicle.
16. Install the transmission connector to the stay, and then connect the connector.
17. Install the intercooler. (Turbo model)
18. Install the air intake chamber. (Non-turbo model)
19. Pour ATF through the oil charge pipe.