
Outback L.L.Bean Edition AWD F6-3.0L (2002)
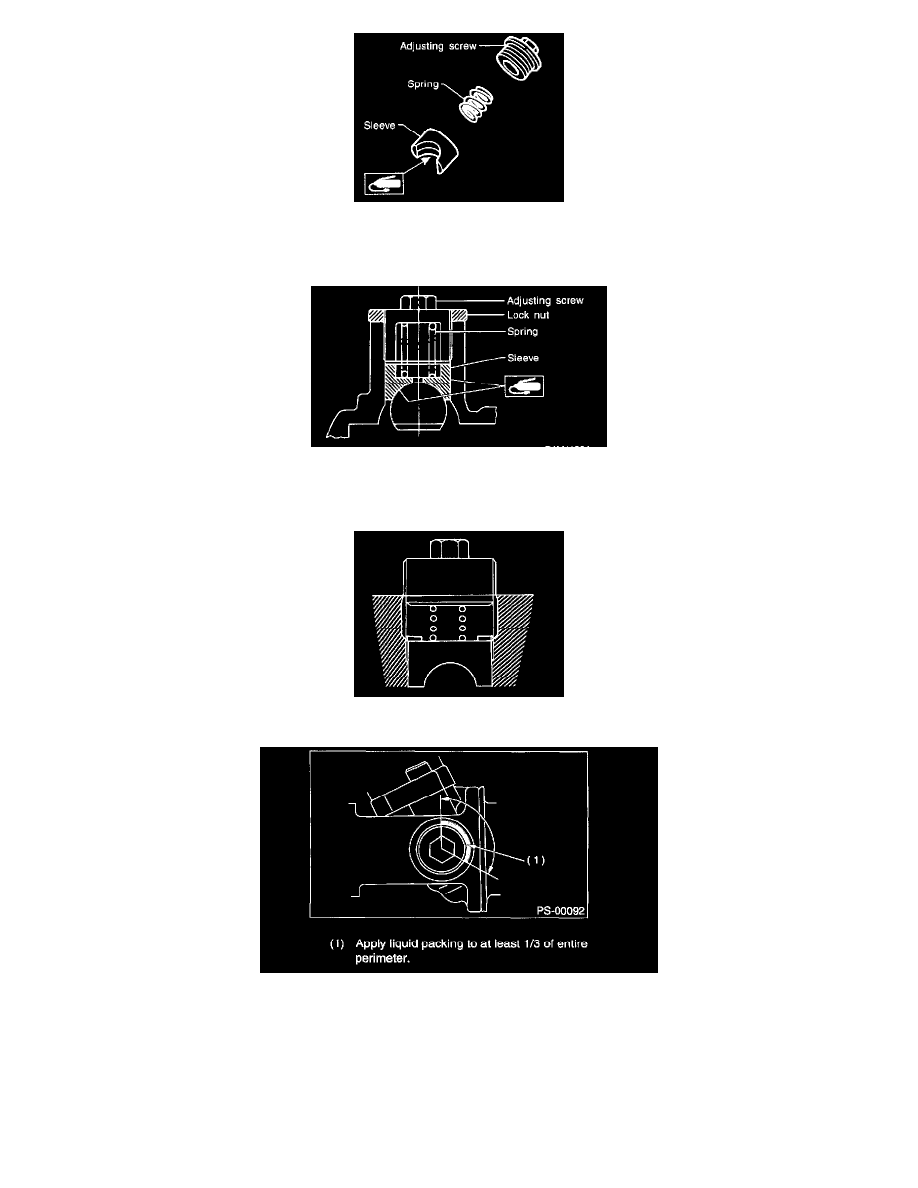
16. Apply grease to sliding surface of sleeve and spring seat, then insert sleeve into pinion housing. Fit spring into sleeve screw, pack grease inside of
screw, then install the screw.
17. Rack and pinion backlash adjustment
1. Loosen adjusting screw.
2. Rotate input shaft so that rack is in the straight ahead direction.
3. Apply grease to sleeve.
4. Tighten adjusting screw by two threads.
5. Apply liquid packing to at least 1/3 of entire perimeter of adjusting screw thread.
Liquid packing: THREE BOND 1141
6. Tighten adjusting screw to 7.4 Nm (0.75 kgf-m, 5.4 ft. lbs.) and back off 25°.
7. Install lock nut. While holding adjusting screw with a wrench, tighten lock nut using ST.
ST 926230000 SPANNER
Tightening torque (Lock nut): 39 Nm (4.0 kgf-m, 29 ft. lbs.)
NOTE:
^
Hold adjusting screw with a wrench to prevent it from turning while tightening lock nut.