
Outback L.L.Bean Edition AWD F6-3.0L (2002)
Shift Fork: Service and Repair
REMOVAL
1. Remove the manual transmission assembly from vehicle.
2. Remove back-up light switch and neutral position switch.
3. Remove transfer case with extension case assembly.
4. Remove transmission case.
5. Removes drive pinion shaft assembly.
6. Remove main shaft assembly.
7. Remove differential assembly.
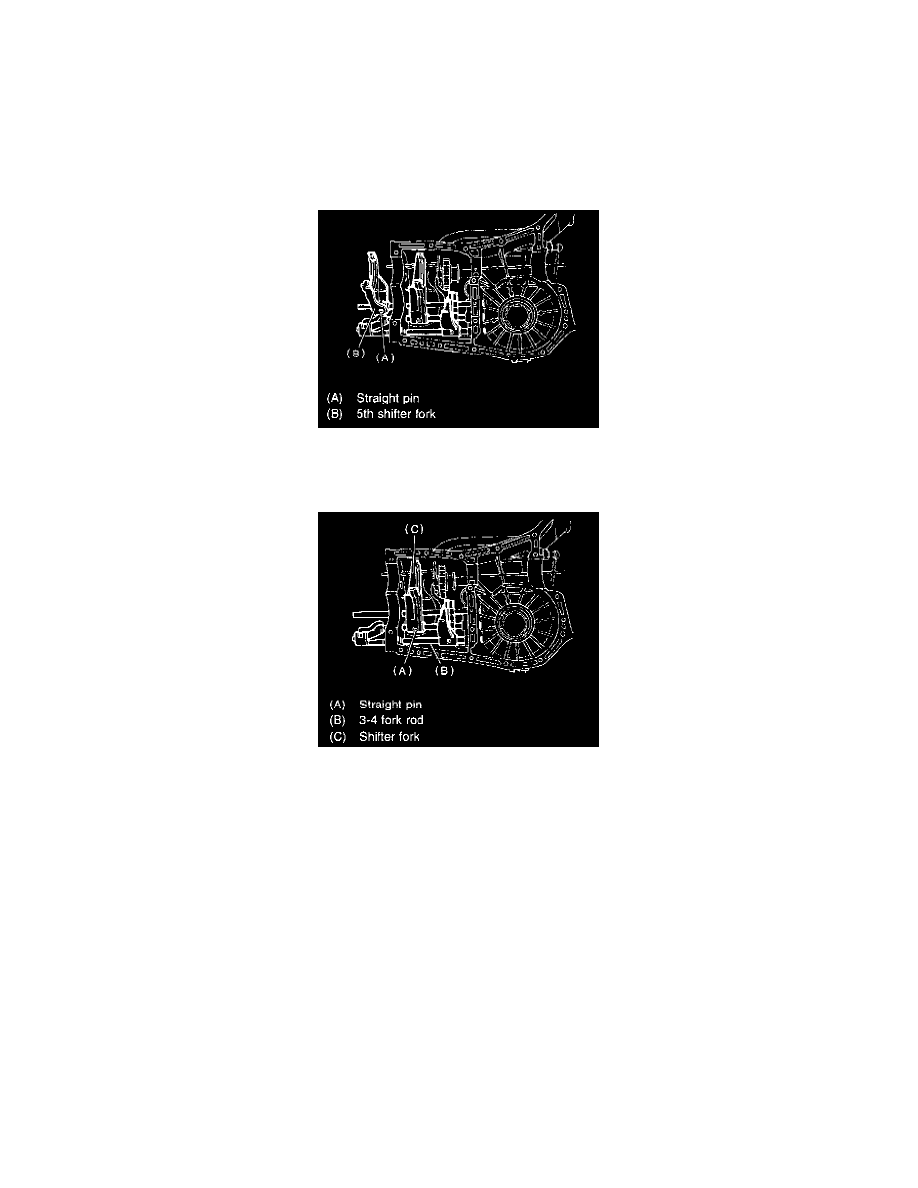
8. Drive out straight pin with ST, and 5th shifter fork.
ST 398791700 STRAIGHT PIN REMOVER
9. Remove plugs, springs and checking balls.
10. Drive out straight pin, and pull out 3-4 fork rod and shifter fork.
NOTE: When removing rod, keep other rods in neutral. Also, when pulling out straight pin, remove it toward the inside of the case so that it does
not hit against the case.
11. Drive out straight pin, and pull out 1 -2 fork rod and shifter fork.
12. Remove outer snap ring, and pull out reverse shifter rod arm from reverse fork rod. Then take out ball, spring and interlock plunger from rod. And
then remove rod.
NOTE: When pulling out reverse shifter rod arm, be careful not to let ball pop out of arm.
13. Remove reverse shifter lever.
INSTALLATION
1. Install reverse arm fork spring, ball and interlock plunger to reverse fork rod arm. Insert reverse fork rod into hole in reverse fork rod arm, and
hold it with outer snap ring using ST.
NOTE: Apply grease to plunger to prevent it from falling.
ST 399411700 ACCENT BALL INSTALLER
2. Position ball, spring and new gasket in reverse shifter rod hole, on left side transmission case, and tighten checking ball plug.
3. Install 1-2 fork rod into 1-2 shifter fork via the hole on the rear of the transmission case.