
Outback VDC Wagon AWD F6-3.0L (2002)
NOTE: Rotate wrench another 90 to 180° after the end of circlip has been wrapped in.
14. Fit mounting rubber onto rack housing.
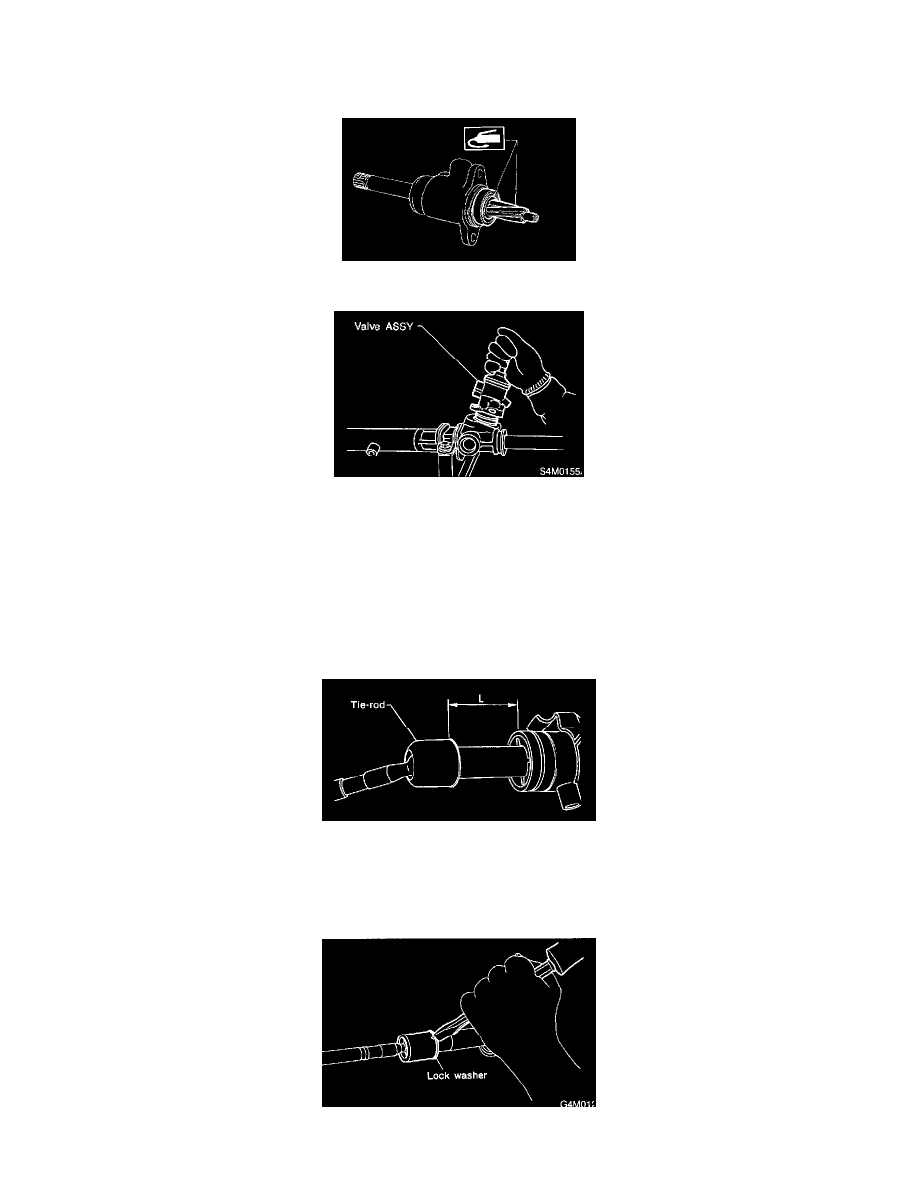
15. Apply genuine grease to pinion gear and bearing of valve assembly.
16. Install gasket on valve assembly. Insert valve assembly into place while facing rack teeth toward pinion.
CAUTION: Be sure to use a new gasket.
NOTE: Do not allow packing to be caught when installing valve assembly.
17. Tighten bolts alternately to secure valve assembly.
Tightening torque: 25 Nm (2.5 kgf-m, 18.1 ft. lbs.)
CAUTION: Be sure to alternately tighten bolts.
18. Install lock washers and tighten left and right tie-rods into rack ends.
On condition
L: Approximately 40 mm (1.57 inch)
Tightening torque: 78 Nm (8.0 kgf-m, 58 ft. lbs.)
19. Bend lock washer.
CAUTION: Be careful not to scratch rack when bending lock washer.