
XT-6 2WD L6-2.7L SOHC (1989)
Seat Belt Retractor Limit Switch: Technical Service Bulletins
Seat Belt - Front Limit Switch Replacement
NUMBER
07-41-89
DATE
10-16-89
APPLICABILITY 1988 & 1989 4DR SEDAN AND STATION WAGONS 1990 LOYALE FROM 8-31-89 TO 7-31-90
SUBJECT:
REPLACEMENT OF THE PASSIVE SEAT BELT FRONT LIMIT SWITCH
The passive seat belt front limit switch is now available as a separate part. This switch can be tested and replaced without removal of the rail assembly.
Tools and materials required:
1/4" Drive Ratchet w/10 mm Socket # 2 Phillips Screwdriver Pocket Screwdriver OHM Meter Roll of 1/2" wide Electrical Tape
Testing:
When the front limit switch is suspected, the following continuity test should be performed.
1.
Carefully remove front pillar upper trim panel as described in the 1989 Service Manual section 5-3, page 35.
2.
Disconnect the front limit switch at the connector near the front of the rail assembly.
3.
Place a circuit tester (OHM meter) on each pole of the connector (switch side).
4.
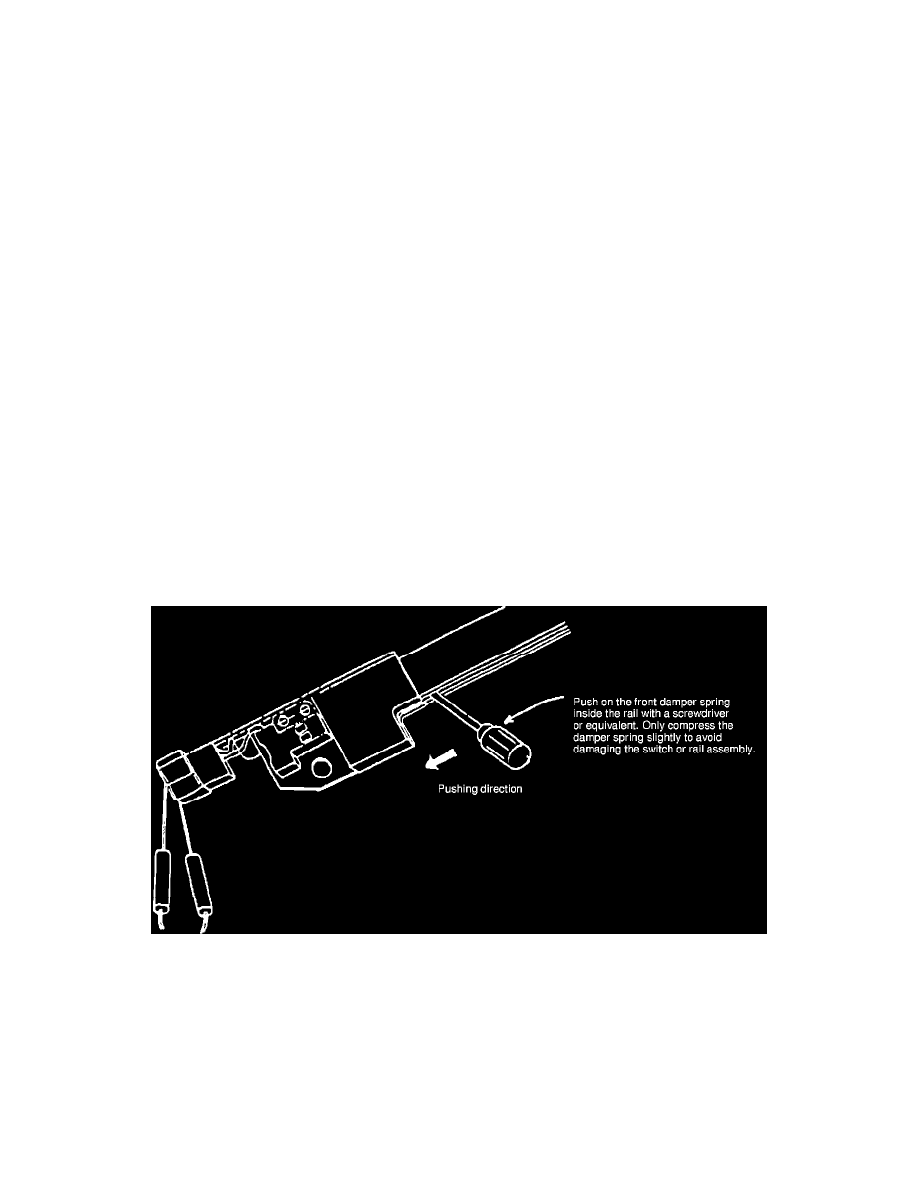
Insert a screwdriver or equivalent in the rail and push on the damper spring which is installed on the front of the rail.
NOTE:
Use care not to damage the surface treatment inside the rail, or the damper spring, or the rail itself.
5.
If the switch is good, the following reading will be noted.
a.
When the damper spring is pushed - switch off (no continuity) (Infinity)
b.
When the damper spring is not pushed - switch on
(continuity) (
0 Ohms)
If the limit switch has been diagnosed as the problem, the following procedures should be followed.
Removal:
1.
Disconnect negative cable from battery.
2.
Remove tape holding plug connector to rail assembly.
3.
Remove 10 mm bolt from rail assembly to roof pillar. This will allow room to rewrap the connector with electrical tape later on.
4.
Remove the two Phillips screws holding the limit switch cover. At this time, the limit switch can be removed.
Installation:
1.
When installing the limit switch cover, make sure that the bosses of the limit switch fit in the holes of the limit switch cover.
2.
Make sure that the electrical connector is securely taped on. Reinstall the 10 mm bolt from rail assembly.