
Aerio L4-2.3L (2006)
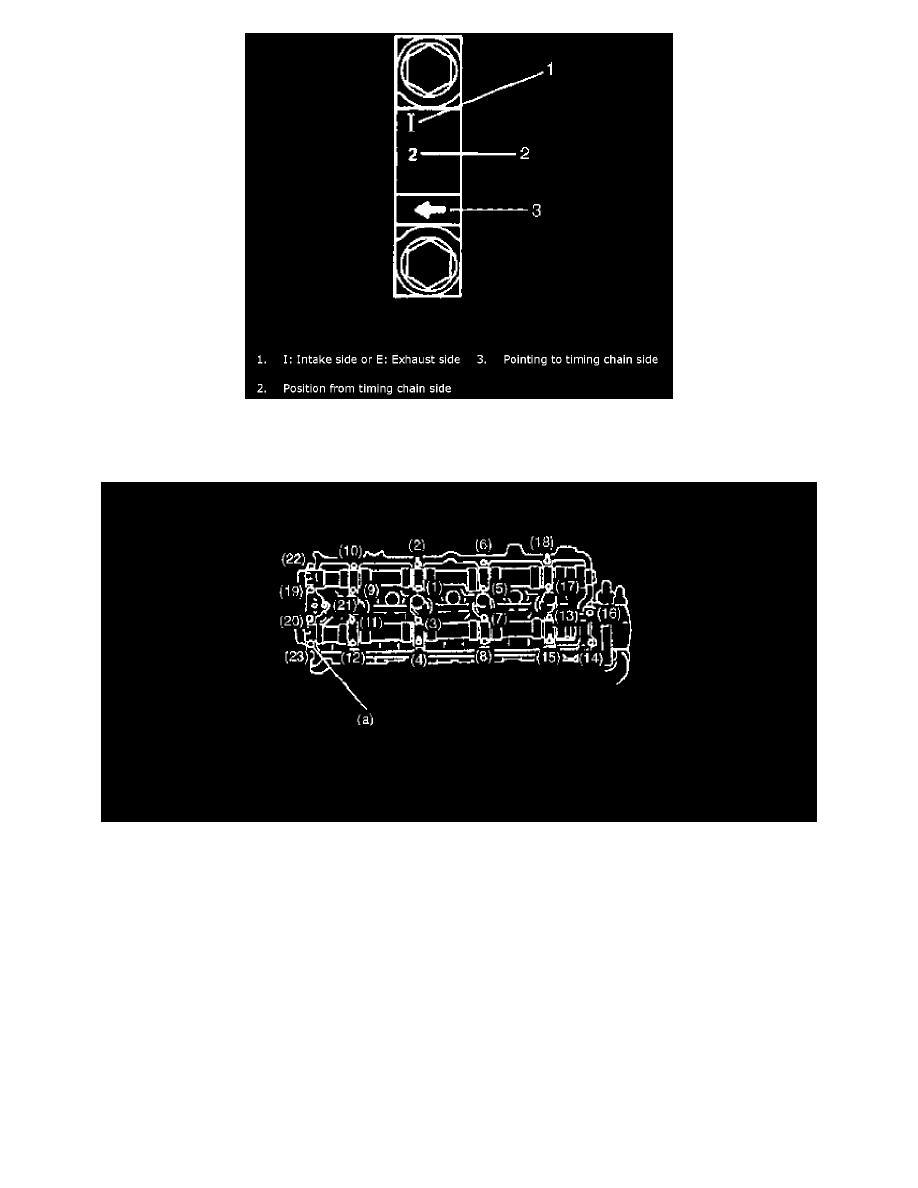
7) Check position of camshaft housings.
Embossed marks are provided on each camshaft housing, indicating position and direction for installation. Install housings as indicated by these
marks.
8) After applying oil to housing bolts, tighten them temporarily first. Then tighten them by numerical order in figure.
Tighten a little at a time and evenly among bolts and repeat tightening sequence two or three times before they are tightened to specified torque.
Tightening torque
Camshaft housing bolts (a): 11 Nm (1.1 kgf-cm, 8.0 ft. lbs.)
9) Install CMP sensor.
10) Install 2nd timing chain.
11) Install timing chain cover.
12) Install cylinder head cover.
13) Install oil pan.
14) Install engine assembly to vehicle.
CAUTION:
^
Don't turn camshafts or start engine (i.e., valves should not be operated) for about half an hour after reinstalling hydraulic valve lash adjusters
and camshafts. As it takes time for valves to settle in place, operating engine within half an hour after their installation may cause interference
to occur between valves themselves or valves and piston.
^
If air is trapped in valve lash adjuster, valve may make tapping sound when engine is operated after valve lash adjuster is installed. In such a
case, run engine for about half an hour at about 2,000 to 3,000 r/min., and then air will be purged and tapping sound will cease. Should
tapping sound not cease, it is possible that valve lash adjuster is defective. Replace it if defective. If defective adjuster can't be located by