
Aerio L4-2.3L (2006)
Fuel Tank Pressure Release Valve: Service and Repair
Fuel Tank Pressure Control Valve Removal and Installation
Removal
1) Remove fuel tank from vehicle body.
2) Remove tank pressure control valve from fuel tank.
Installation
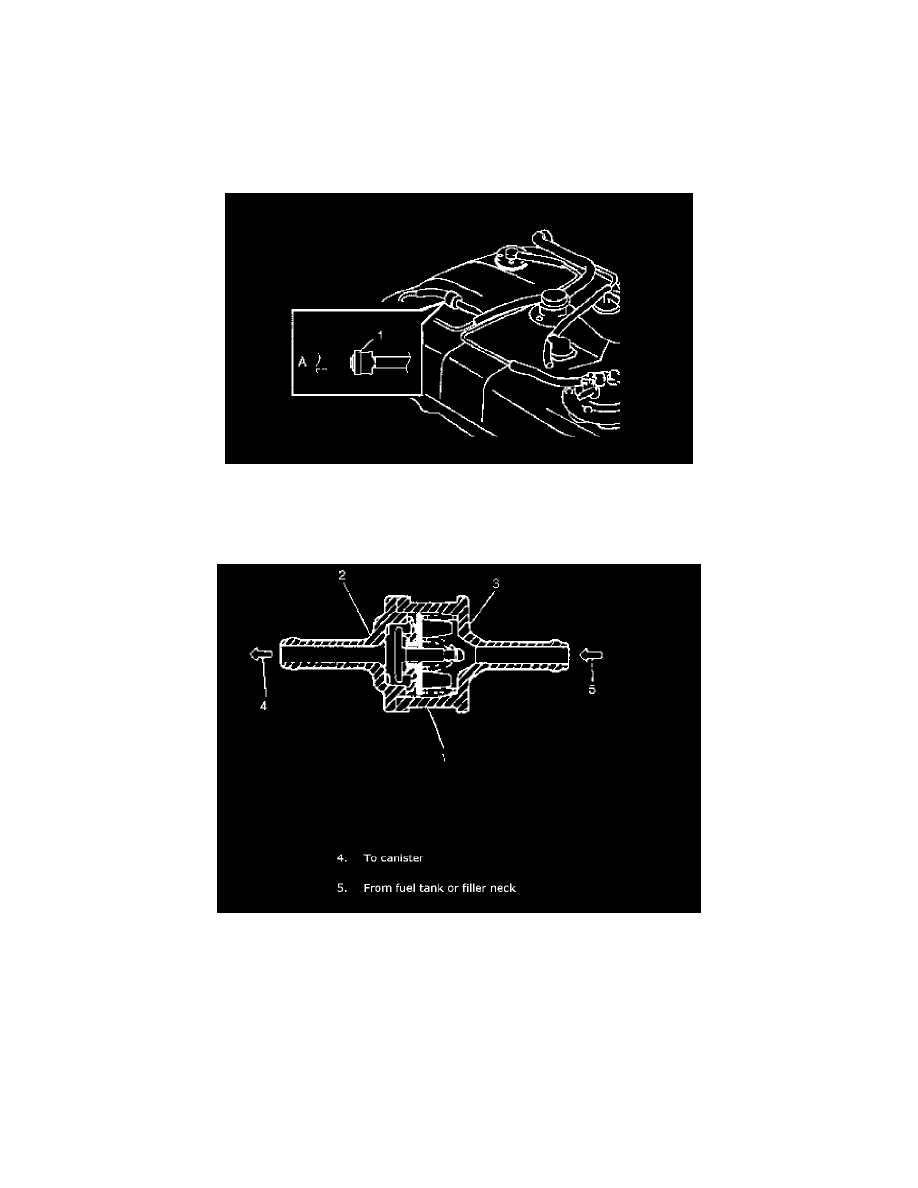
1) Install tank pressure control valve to fuel tank in such direction that vapor flows from its green (1) nozzle side towards canister (A).
2) Connect hoses to tank pressure control valve and clamp them securely.
Fuel Tank Pressure Control Valve Inspection
1) Air should pass through valve smoothly from black (3) side of valve to green (2) side when blown hard.
2) From green side, even when blown softly, air should come out of black side.
3) If air doesn't pass through valve in Step 2) or hard blow is required in Step 3), replace tank pressure control valve (1).
WARNING: DO NOT SUCK air through tank pressure control valve. Fuel vapor inside the valve is harmful.
4) Plug green nozzle and apply 26 kPa (20 cm Hg) vacuum to black nozzle. Check that vacuum is held at that level (there is no leakage). If vacuum
leaks, replace.