
Aerio L4-2.3L (2006)
10. Disconnect high pressure pipe (1) and low pressure hose (2) from steering gear box, using flare nut wrench.
NOTE: As fluid flows out of disconnected joints, have a container under joints or a plug to pipe.
11. Remove steering gear box mounting bolts and then remove steering gear box from vehicle.
Installation
Reverse removal procedure for installation of steering gear box noting the following points.
CAUTION: Be sure to confirm that steering wheel and front tires (wheels) are in straight position when inserting steering lower joint into steering
pinion shaft.
^
If a plug was put to disconnected pipe when removing steering gear box, remove that plug before reconnecting pipe.
^
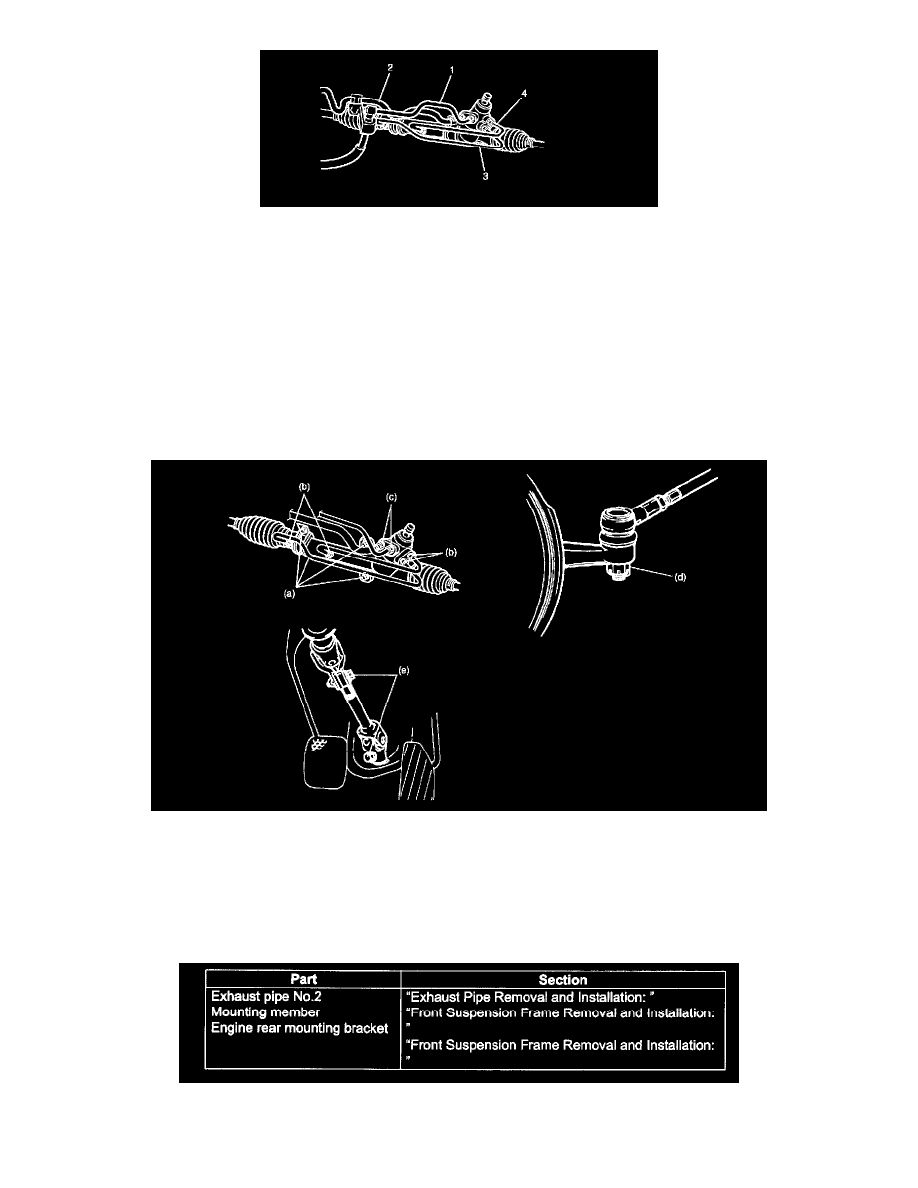
Use specified torque as follows.
Tightening torque
Gear box mounting bolts (a): 55 Nm (5.5 kgf-m, 40.0 ft. lbs.)
Gear box cylinder pipe flare nuts (b): 25 Nm (2.5 kgf-m, 18.0 ft. lbs.)
Gear box high and low pressure pipe flare nuts (c): 35 Nm (3.5 kgf-m, 25.0 ft. lbs.)
Castle nuts (d): 35 - 55 Nm (3.5 - 5.5 kgf-m, 25.5 - 39.5 ft. lbs.)
Steering shaft upper and lower joint bolts (e): 25 Nm (2.5 kgf-m, 18.0 ft. lbs.)
^
For installing each part, refer to respective procedures as indicated in the following.
^
After installation, be sure to fill specified power steering fluid and bleed air.
^
Check toe setting. Adjust as required.