
Aerio L4-2.3L (2006)
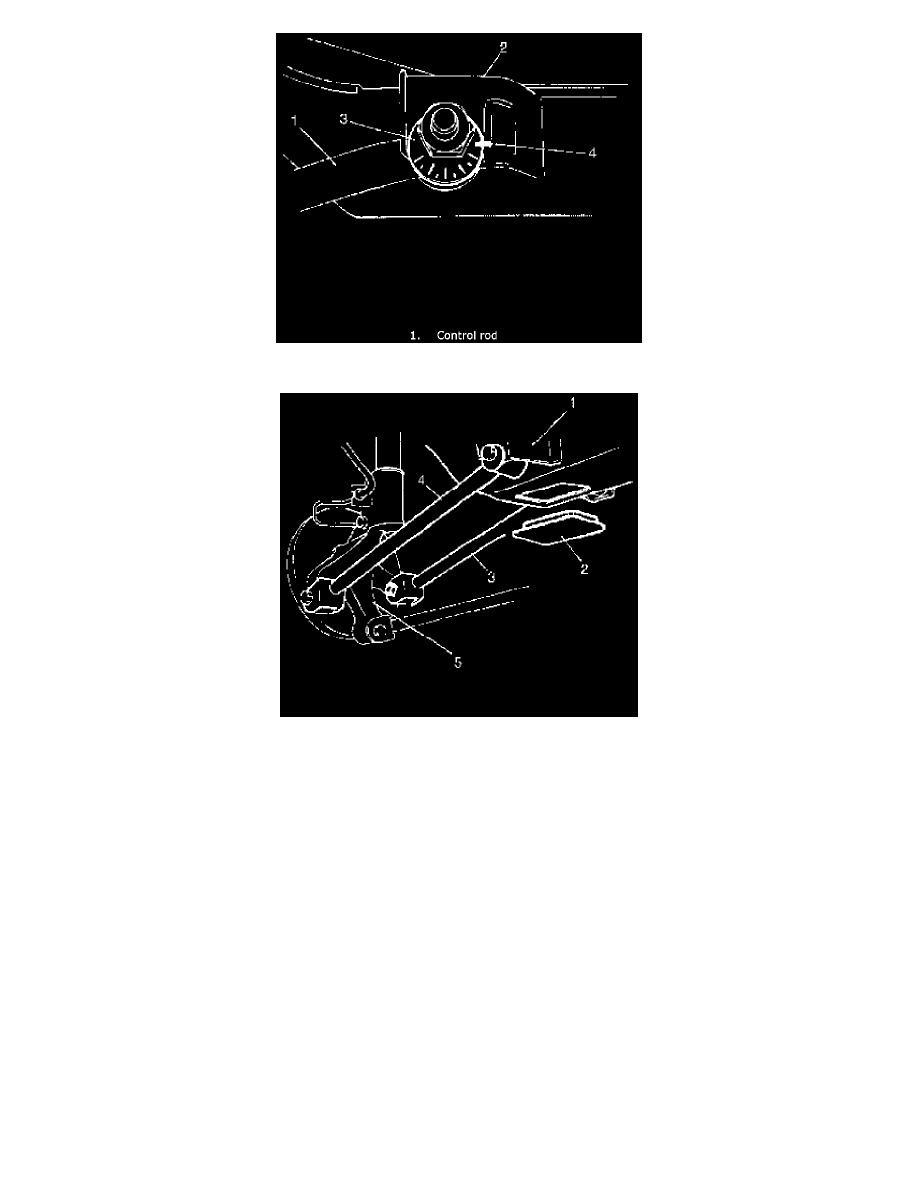
3) To facilitate toe adjustment after reinstallation, put match marks (4) on washer (3) and on suspension frame (2).
4) Remove suspension frame cap (2).
5) Remove control rod No.2 (4) and No.1 (3) from suspension frame (1) and knuckle (5).
Installation
1) Install control rod No. 1 (1).
a) Install control rod No.1 (1), setting it so that its welded nut (8) comes toward the rear.
b) Insert inner bolt (4) and outer bolt (3) from the vehicle front and tighten them temporarily by hand.