
Aerio L4-2.3L (2006)
Shift Interlock Cable: Service and Repair
Key Interlock Cable Removal and Installation
NOTE: Don't bend interlock cable excessively when removing and installing it, or system will not operate correctly.
Removal
1. If the vehicle is equipped with air bag system, disconnect negative cable at battery and disable air bag system, referring to Disabling Air Bag
System: Advanced Air Bag or Disabling Air Bag System: Except Advanced Air Bag.
2. Remove steering column cover.
3. Turn ignition switch to ACC position.
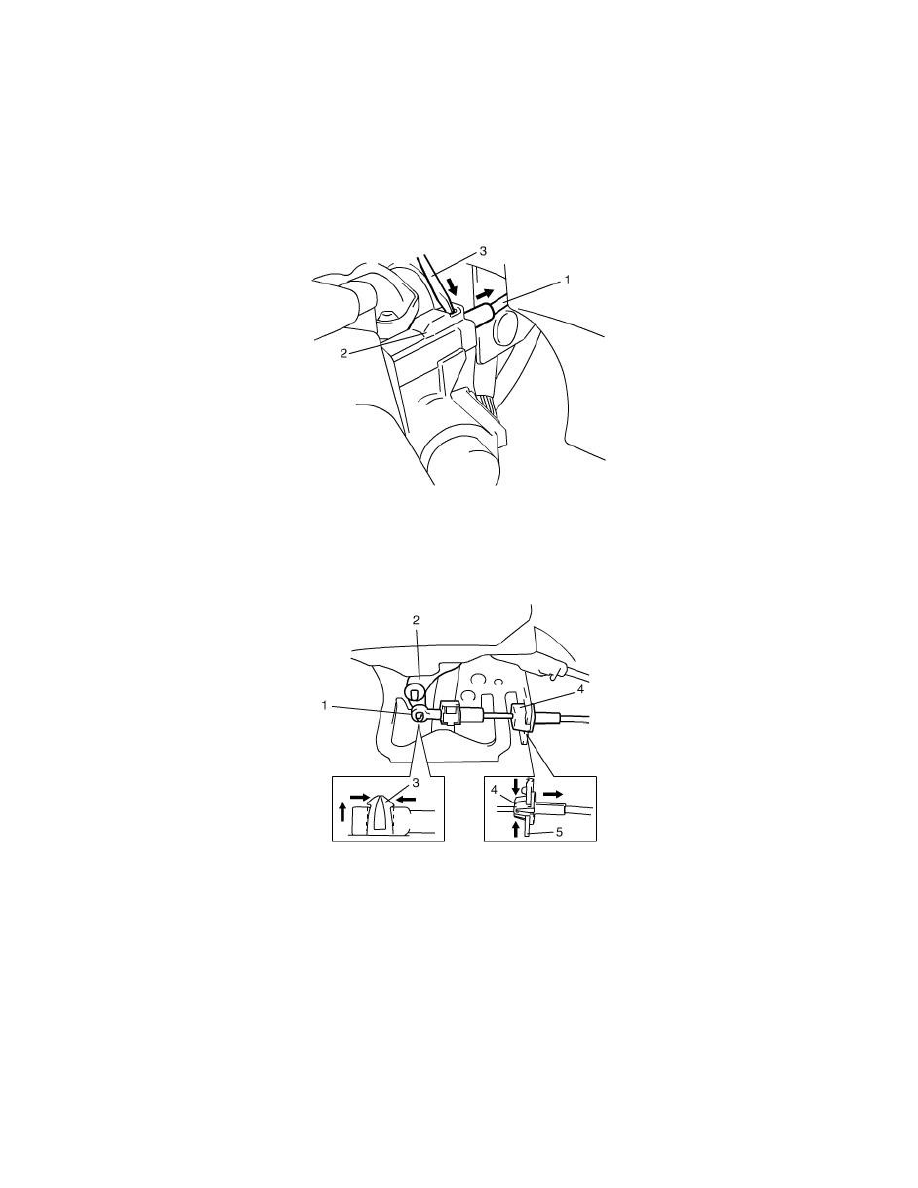
4. Pull out key interlock cable (1) from key cylinder cover (2) while pressing checkhook with slotted screwdriver (3) or the like.
5. Turn ignition switch to LOCK position.
6. Remove parking brake cover and console box.
7. Detach cable end (1) from interlock cam (2) while pressing claws (3) of interlock cam boss. At this time, be careful not to cause damage to its
claws. Detach cable casing cap (4) from selector bracket (5) while pressing checkhook.
8. Remove interlock cable.
Installation
1. Lay interlock cable to its original cabling route.
2. Turn ignition switch to ACC position.
3. Insert cable casing cap (1) into key cylinder cover (2) securely.