
Aerio L4-2.3L (2006)
NOTE: Do not reuse gasket.
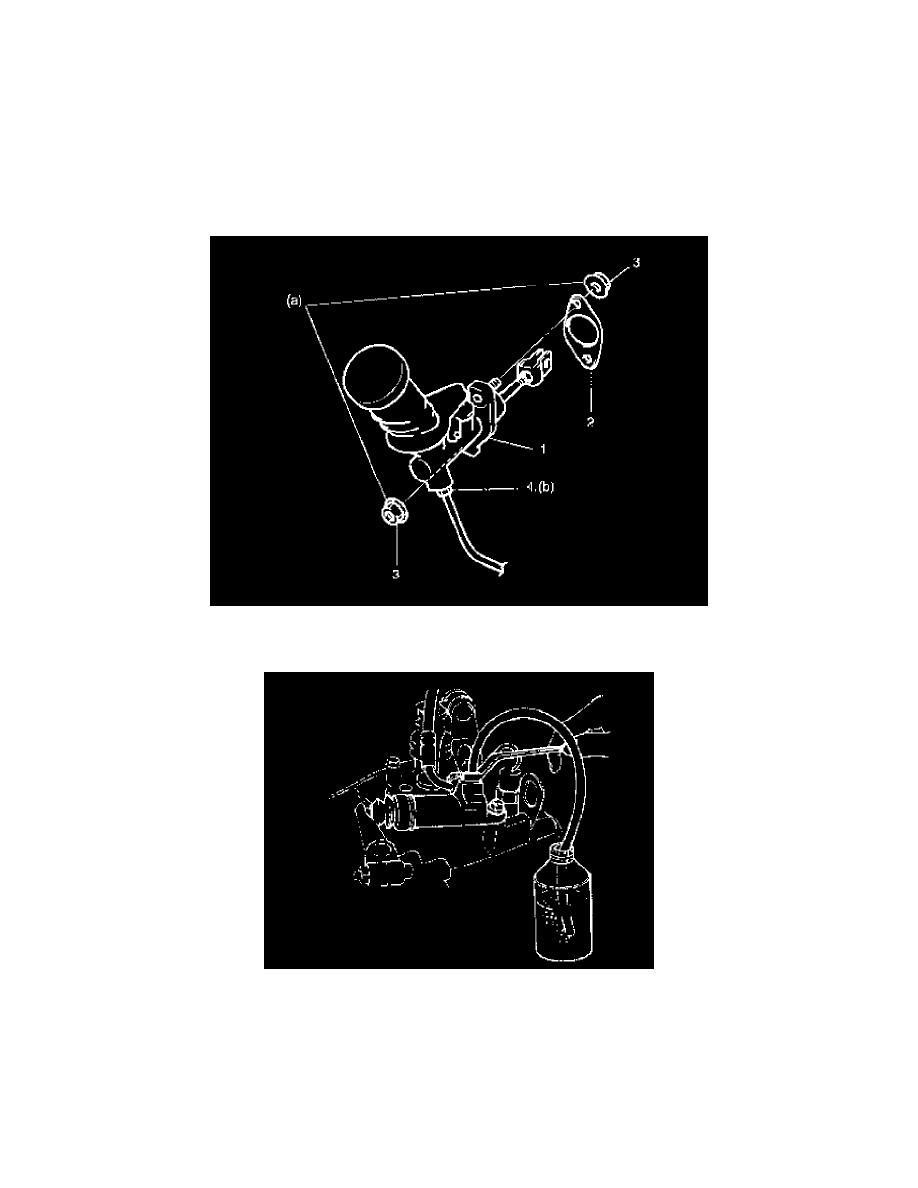
3. Tighten attaching nuts (3) to specified torque.
Tightening torque
Clutch master cylinder attaching nuts (a): 13 Nm (1.3 kgf-cm, 9.5 ft. lbs.)
4. Connect fluid pipe and tighten flare nut (4) to specified torque.
Tightening torque
Clutch pipe flare nut (b): 16 Nm (1.6 kgf-cm, 11.5 ft. lbs.)
5. Apply grease to clevis pin and install clevis pin.
Grease 99000-25010
6. Install clevis-to-pin.
7. Fill master cylinder reservoir with specified brake fluid and check fluid leakage.
8. After installation, bleed air from system.
9. Check clutch pedal free travel and clutch release margin.