
Aerio L4-2.3L (2006)
Clutch Pedal Assembly: Testing and Inspection
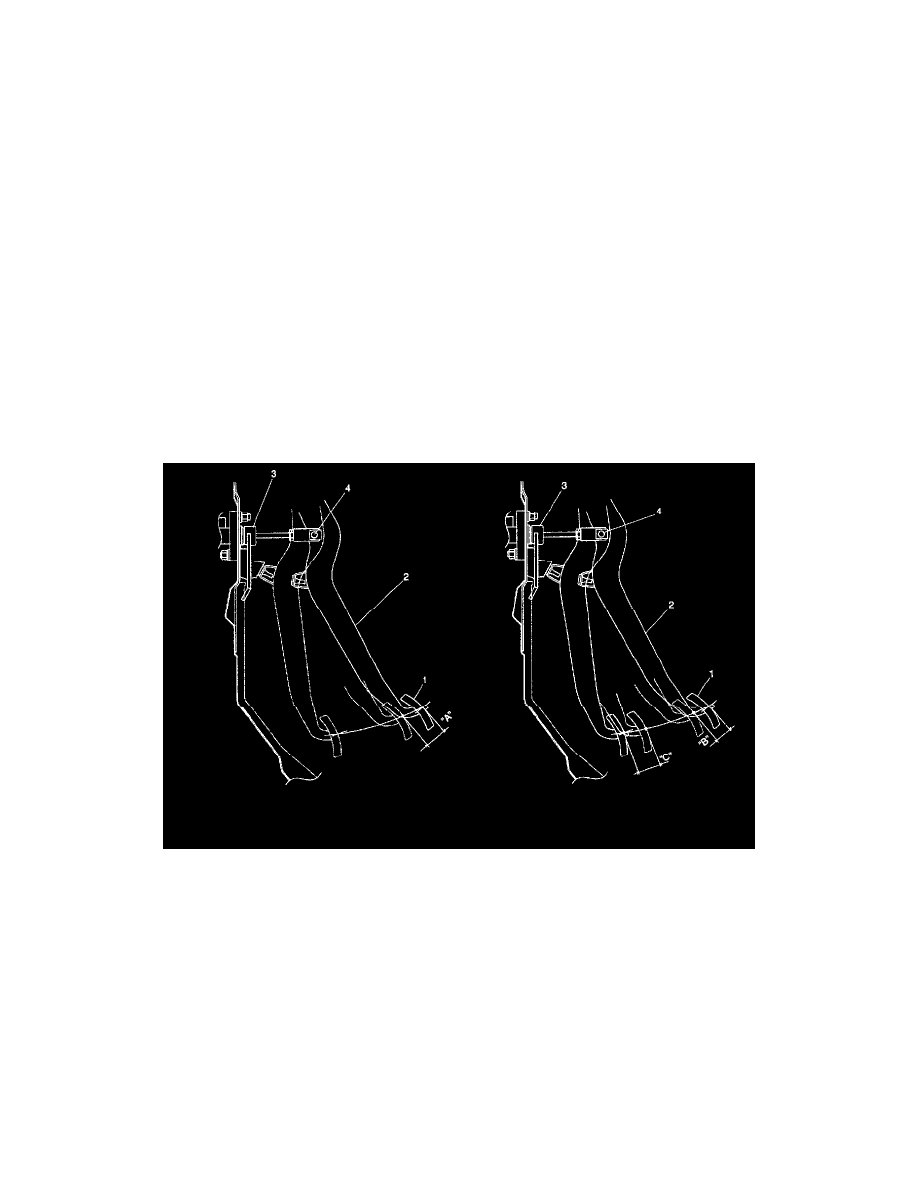
Inspection
Clutch pedal free travel "A"
1. Depress clutch pedal (1), stop the moment clutch resistance is felt, and measure how much pedal has moved (clutch pedal free travel) as
represented by "A" in the figure. Then check its conformance to the specification.
Clutch pedal free travel
"A": 15 - 20 mm (0.59 - 0.79 inch)
2. If "A" is not within specification, check pedal arm (2) and master cylinder (3) and replace defective part.
Cylinder push rod play "B"
1. Press clutch pedal (1) gradually with finger, stop when slight increase of resistance is felt and measure how much pedal has moved (push rod play)
as represented by "B" as shown. Then check its conformance to the specification.
Push rod play
"B": Max. 3 mm (0.12 inch)
2. If "B" is not within specification, replace clevis pin (4) or pedal arm (2).
Clutch release margin "C"
1. Pull up parking brake fully and block wheels.
2. Start engine and keep engine at idle with neutral gear position.
3. Without clutch pedal (1) depressed, be slow to shift the shift lever to reverse position until transaxle emits gear contact noise.
4. Be slow to depress clutch pedal (1), and at gear contact noise died position (release point (4)) stop depressing.
5. Measure distance between release point (4) and full stroke point (3) on clutch pedal (1), which is shown by "C" in the figure.
Clutch release margin
"C": 25 mm (1.0 inch) or more
6. If "C" is not within specification, it is possible that air is trapped in this system. If suspected so, bleed air. Upon completion of the inspection, start
engine and check clutch for proper operation.
Clutch Pedal Position (CPP) Switch for Starter Inspection